I love simple cards. They can bring out the beauty of a single stamp and sentiment like nothing else. The clean lines are uncluttered and elegant and, well, simple. They are quick and easy to make for those last minute occasions when you want to send a handmade card.
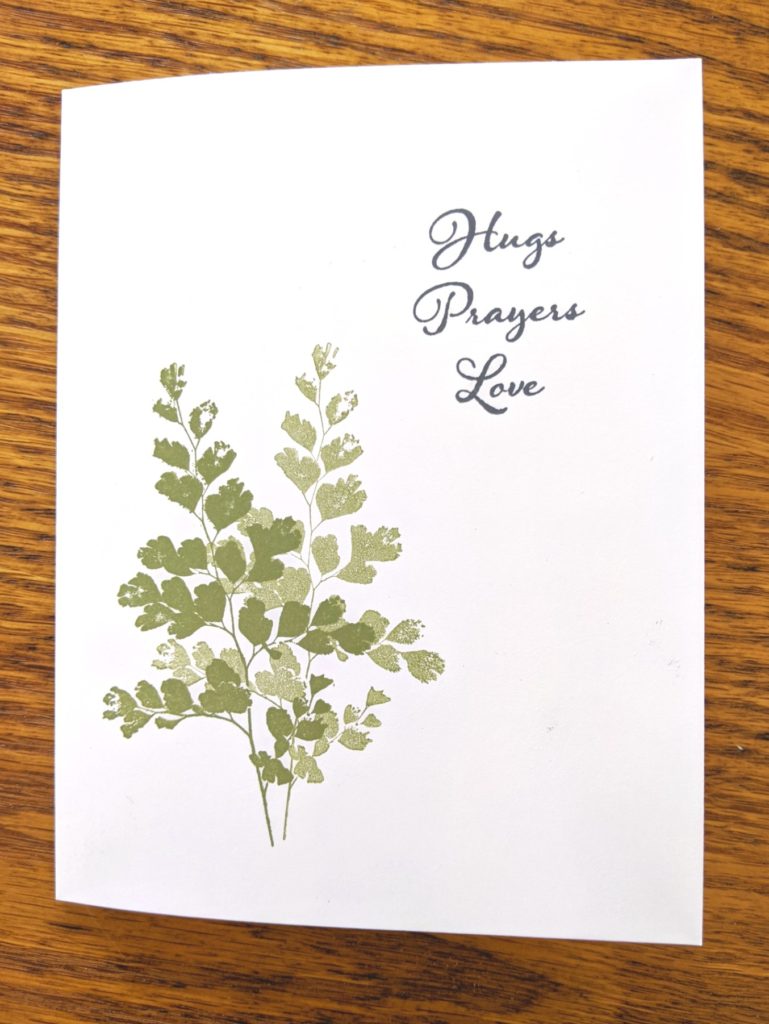
Simple Card
This card was made by stamping the leaves, then without re-inking, stamping them again to achieve some depth. A sentiment stamped in the upper corner finishes it for a clean and simple look. #simplestamping
Stepped-Up Card
Sometimes you want to dress it up though. Maybe you have extra time to create, you have that gorgeous paper you bought that you just have to use, or you want to add a little more. Here is the same basic card with some Designer Series Paper, some layers, and a frame die cut.
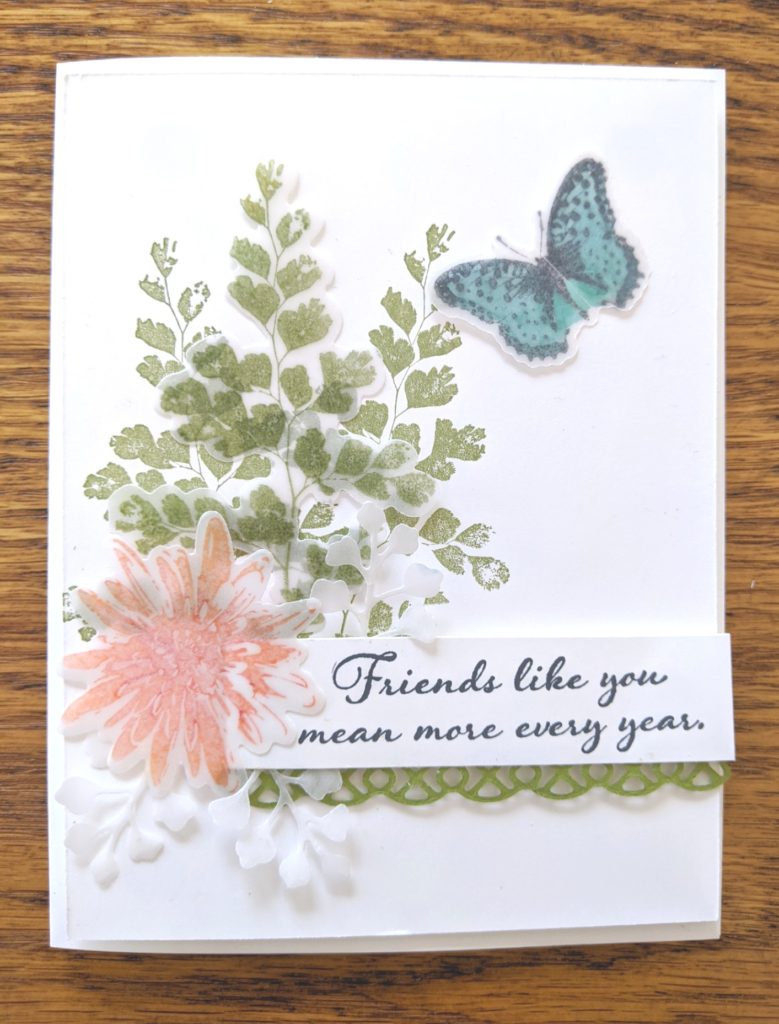
Fancy Card
Or maybe your creative juices are really flowing or you want to try a new technique. You can add lots of layers, ribbon or twine, or embellishments. The sky is really the limit!
On this card I used vellum to stamp the leaf, flower, and butterfly, then colored them with Stampin Blends. I also cut some additional leaves out of vellum and popped it up . It is still the same basic design, but dressed up.
I really like how you can achieve a variety of looks with one stamp set. And I love the Positive Thoughts stamps. I was so happy when they came out with the coordinating die, Nature’s Thoughts. I was debating whether to purchase the stamps, but when the dies came out, it was a no brainer for me. If you like them too, hurry, because they are only available for a limited time!
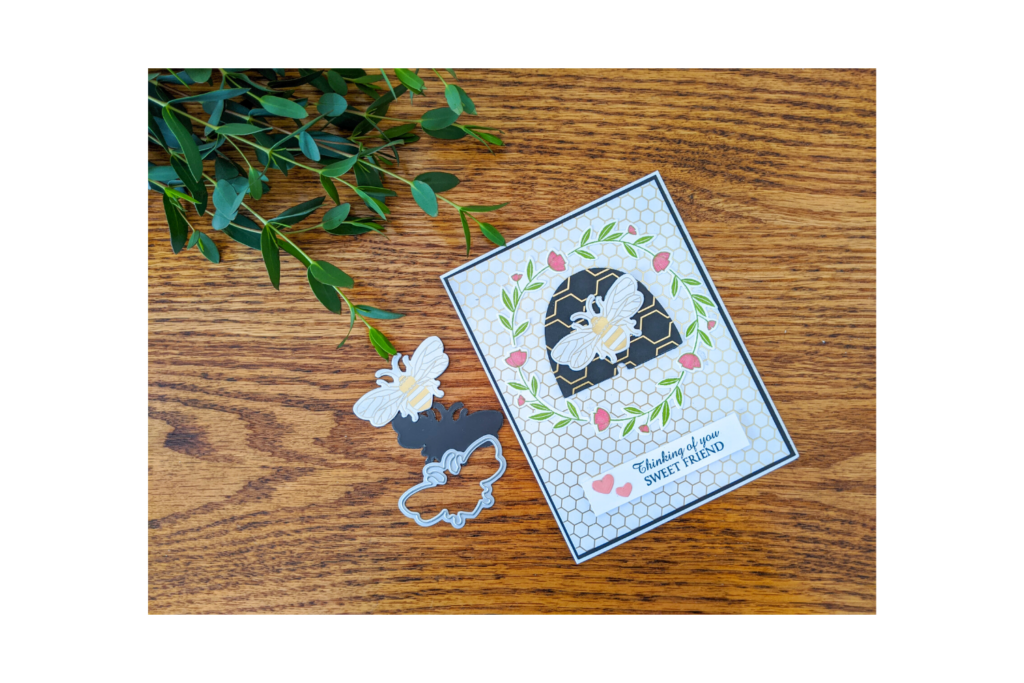
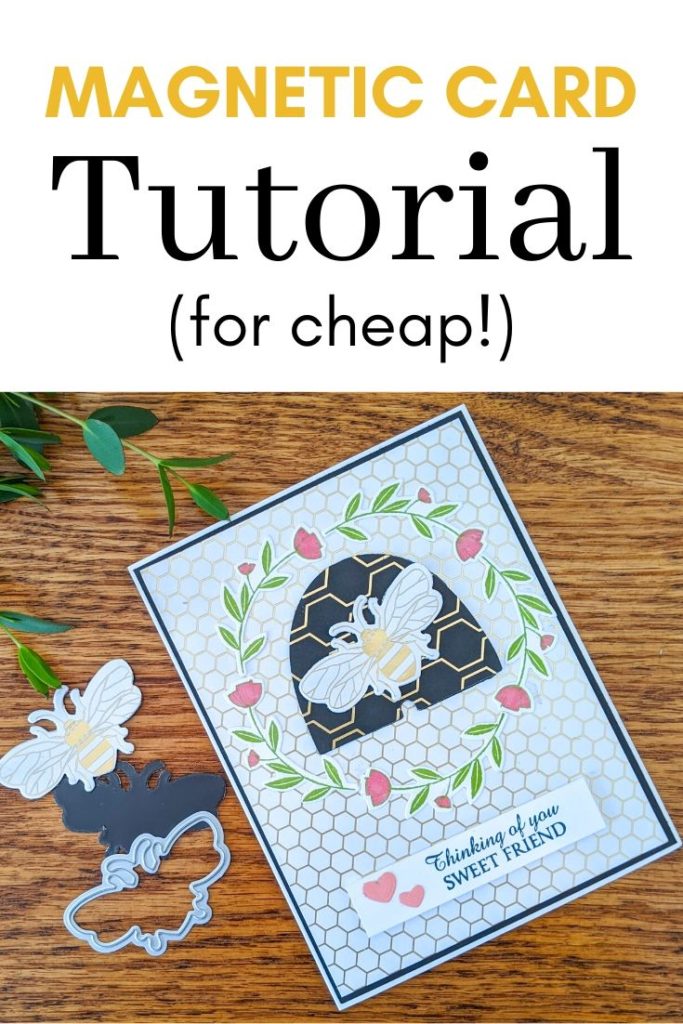
I had so much fun making the magnetic embellishment for this card. There is always some leftover magnetic sheet when I cut them for my dies, and I hate not using them. I have made magnets with them before, and I decided it was time to put them on a card.
The magnetic sheets I use are actually vent covers that you can find at your local home improvement stores. They work well for keeping your dies together. And for making magnetic embellishments!
When you cut the bee out, make sure you have the white side up, and for the hive, the magnetic side up. This way the magnets will be back to back so they stick together.
I usually run them through my die cut machine a couple times to ensure that they cut through. You may need to take scissors or a craft knife to some of the area if it didn’t cut all the way through. I haven’t had too many problems though. Just be careful when removing them from the sheet. Especially around delicate areas like the bee’s antenna. They can rip easily.
Here is a video I made showing how to make the bee and hive.
Video Tutorial
I cut the bee and hive out of the Golden Honey Specialty Paper that is one of the free products you can get with a purchase during Sale-A-Bration. Just put a little tombow glue on the paper and glue them on and you have your magnetic embellishment to go on your card.
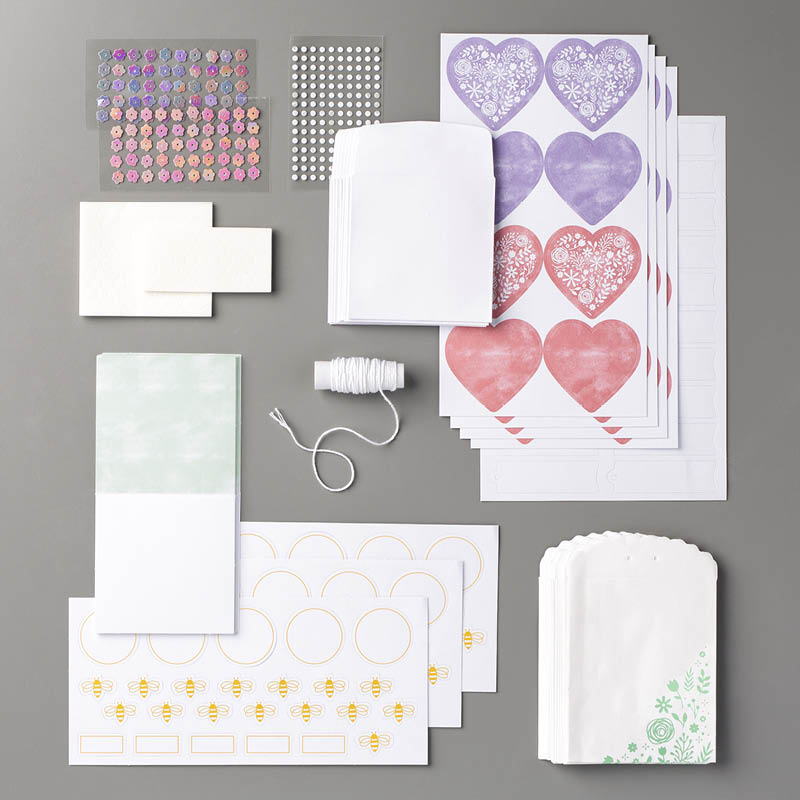
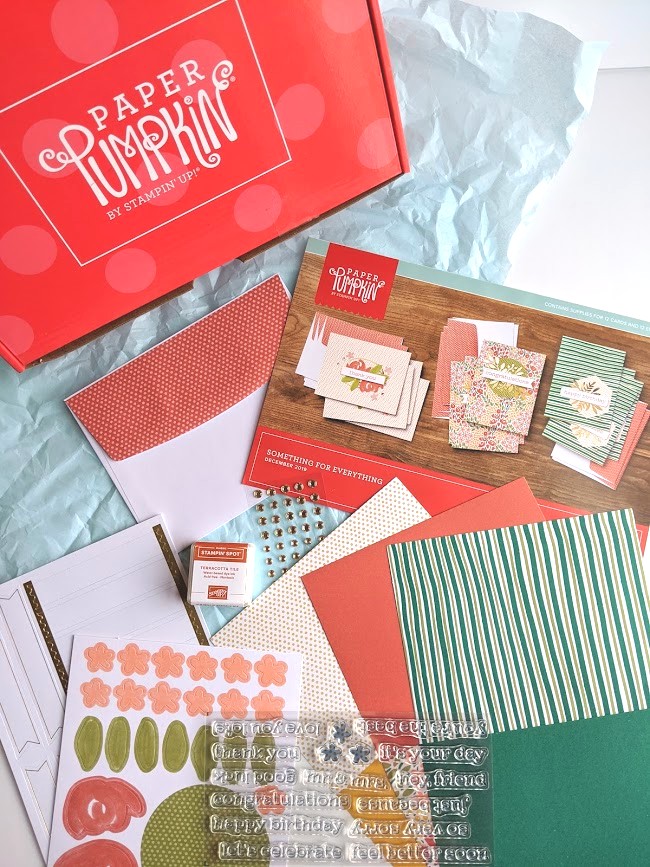
Paper Pumpkin is such a great subscription box! Did you know it is rated one of the top 20 subscription boxes by Best Arts and Crafts Subscription Boxes. I can see why! Here is what came in the January kit.
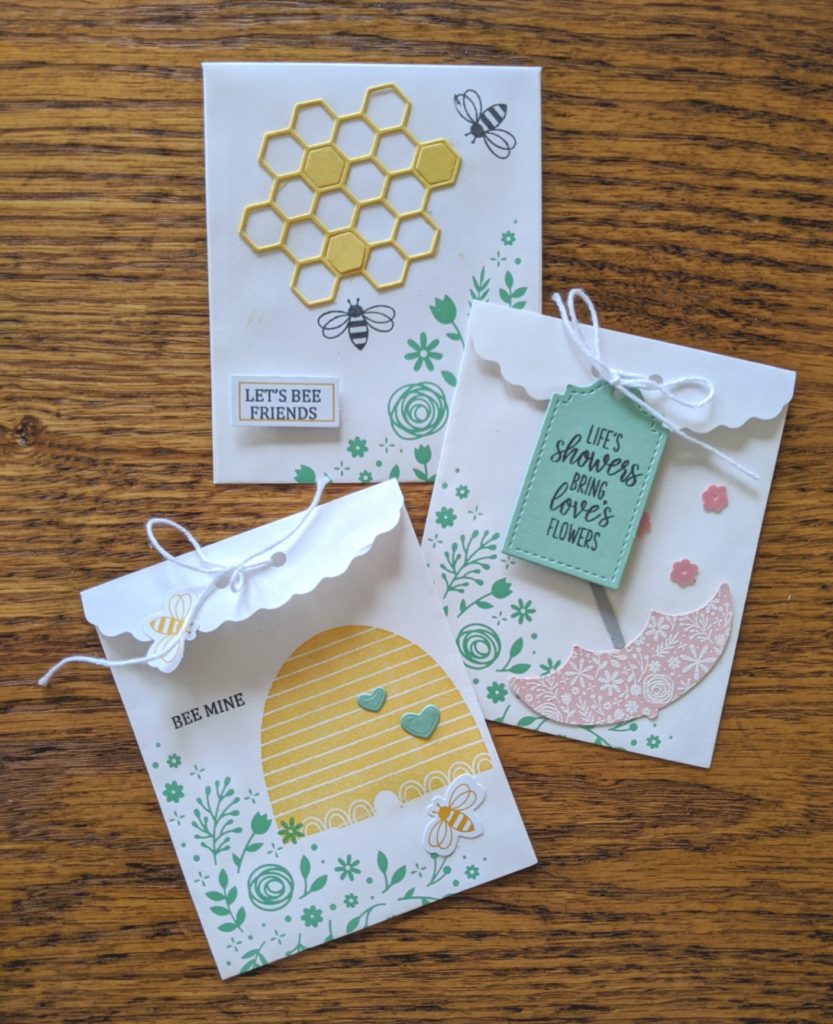
This month’s kit made up some adorable treat bags and gift enclosure cards. Check out the video to see them.
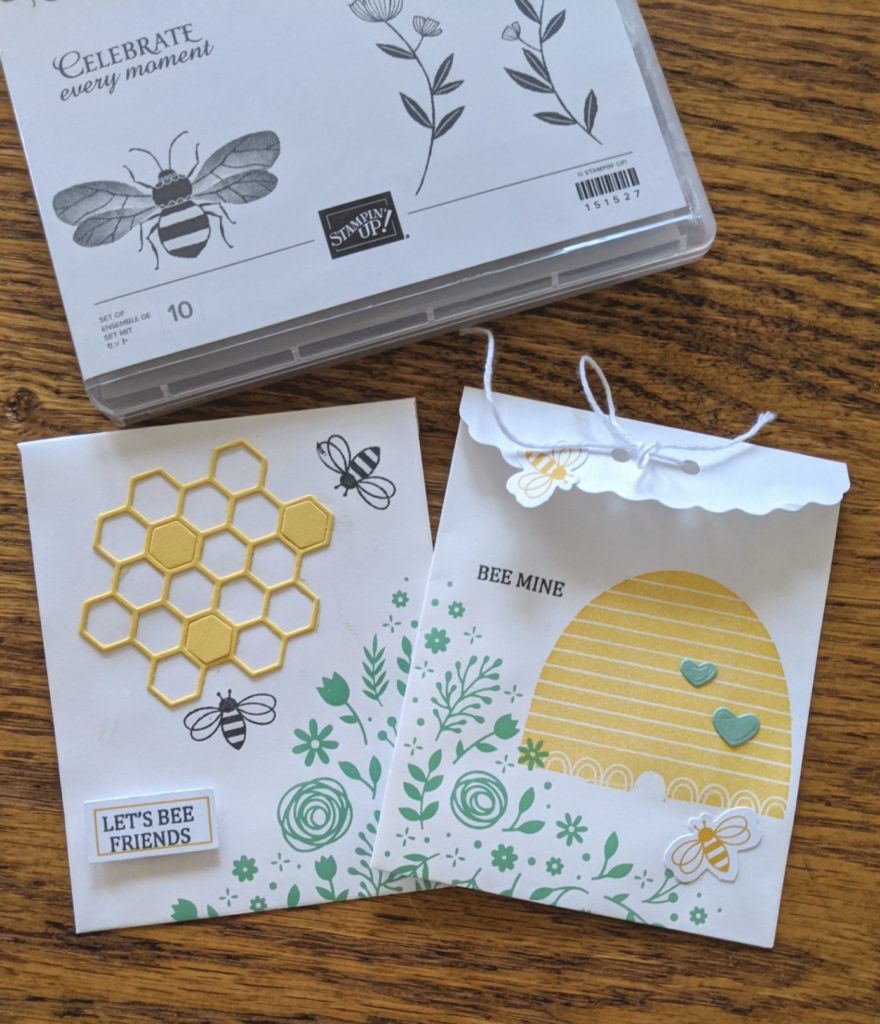
All my children are adults now so I made up the bags for my Card Class ladies, although I’m sure my girls would like some of the chocolate too! I also had some fun making other designs for the bags. Here are a few I made.
The January kit works well with the Honey Bee Bundle. I used the hive stamp from the Honey Bee stamp set and the honeycomb die from the Detailed Bees Die . This set is so cute and there is FREE paper in the Sale-A-Bration catalog to go with it.
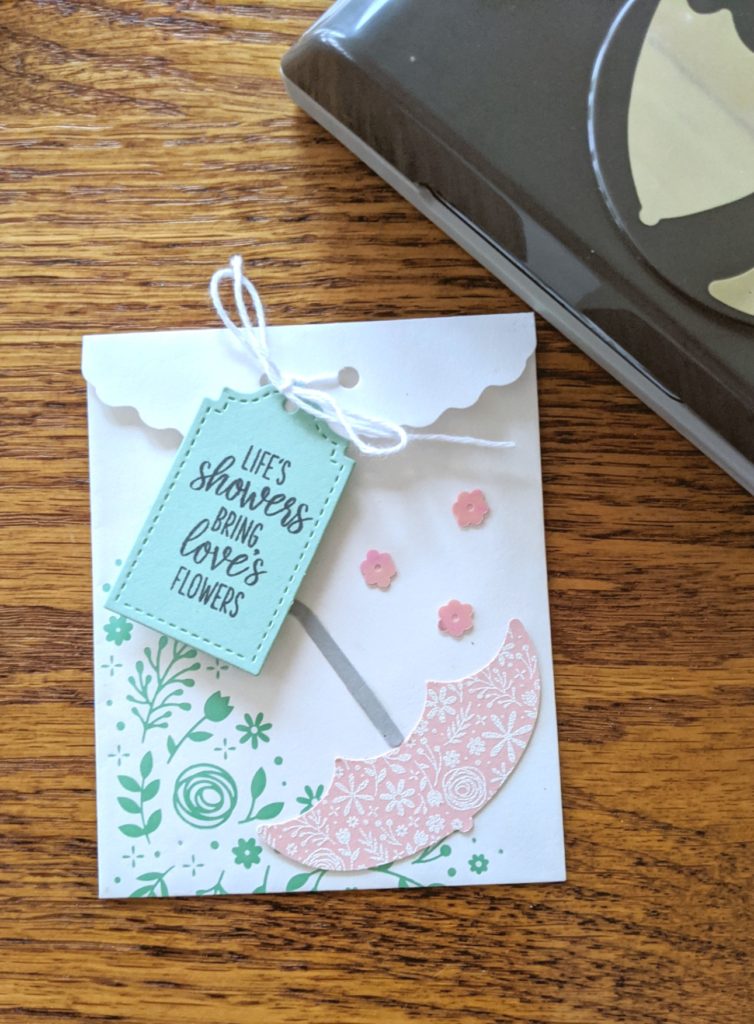
For this one I used the Under My Umbrella Bundle. This would be an absolutely darling set for bridal or baby showers.
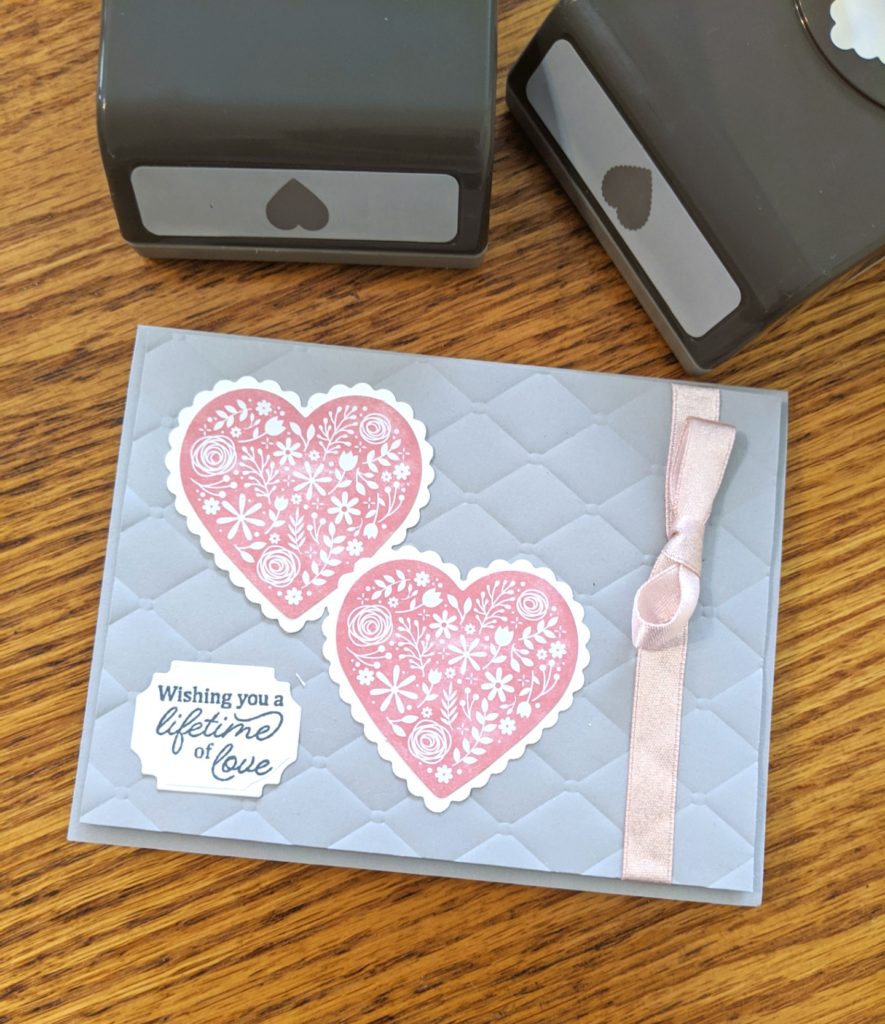
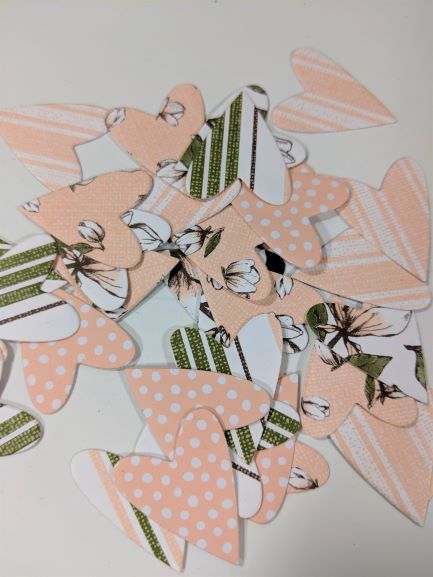
I also made a couple card alternatives. I made two gift card enclosures and then a A2 Wedding card. And I still had plenty of supplies left over for more projects! I love how this kit coordinates with so many different supplies. The Heart Punches were used for the wedding card.
If you like subscription boxes, Paper Pumpkin is one to try. Subscribe before the 10th to get this months box. And enjoy!
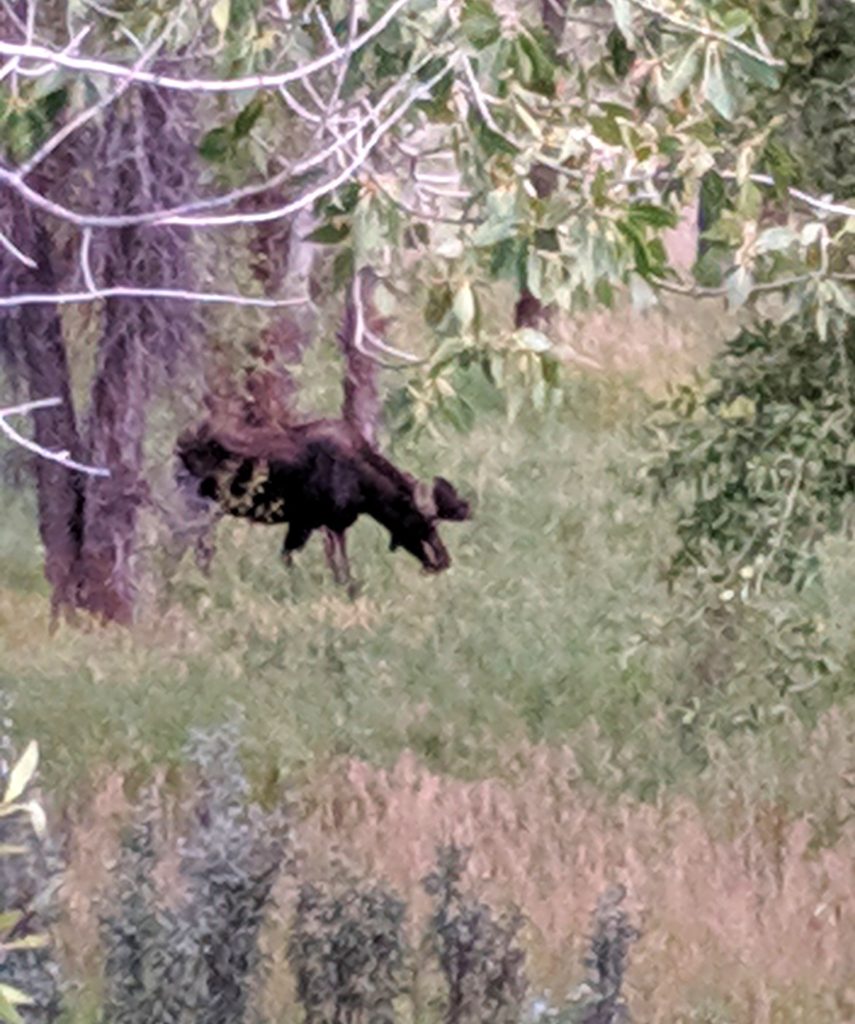
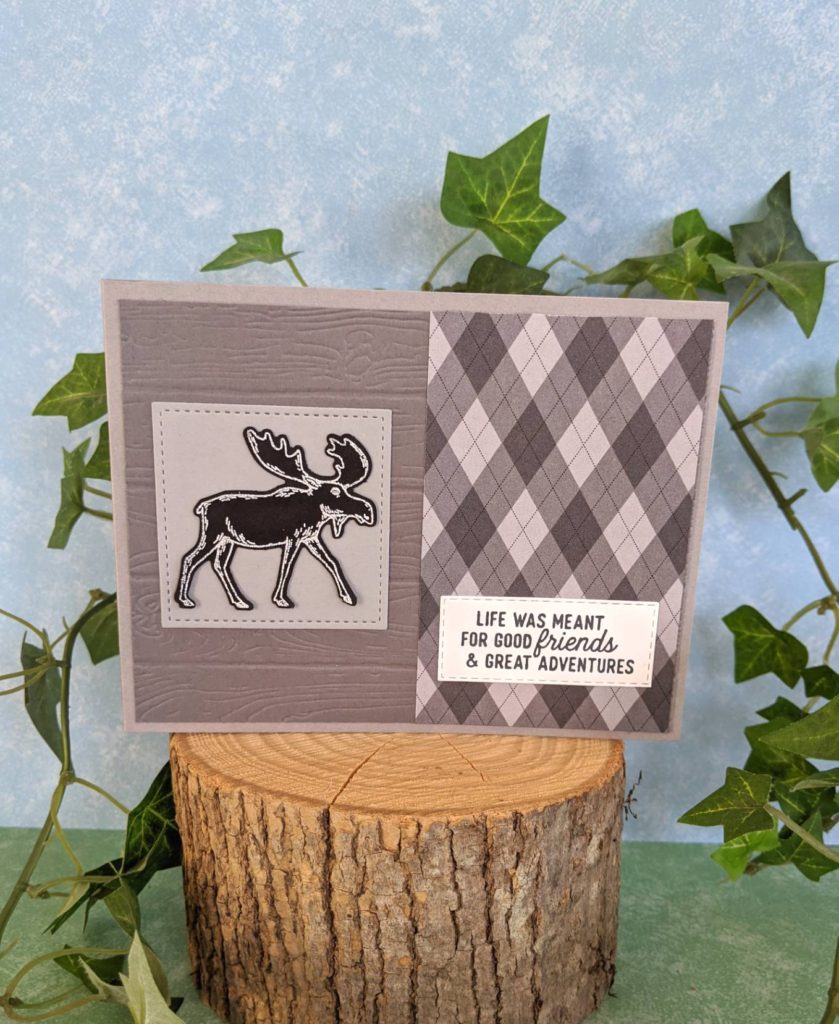
I have always wanted to see a moose in the wild, and in September I finally did! We were visiting my daughter in Wyoming when, lo and behold, there was a moose by the side of the road, near a construction site. Not quite the wild, but I still got to see him!
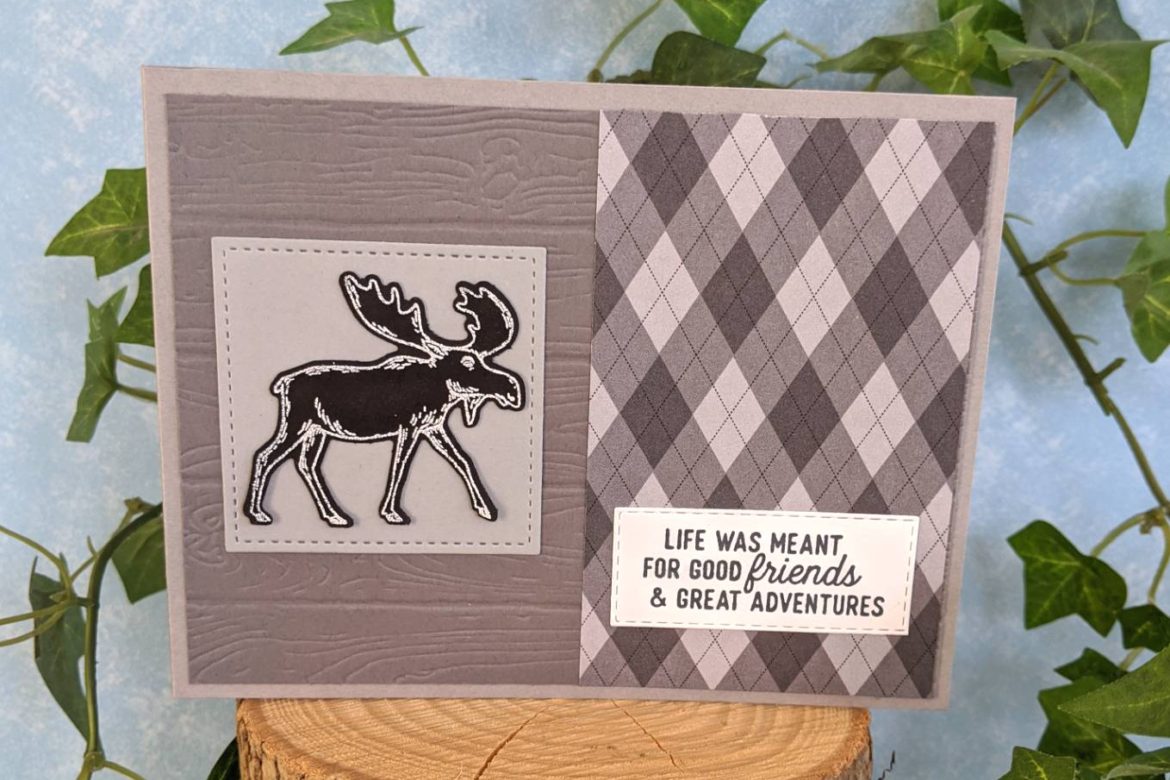
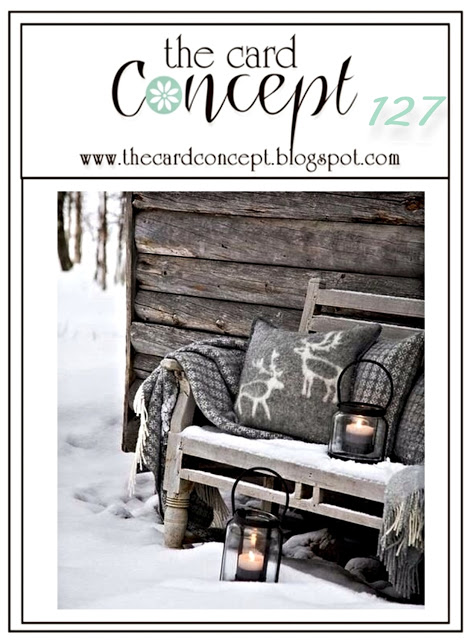
He was just a young moose, but I was excited. And when I saw the challenge over at The Card Concept, I knew I had to make a moose card. I had ordered the moose punch from Stampin’ Up! but didn’t get it for a while because it was back-ordered. I’m so glad they will be having it in the Holiday Catalog for next year! That gives me plenty of time to play with him and come up with lots of fun moose cards.
Here is one card I came up with. I was inspired by the moose (of course!), but also the monochromatic color scheme and the textures. The picture reminds me of the cabin we stayed at while in Wyoming.
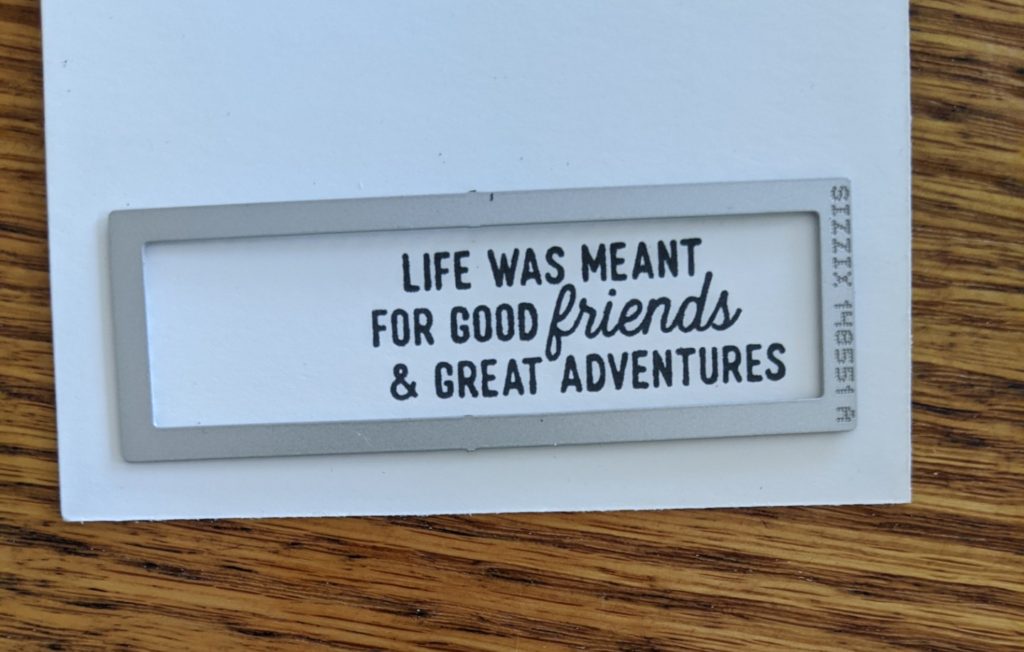
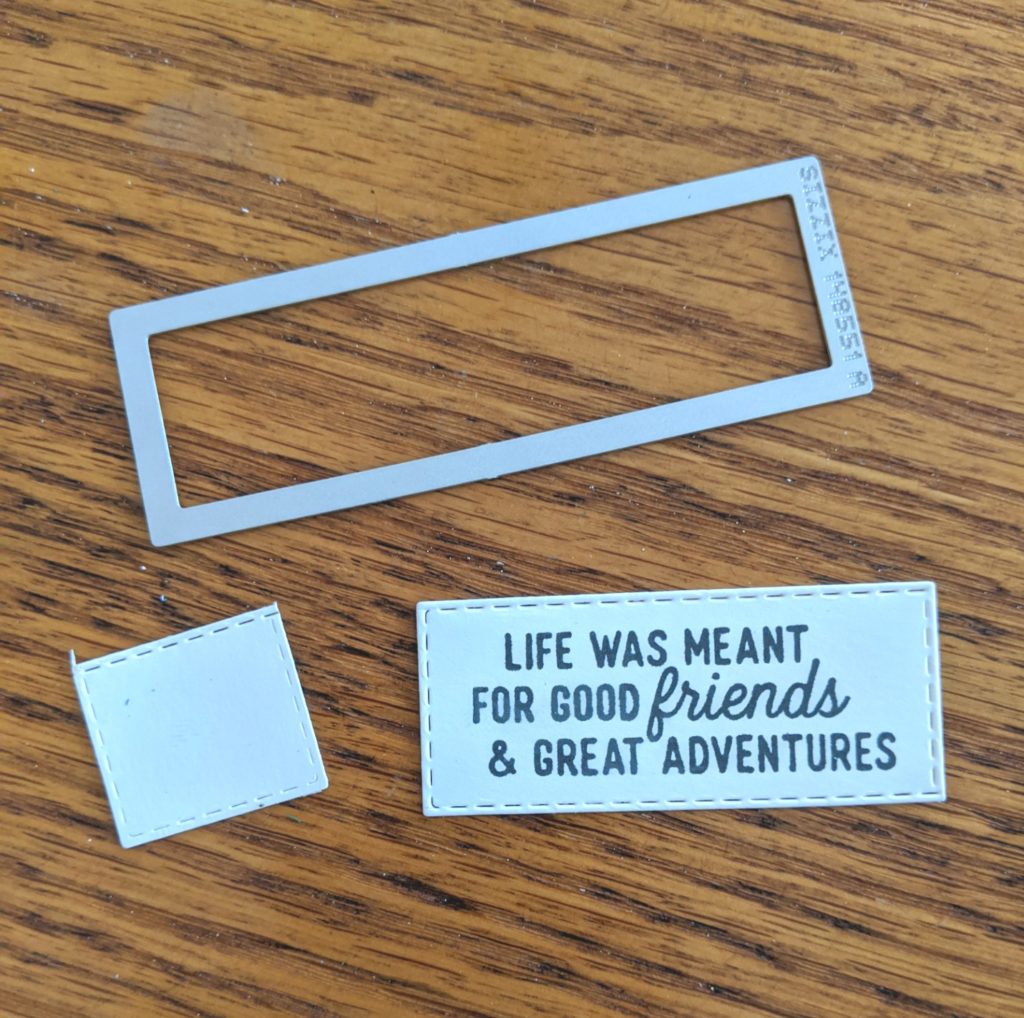
Here’s a little tip for you too. I used the Stitched Shapes Dies and wanted to us a stitched die for the sentiment too. So I pulled out the Stitched Rectangles Die but they were all too long. So I die cut it out once, leaving a bigger white space to the side.
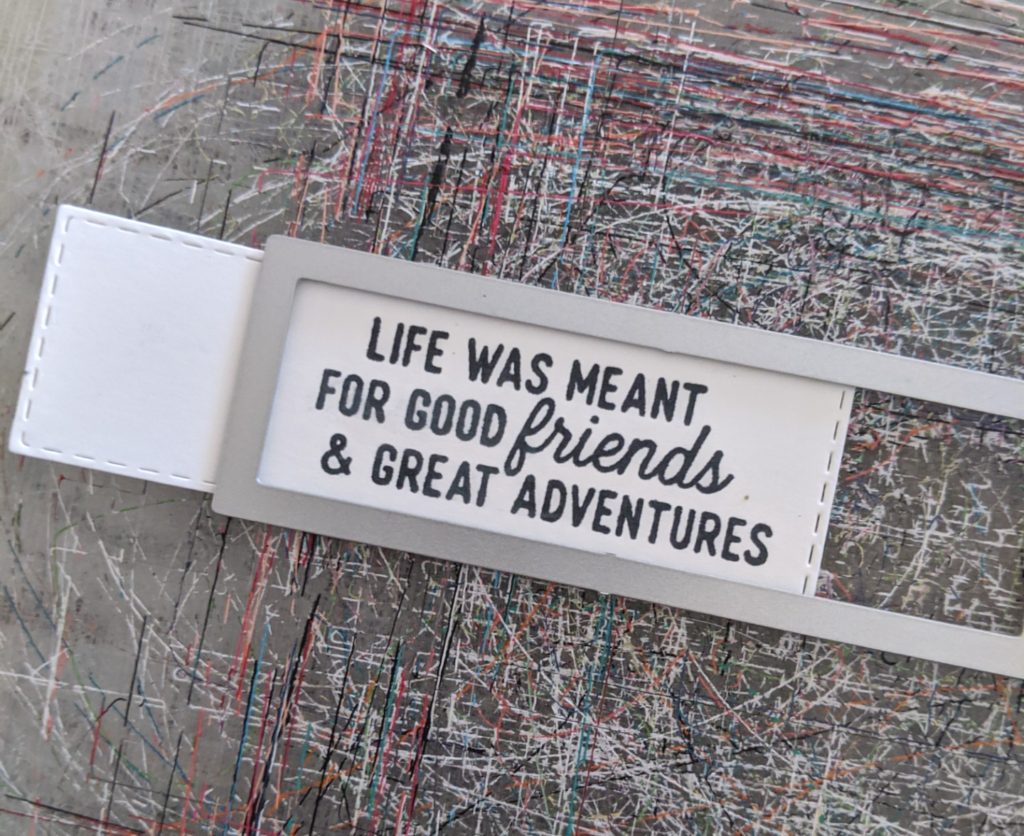
Then I lined it up to make the size I wanted. The stitched dies work well for this because you can feel the die slide into the stitched grooves so you know it is lined up. (Boy, those cutting plates sure are used!)
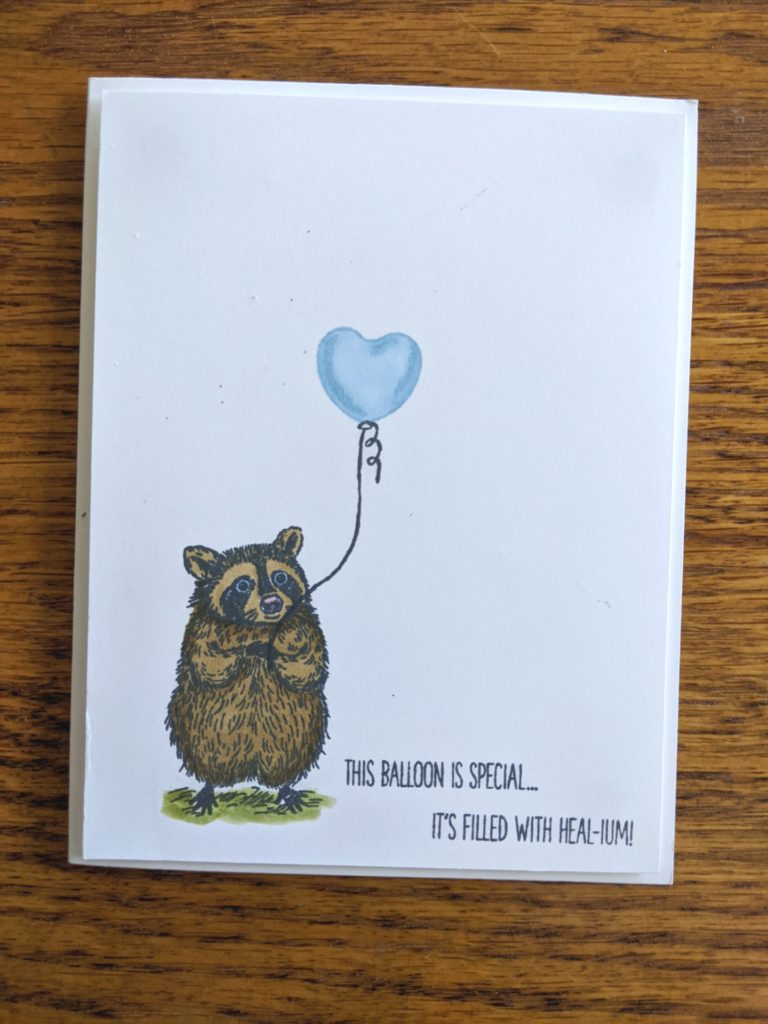
Over at CAS on Friday, they have a challenge for a Get Well card. I’ve been wanting to break out the Special Someone stamp set and this was the perfect occasion.
I just love this raccoon! The expression on his face is just precious! So I was excited to use him for this get well card. Plus the saying is so cute!
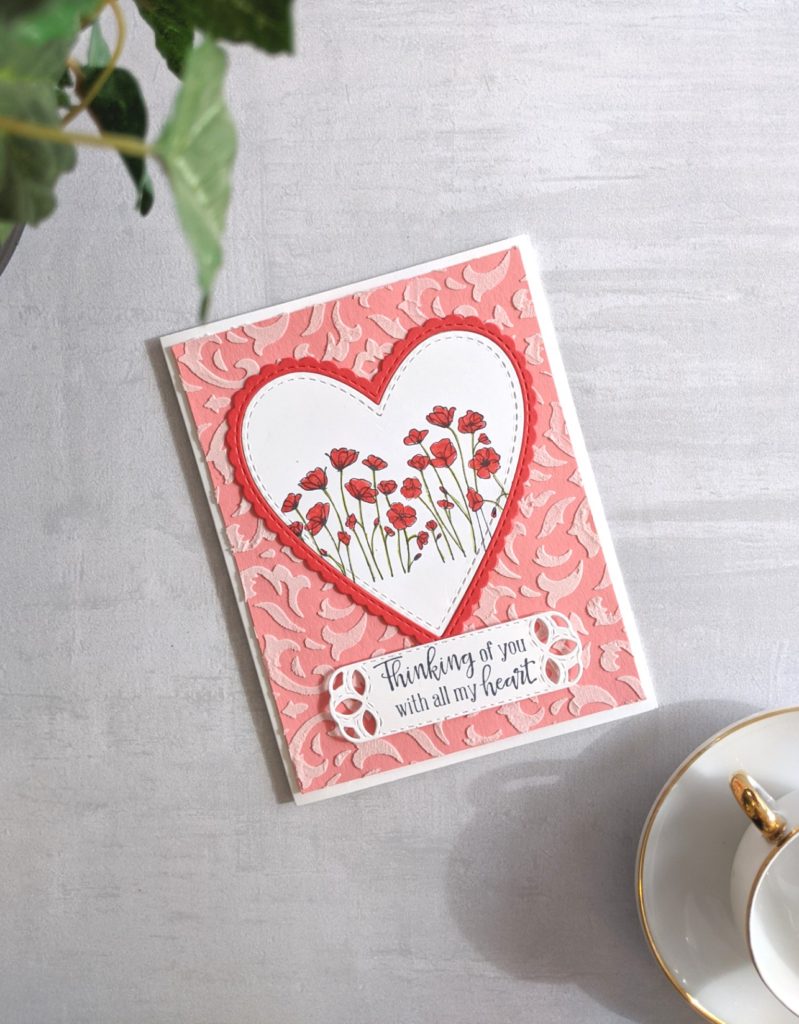
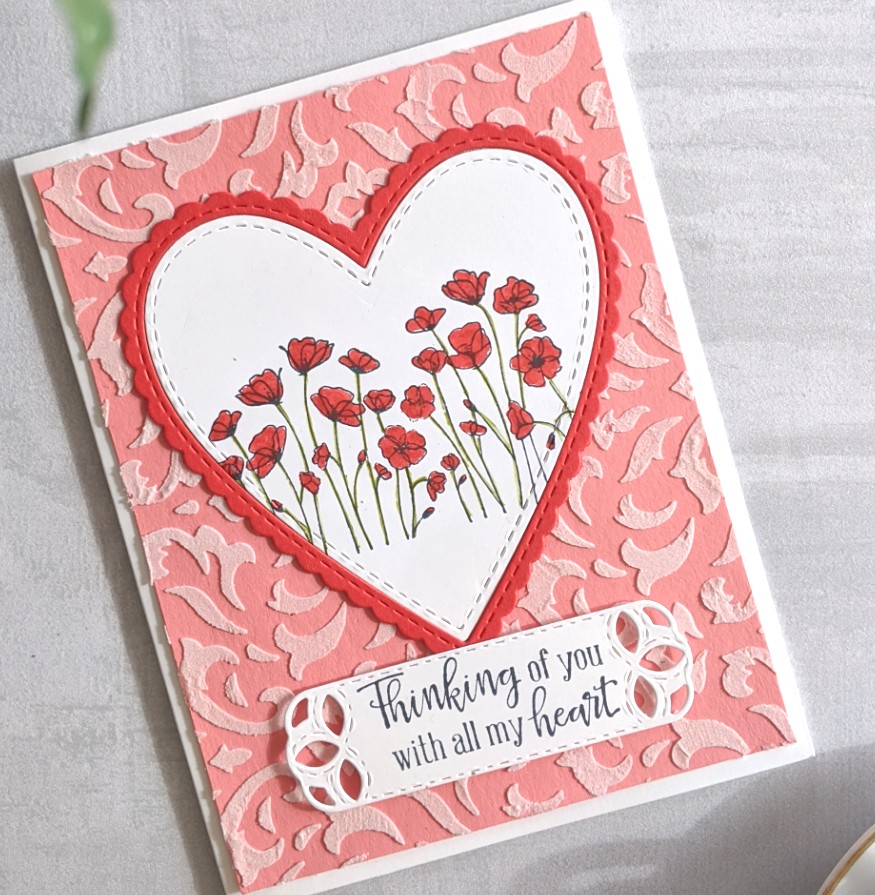
Valentine’s Day is right around the corner and if you haven’t made your Sweetie a card, here is cute Valentine’s Day card idea. Or you could use it to remind someone that you are thinking of them.
I loved using the Painted Poppies set again. This time I decided to die cut it out with a heart to go with a Valentine’s Day theme. Or to represent love to those you are thinking about.
I haven’t used my embossing paste for awhile and decided to bring out the embossing masks that I bought but haven’t used yet. I’m really itching to use the tree one, but didn’t think it would work well with this card! There is so much you can do with them and I an hoping to have some time to do more embossing.
I really like the way the embossed background works with the images and makes the heart pop.
I am entering this card in the Festive Friday Challenge #FF0051 using the 3 elements of hearts, pink and flowers. Although I may have eaten chocolate while making the card!
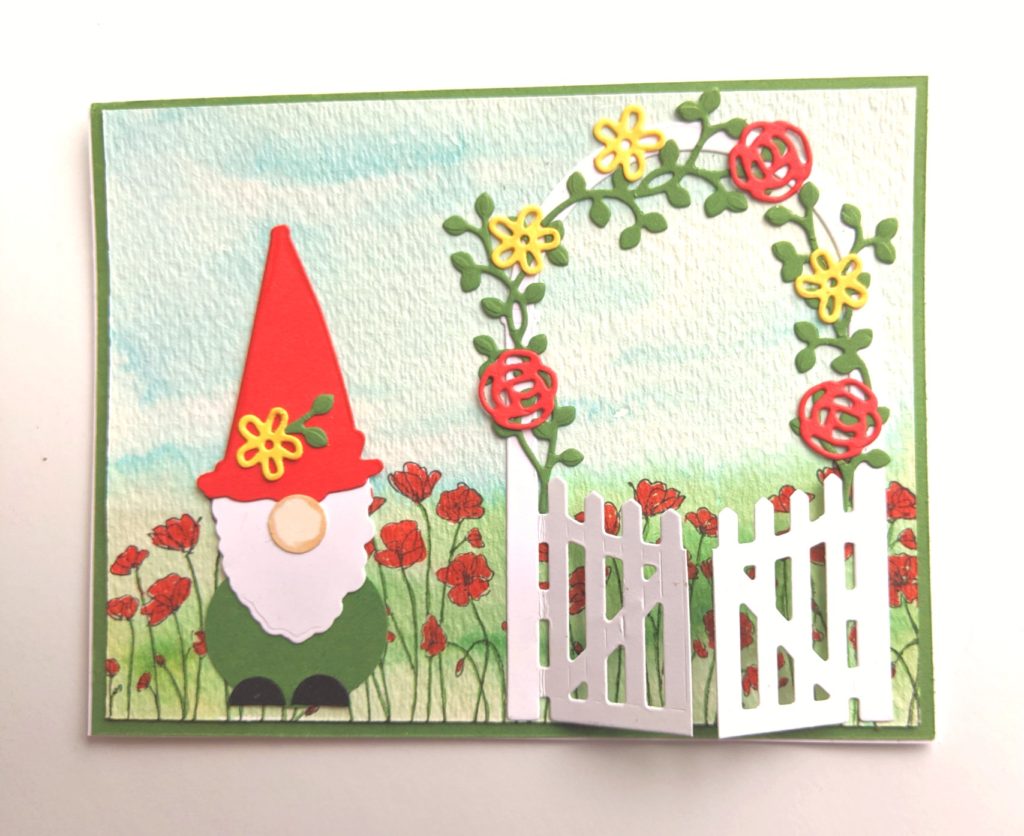
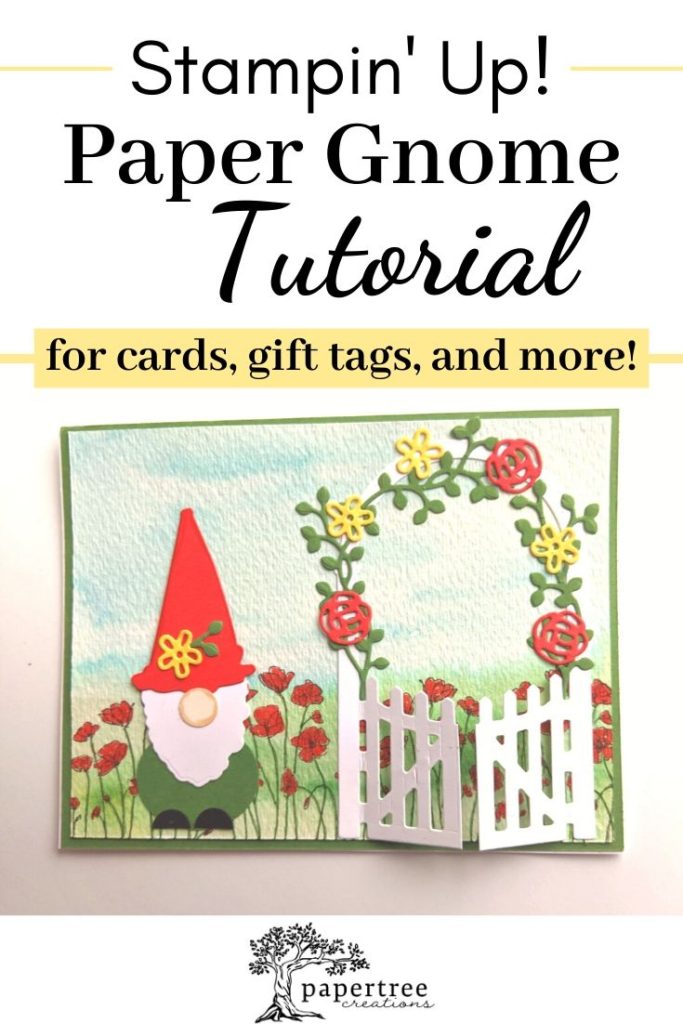
As promised in this blog post, here is the tutorial for making the Garden Gnome card. It was so much fun and I think he is just adorable! You can stamp a sentiment in the space in the middle of the arbor or on a strip of cardstock and place it on the top left, above our little gnome. I left mine blank so I can add the appropriate sentiment when I decide to send him out.
Card Tutorial
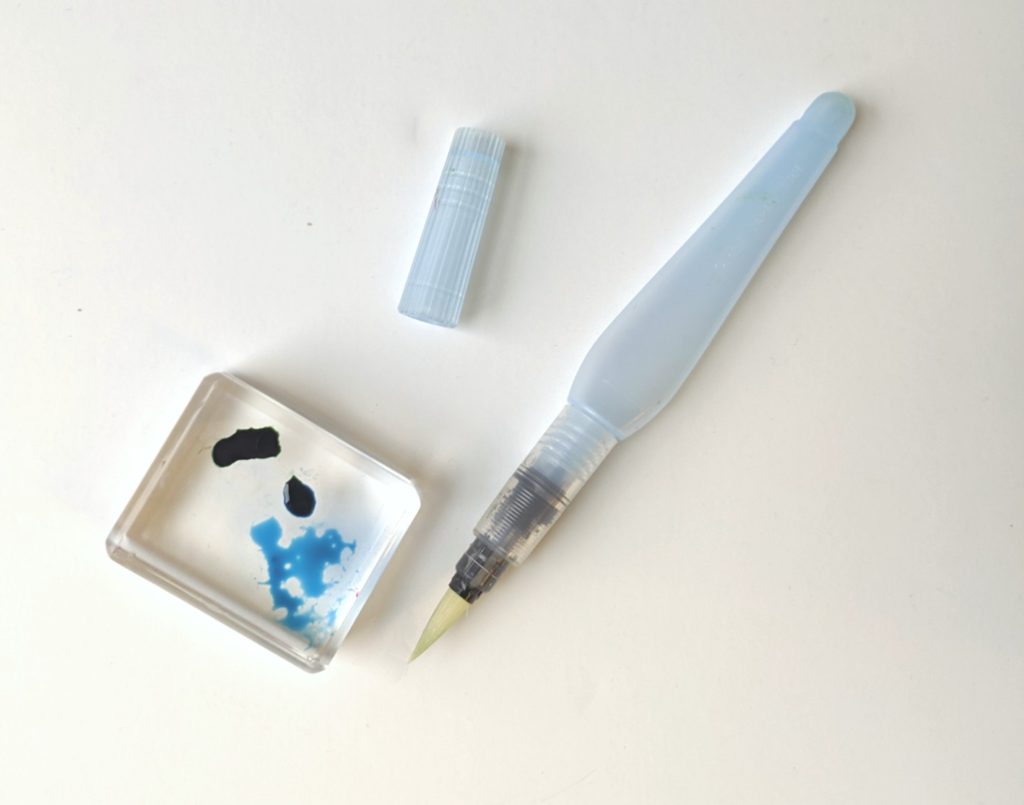
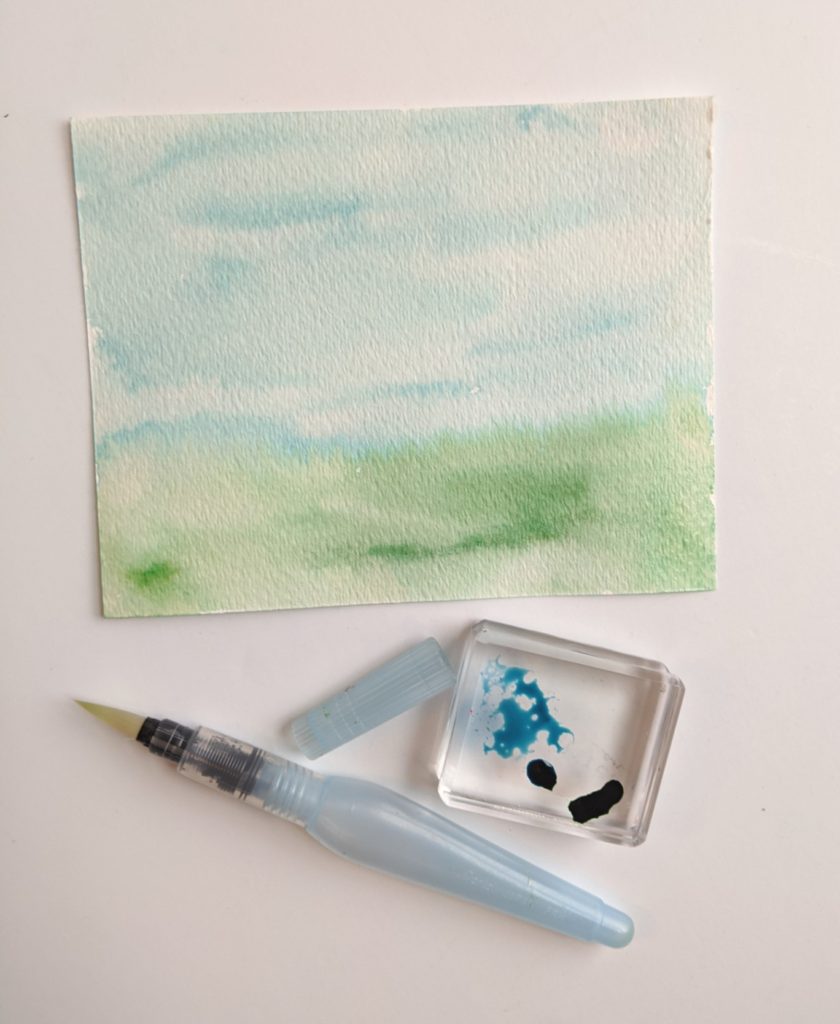
Cut a piece of water color paper to 4″ x 5 1/4″. Put a drop of Balmy Blue ink and Garden Green Ink on a block or surface that won’t absorb it.
2.Using a Watercolor Brush, do a wash of blue for the sky and a wash of green for the grass. The intensity of the color depends on how much water you use.
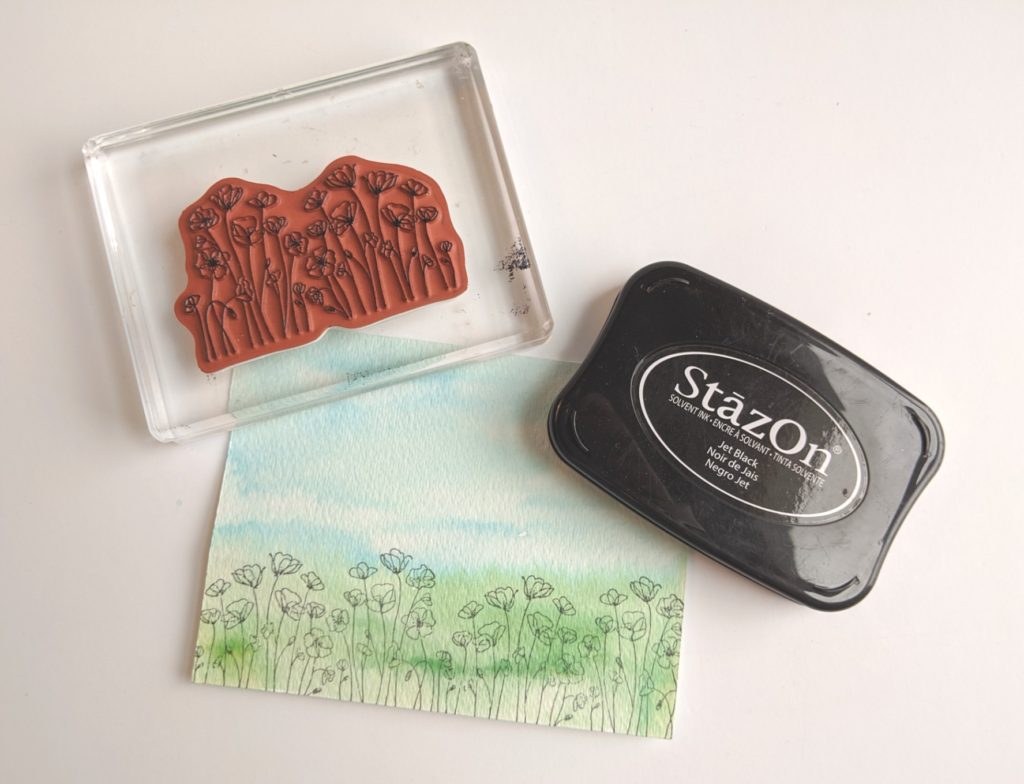
3. Stamp the flower image from Painted Poppies in black ink. I used Stazon for this card because I was using Stampin’ Write markers to color with.
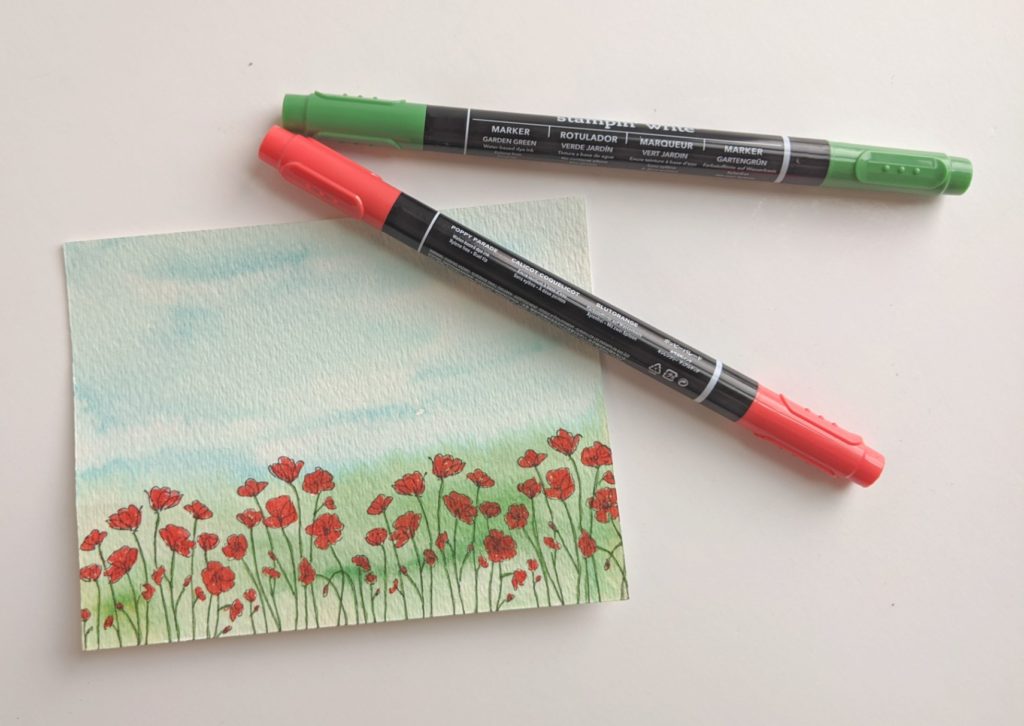
4. Color the flowers with Poppy Parade and use Garden Green Stampin Write Markers to trace the stems.
5. Die Cut the gate from the Garden Gateway Dies in Whisper White, the flowers from Poppy Parade and Daffodil Delight, and the leaves from Garden Green Cardstock.
6. Make the Garden Gnome following the instructions from this blog post.
7. Glue on the gate (I snipped up the middle of it so the gate would open), flowers, and leaves. Add the gnome. Mount on a piece of Garden Green Cardstock (4 1/8 x 5 3/8) and glue to your A2 card base (8 1/2 X 11, scored at 4 1/4)
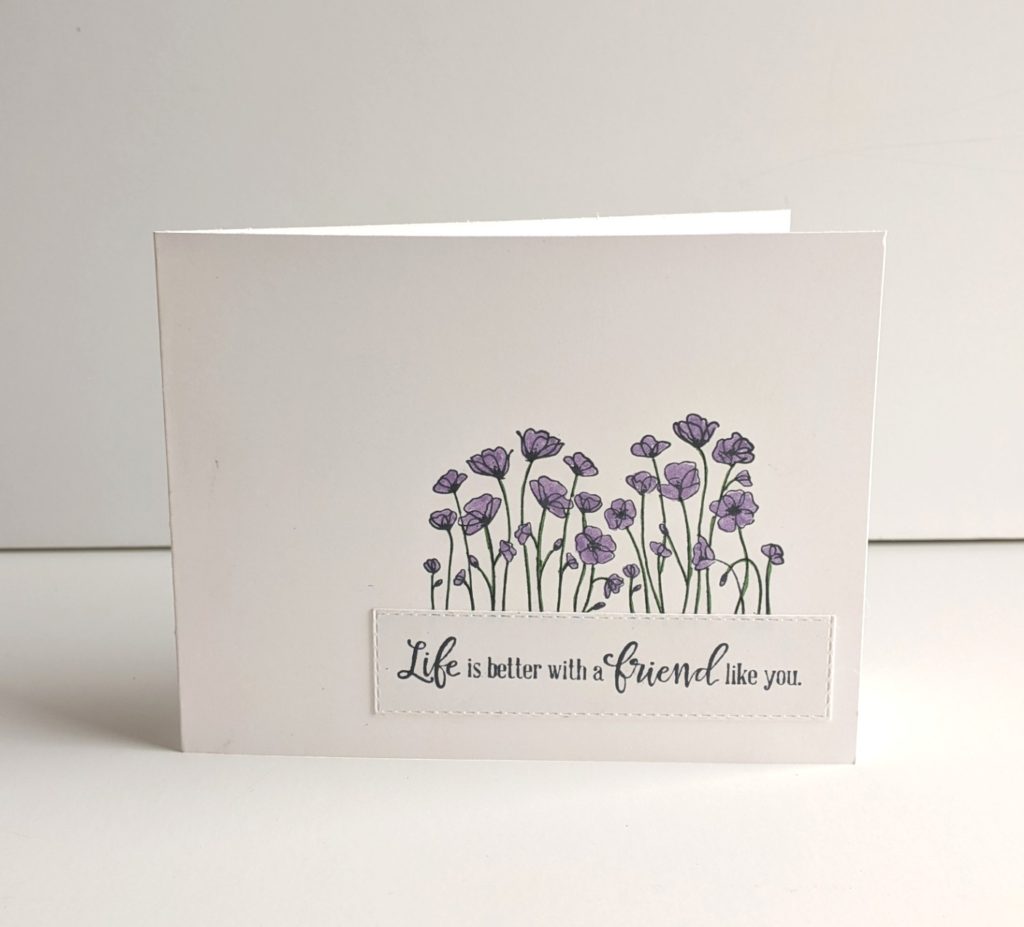
If you are looking for a simple card to make for any occasion, look no further. The Painted Poppies set is awesome for this. And if you buy the bundle before March 31, 2020, it qualifies you for a free Sale-A-Bration item.
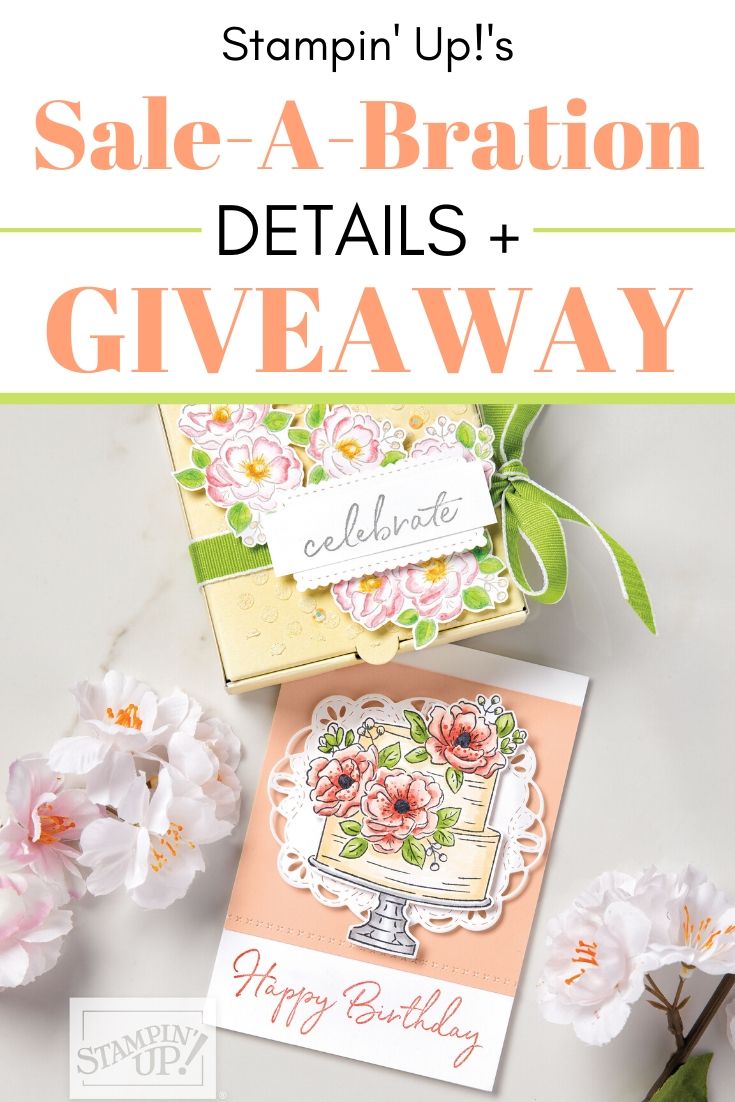
Check out my blog post here for information on Sale-A-Bration and a Giveaway I am doing.
For this card, stamp the poppies on the card base. Because it is a one-layer card, color it using Stampin’ Write Markers. They don’t bleed through the paper like the alcohol markers do. The colors in this card are Garden Green and Highland Heather.
Stamp your sentiment of choice and adhere it and you have a simple and beautiful card. That easy.
This is a great layout for a quick card. You can use any type of stamp or sentiment for endless ideas and occassions.
Over the past year, I’ve seen tons of adorable garden gnomes popping up in stores and in people’s yards. I love it so much, and I wanted to figure out a way I could incorporate them into my cards. Since Stampin’ Up! doesn’t have a gnome stamp set, I decided I was going to have to come up with my own way to create a gnome for my cards.
I had a lot of fun figuring out how to make my own gnome card, and I’ve laid out a tutorial for making the paper gnome below. Enjoy! This is perfect for spring, but it doubles as a cute Christmas craft!
Cardstock in color of choice (I list what I used below)
Designer Series Paper if you want a pattern for the body or hat
Click Here to learn more about Sale-A-Bration and my Free Give-away.
Paper Gnome Set-up Instructions
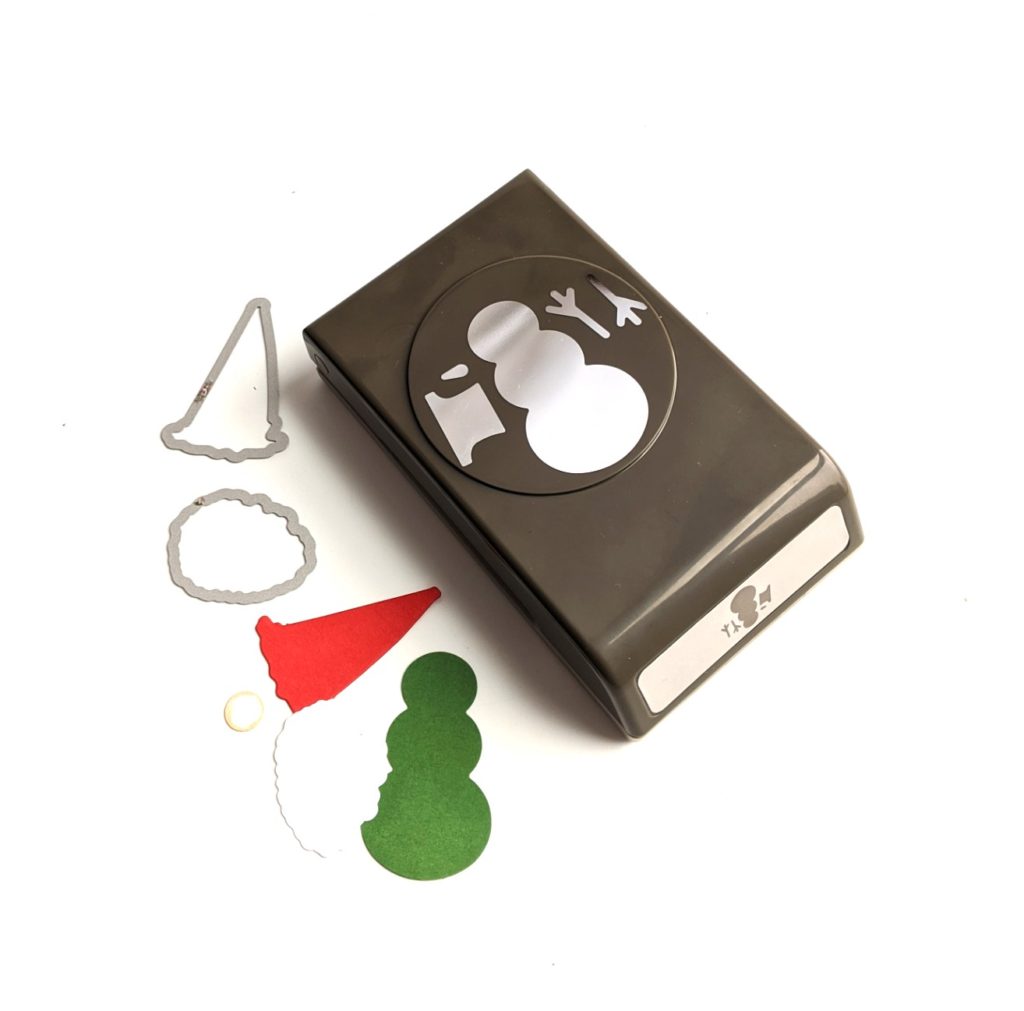
Using the larger pine cone outline die from the Beautiful Boughs Die Set, cut the beard from Whisper White Cardstock.
Using the smaller, single ship die from the Smooth Sailing Dies, cut the hat from Poppy Parade Cardstock.
For the body, use the Snowman Builder Punch in Garden Green Cardstock.
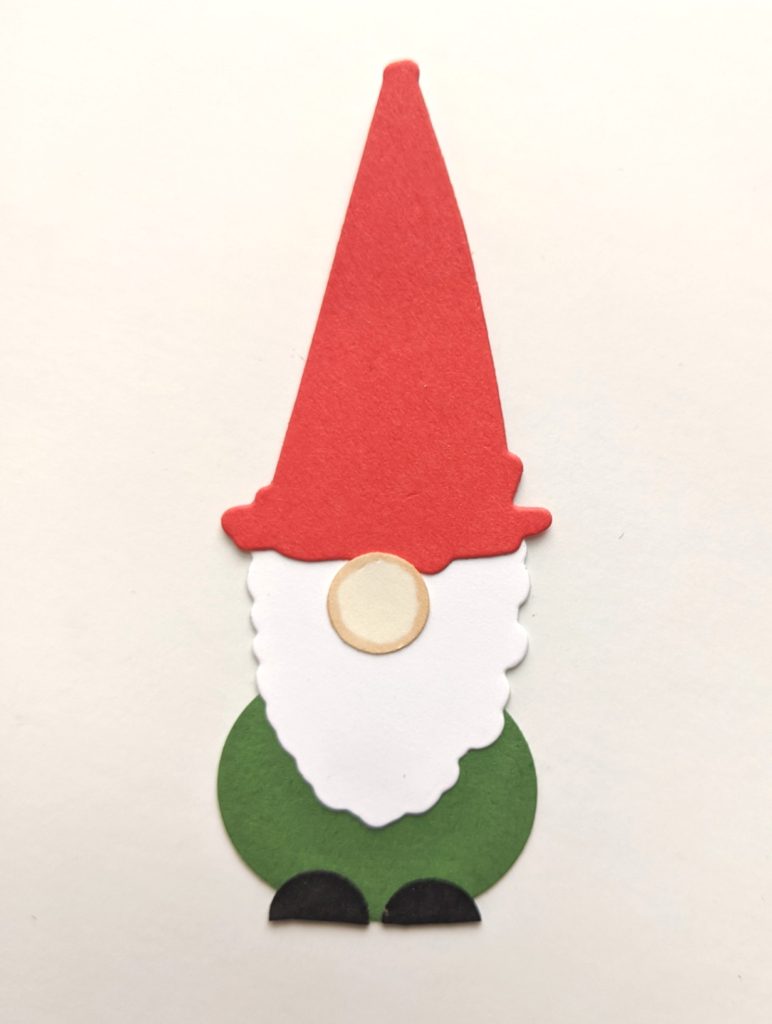
Use a small circle punch for the nose in Very Vanilla and shade the sides of it with the Ivory Stampin’ Blends by coloring the outside of the circle (or whatever marker/ink you happen to have).
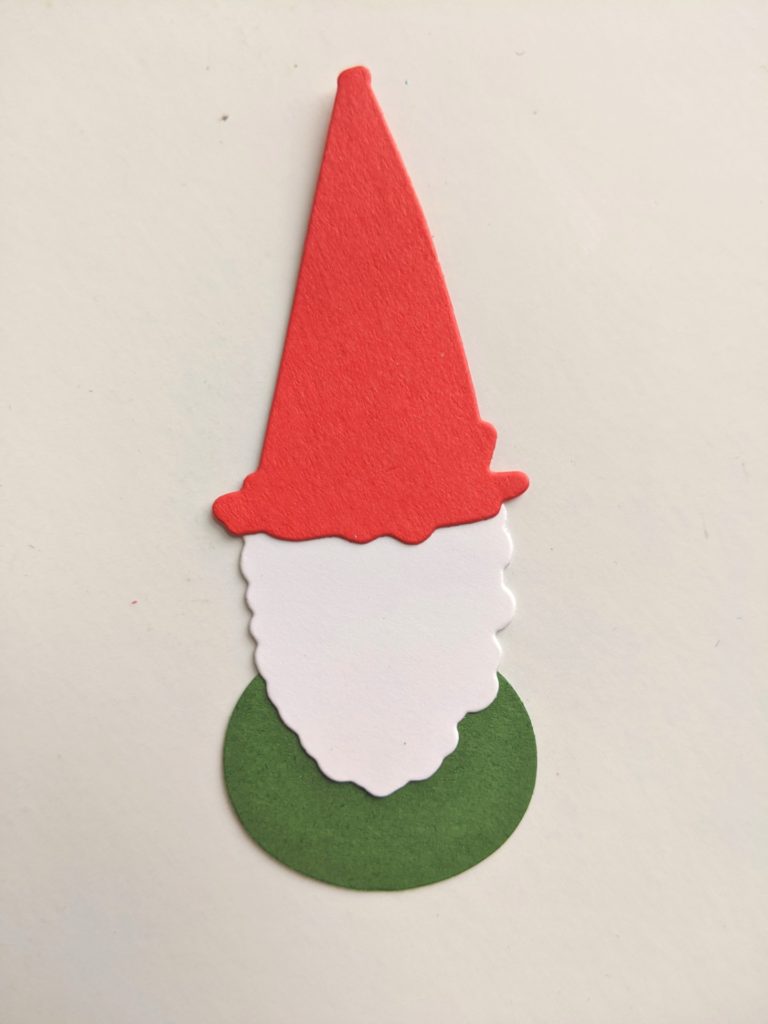
Paper Gnome Assembly Instructions
1.Take the beard and glue it to the snowman.
2. Position the hat where you want it and glue it down.
3. Add the nose right below the hat. I also cut a circle in half out of black cardstock for shoes.
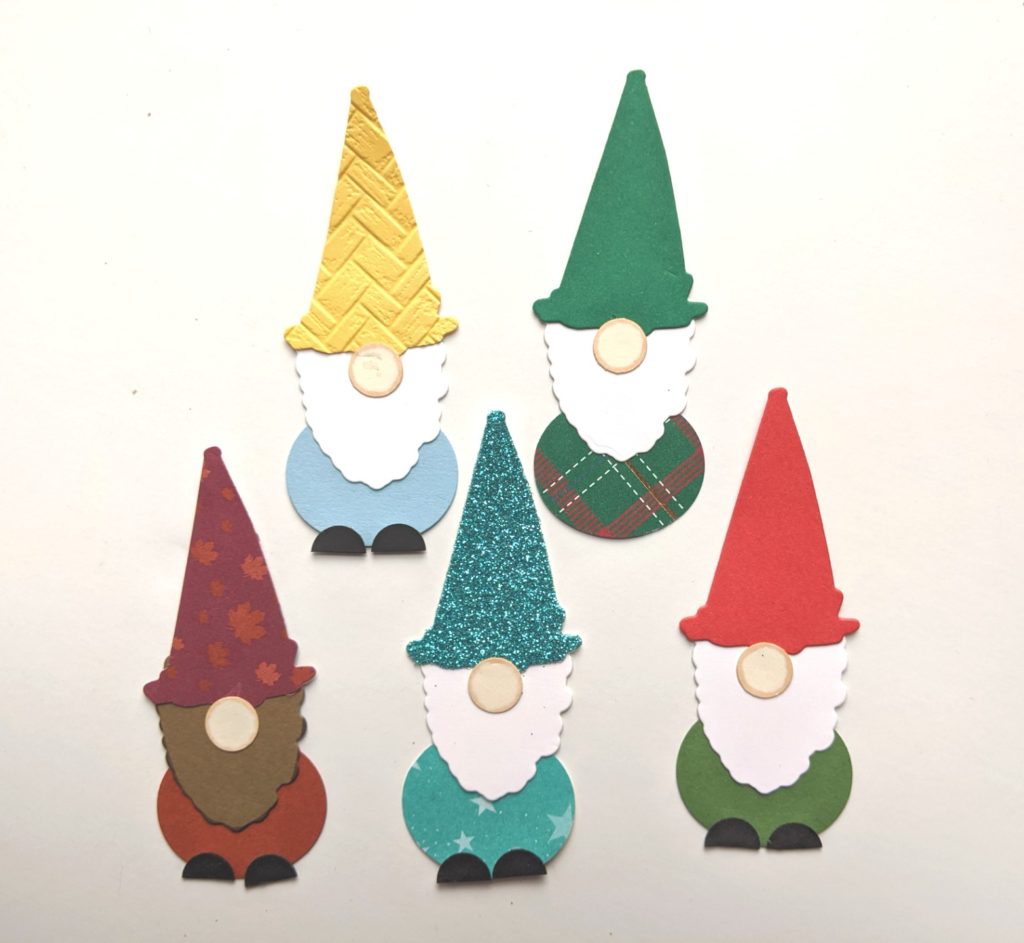
And that’s it! You can add these to cards or gift tags, or it’d be a fun craft for kids! You can also embellish them however you want with sequins, hearts, flowers, etc.
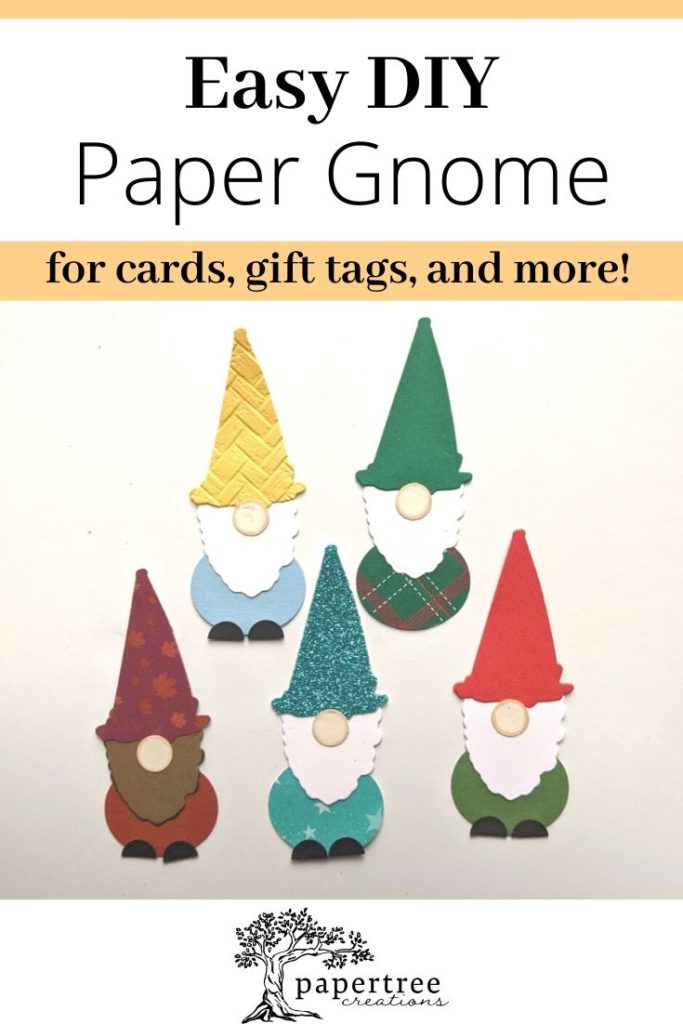
Here are a bunch more paper gnomes I made. I think they are adorable! You can do so much with them. Use patterned paper for their hat or body, emboss for more texture, or even use glitter paper to make a gnome wizard!
These paper gnomes are so much fun to make, and the possibilities are endless with them! Here’s a spring garden card I made using the gnome I created for this tutorial.
Just adorable! I hope you will try this and let me see what you come up with. Here is a tutorial for the card.
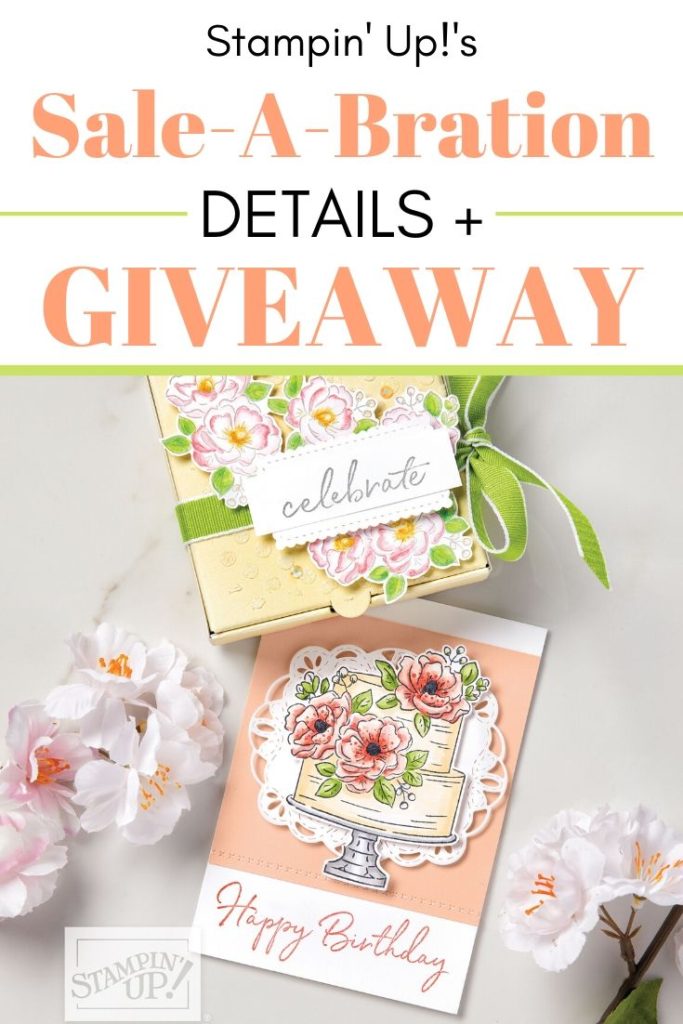
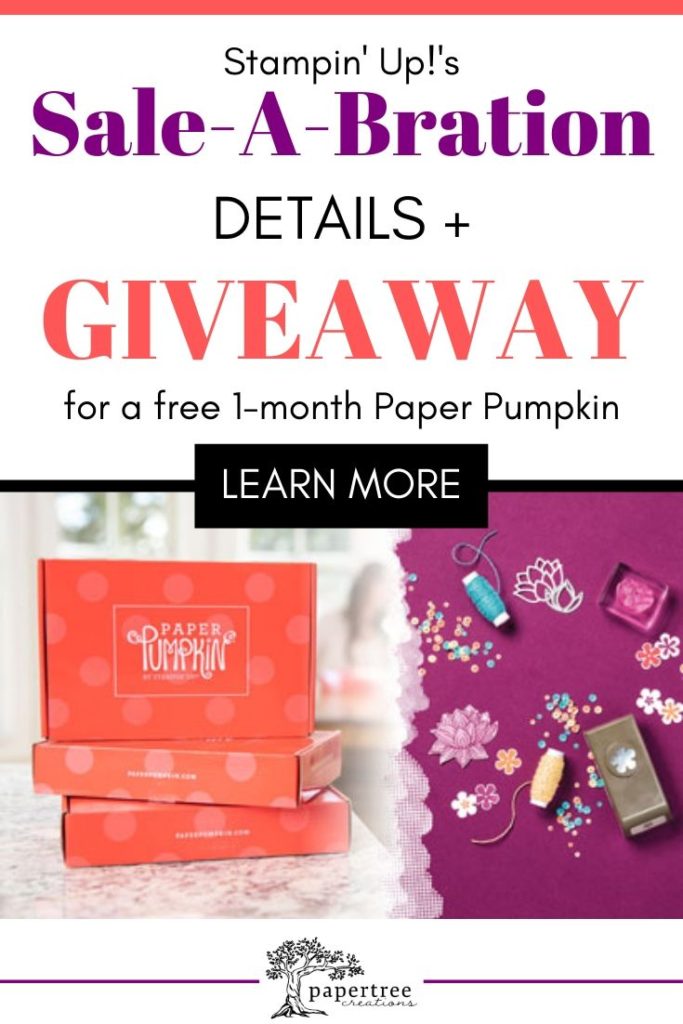
It’s Sale-A-Bration time again! NOW through March 31st, 2020, you can earn free products from your purchases (until supplies last). Plus you can enter my giveaway (below) for a chance to get more free stuff!
For every $50 you spend, you get to choose something from the Sale-A-Bration brochure. There are some items that you need to spend $100 to get, which you can also find through the link above.
The offerings are so cute this year, and I had such a hard time choosing! But it’s definitely worth it because you can get so much free stuff. PLUS because I’m so grateful for all my customers, I’m doing a Paper Pumpkin giveaway for anyone who spends $50 during Sale-A-Bration through an online order with me! All of the details and rules are below.
Here are some of the free things you can get during Sale-A-Bration:
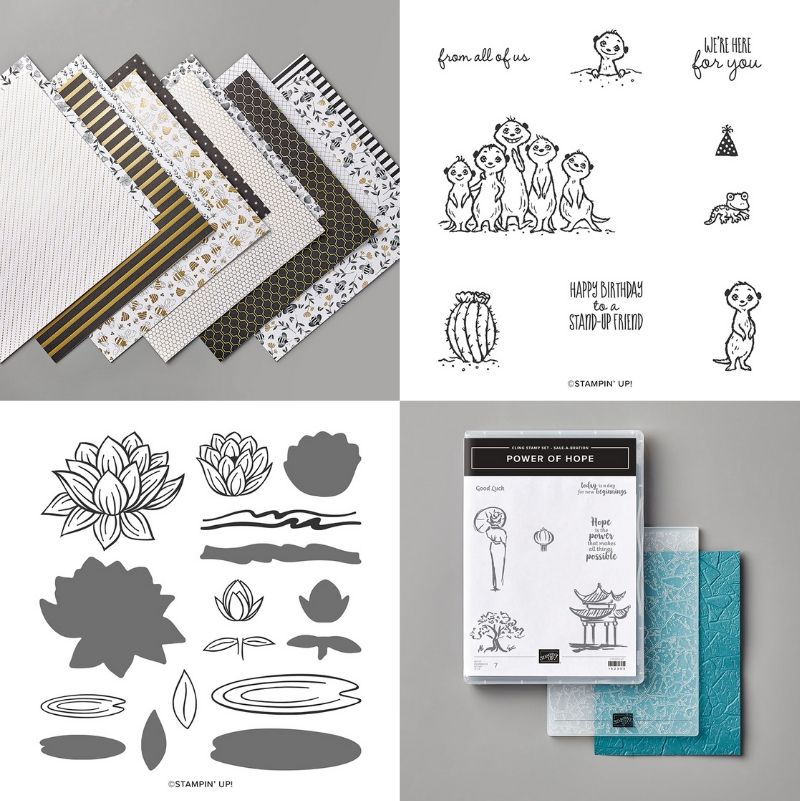
Lovely Lily Pad Stamp Set: This comes with 8 photopolymer stamps, AND they’re reversible! The value for this is somewhere around $15-$18, and you have a chance to get it free!
Power of Hope Bundle*: In this bundle, you get the Power of Hope Stamp Set and a 3D stone embossing folder. Something like this would normally go for $25-$30, so getting it free is an amazing deal!
Golden Honey Specialty Designer Series Paper: This pack comes with 12 sheets, 2 each of 6 double-sided designs. Such cute patters, plus there’s gold foil! Value for something like this is usually $14.50.
The Gangs All Here: This comes with 9 adorable cling stamps. There’s even a cute cactus! That has a value of around $15-$18.
*You must spend $100 to get the items marked with an asterisk for free.
Sale-A-Bration is the best time to stock up on all your Stampin’ Up! supplies. But when you’re looking through the whole catalog, it can be overwhelming.
That’s why I’m giving you a few suggestions and ideas for what to buy to help you qualify for free stuff and get the most for your money!
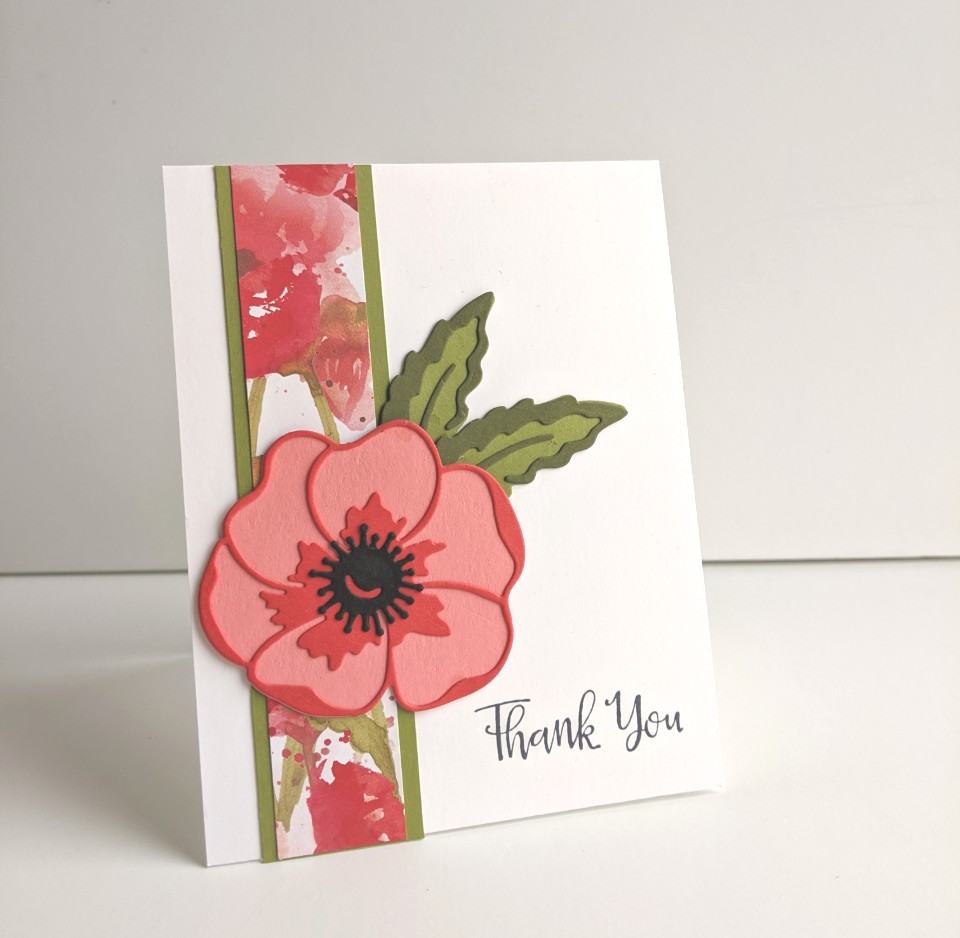
One thing that will qualify you instantly is the Peaceful Moments Bundle. You get 10 cling stamp sentiments plus the Poppy Moment Dies, which has 16 floral and leaf dies.
Since it’s a bundle, it costs $52 instead of $58, saving you 10%. On top of that, it qualifies you for a free product from the Sale-A-Bration catalog! Hello, savings!
Here’s a beautiful card I made with this bundle:
I used Flirty Flamingo card stock to cut out flower base and topped it with the outline in Poppy Parade. The leaves are done in Old Olive with the outline in Mossy Meadow. I used the Peaceful Poppies Designer Series Paper and took a 1″ x 5 1/2″ strip of paper and mounted it on a 1 1/2″ x 5 1/2″ piece of Old Olive cardstock. I used a Thank You stamp for the sentiment but you could use any sentiment you want.
I love Paper Pumpkin and think it is such a great deal, so I am giving away a one month subscription every month of Sale-A-Bration. I know once you see the quality of this subscription box you will want to start receiving it! So here are the rules:
Once monthly for the months of January, February, and March 2020, I will be hosting a giveaway of a 1-month Paper Pumpkin subscription. This is ONLY for customers who order online from Stampin’ Up through my, Brenda Lane, link.
The prize will come in a form of a coupon code for a free 1-month Paper Pumpkin subscription that can be activated whenever you’d like.
For every $50 (before tax and shipping) you spend online during Sale-A-Bration shopping with me, you will be entered into one of the monthly drawings to win a 1-month subscription to Paper Pumpkin. Example: If you spend $100 in January, you will be entered twice into the January giveaway, but not the February or March giveaways, unless you purchase again.
You will be automatically entered to win AS LONG AS you DO NOT check the “No Contact” box during your checkout process. I have to be able to get in touch with you to be able to notify you if you win.
You must live in the USA. I am not allowed to sell to people of other countries. Sorry.
You must be 18 years or older to enter.
The winner will be determined at random. I will announce the winner’s first name on the first of the following month in this blog post, on my Facebook page, and in my newsletter. I will also contact the winner by the email they made their Stampin’ Up! purchase with.
This giveaway is not sponsored by or associated with Stampin Up! It is purely my own.
Happy New Year! I hope you all had a great holiday. It’s hard to believe 2020 is here and it’s almost time for Sale-A-Bration. I am so excited for this years Occasion catalog and Sale-A-Bration brochure. There are some wonderful offerings of stamps, paper, and die cuts, as well as some wonderful new embossing folders. Keep checking back for some great ideas of what you can do with them.
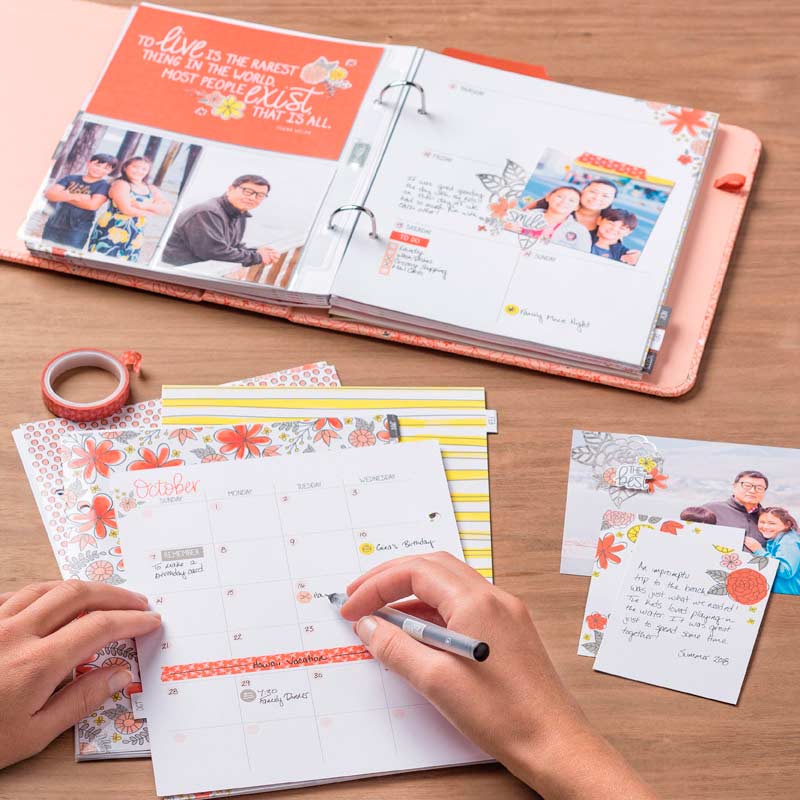
I just finished setting up my new planner. I just love it. This is my third one. It’s great that you can set it up to start in any month. Check out my Planner Post to read about it. Although it is no longer in the catalog, it is available on the clearance rack right now. A great way to keep track of your year and record the important things that happen.
Valentine Project
Here is a cute project for your Valentine’s Day decorating. It’s not too hard to make and looks darling hanging on the wall.
I used some floral wire I got at Walmart and formed a heart shape with it. Get the thicker wire that is already wrapped because it is easier to shape. It is only about 7-8 inches, but if you wanted a bigger on you could use two wires and tape them together. Then I wrapped it in washi tape (because we all have tons of it around!) to secure it. Cut out a bunch of hearts and attach them with glue, add a ribbon bow to hang it up and you’ve got a cute wreath to decorate with.
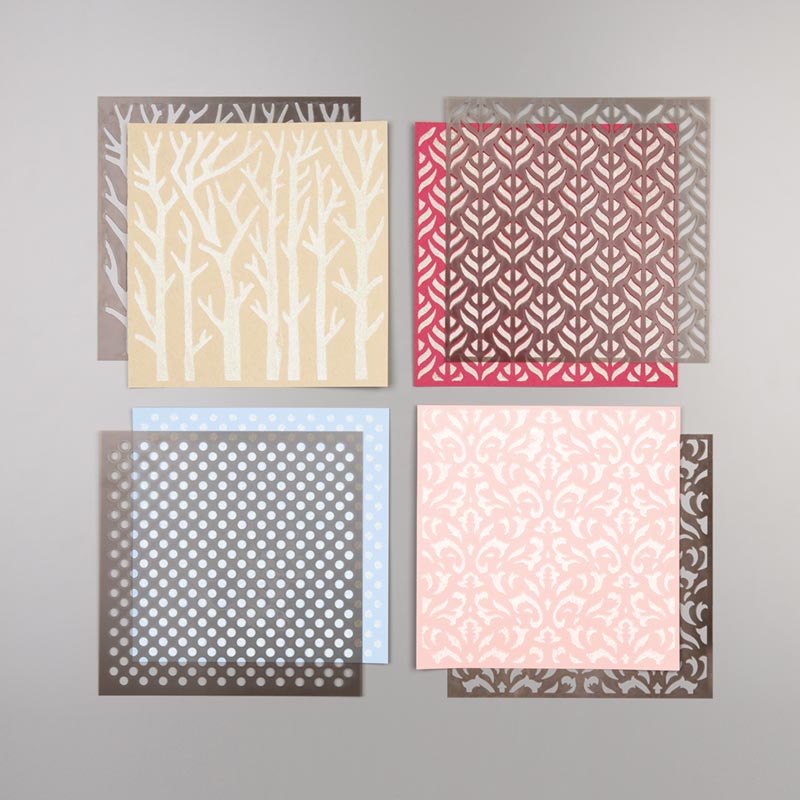
I used the Magnolia Lane Designer Series Paper because I like the muted colors, but it would look great in reds or neutrals too.
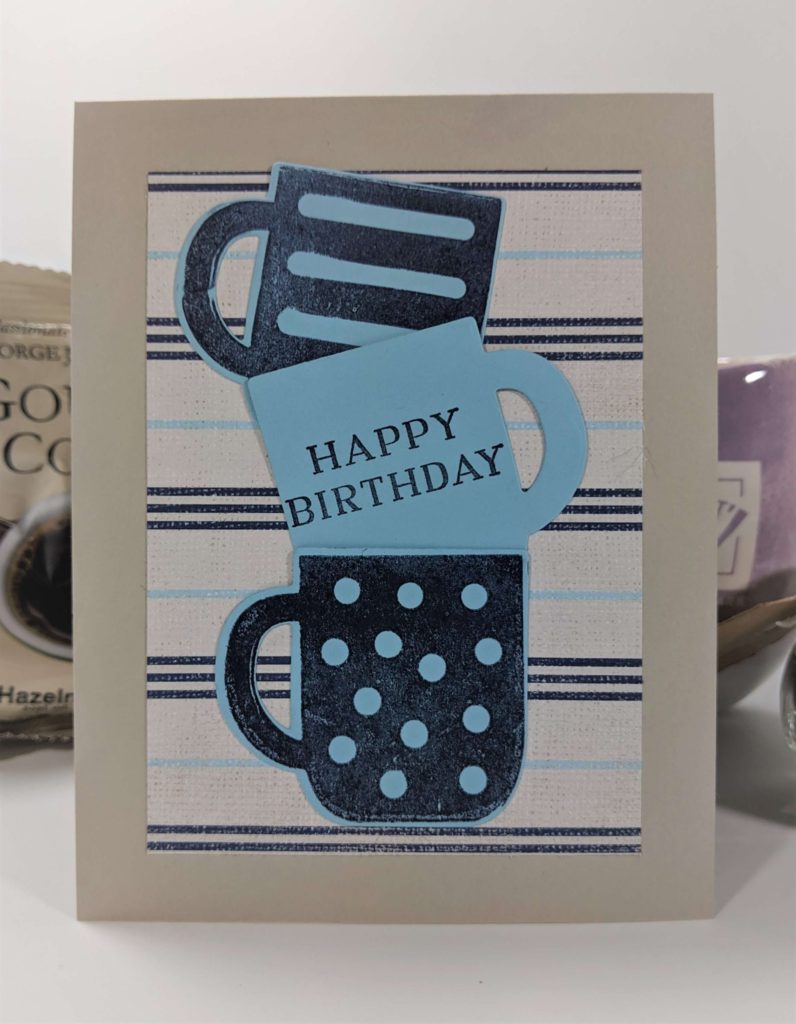
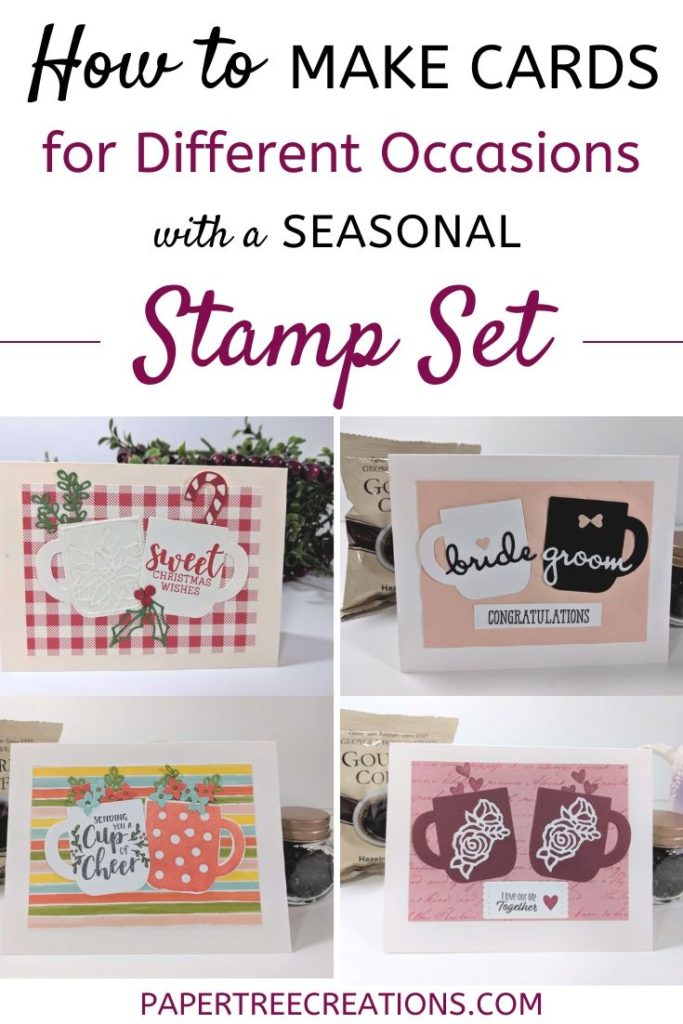
I just love when you can get more than one card occasion from a seasonal stamp set. And the stamp and die setCup of Christmas lends itself to that. Since we all know coffee and tea lovers, this is a great set to add to your collection. But hurry because this is retiring at the end of the year!
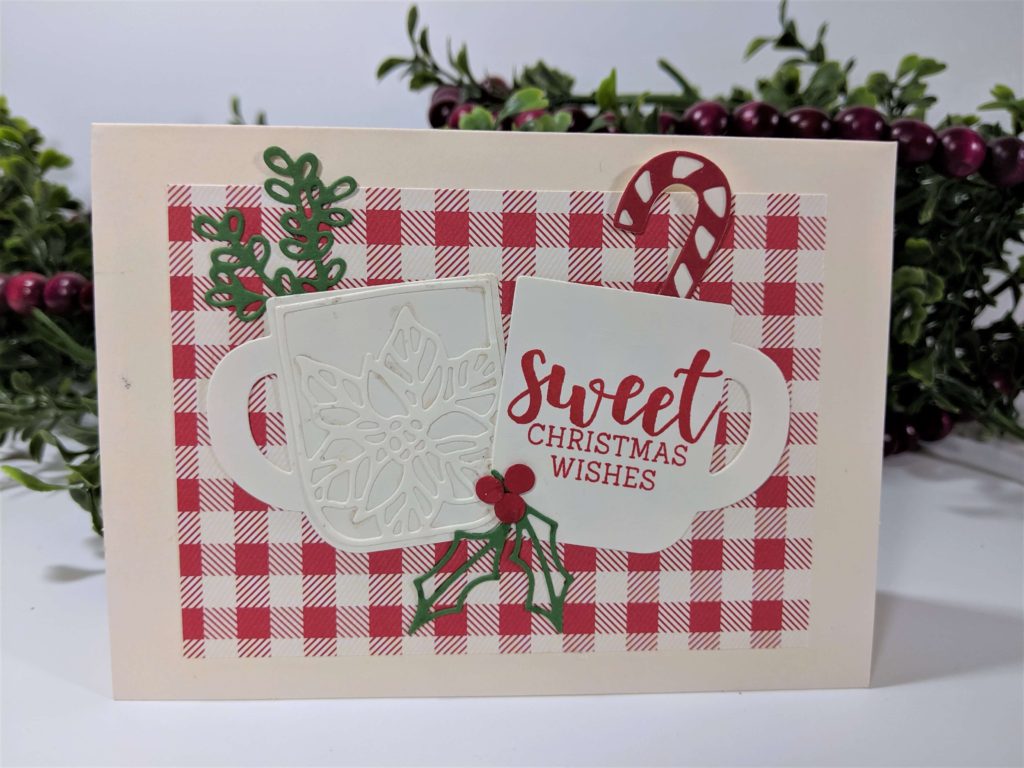
Christmas Card
I used this set in my last card class to make a Christmas card. It turned out really cute. The candy cane and the greenery that come with the set add just the right amount of pop and color to the card. Give this to a coffee or tea lover with their favorite brew. Hot chocolate would work too.
While I was playing with that card, I started to think of other ways to use it. Using the same simple layout, I came up with the following ideas.
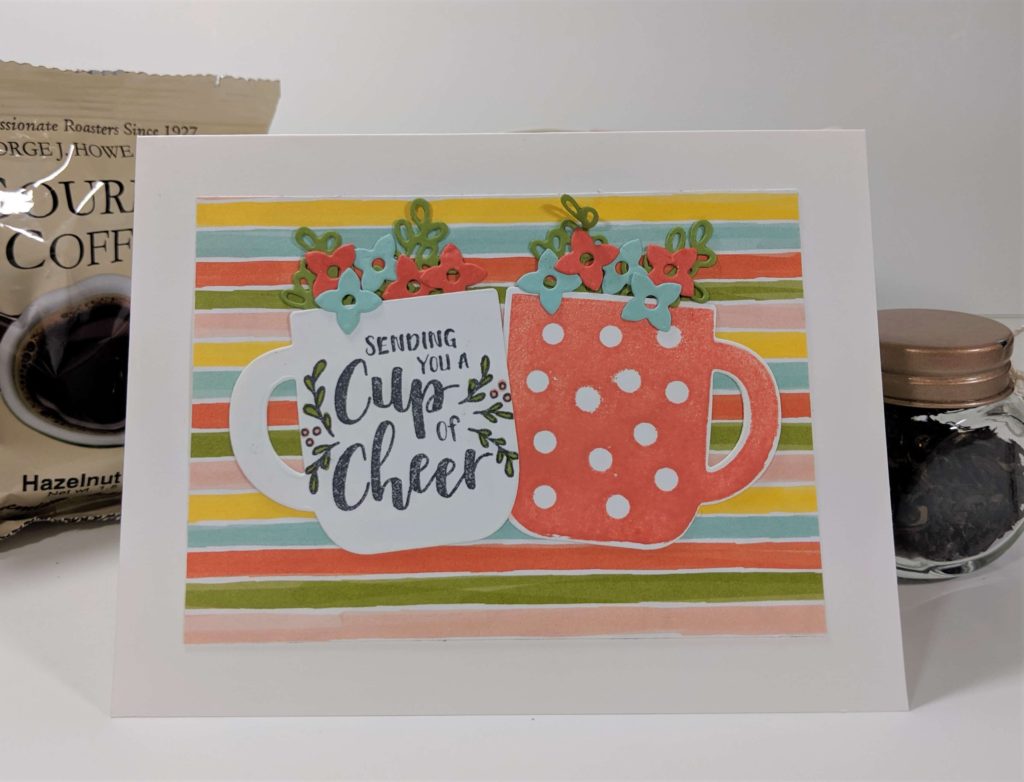
Cheer Someone Up Card
The saying “cup of cheer” that comes with the set doesn’t have to be Christmas. You can send someone cheer anytime of year! So I put a few flowers in it and have a card to send to cheer someone up.
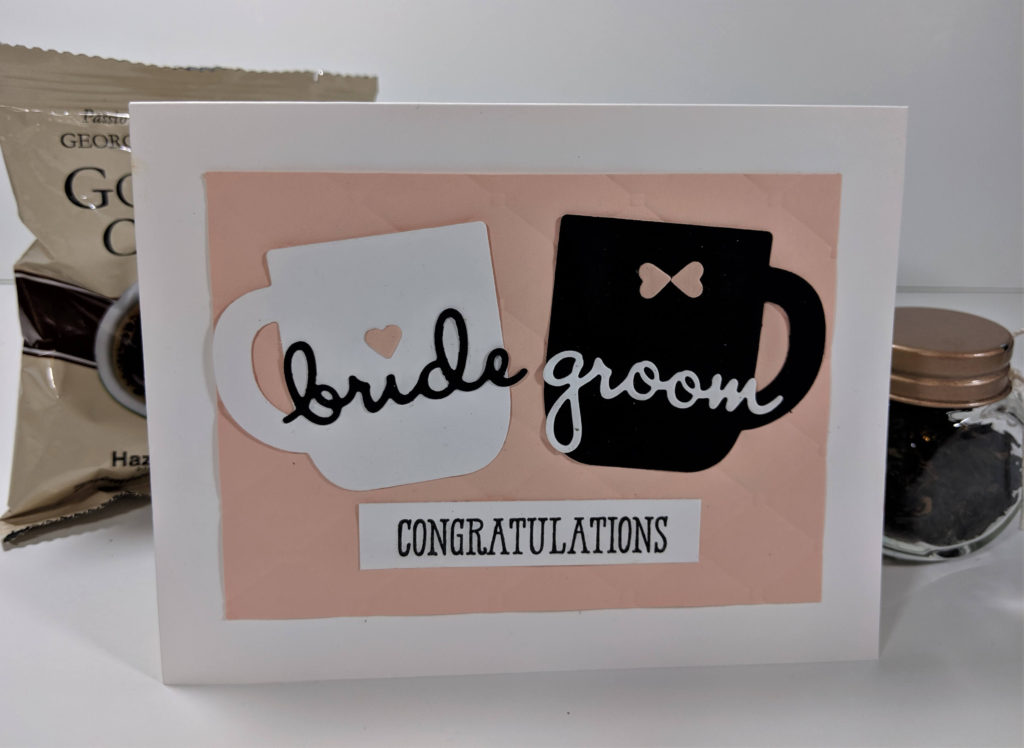
Do you have a couple getting married that are coffee or tea lovers. Make them a mug wedding card! I just was at a wedding where they gave out tea samples to all the guests. If I would have know they were tea lovers, I would have given them this card!
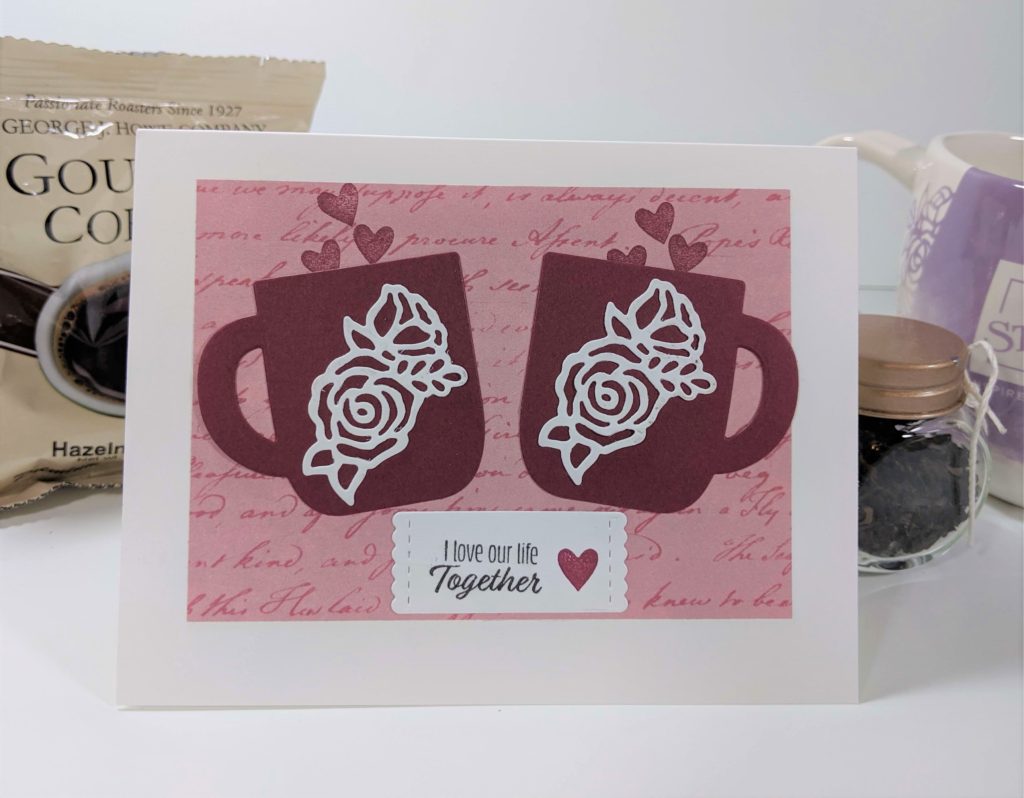
And for those of us who are getting a head start on those Valentine cards or if you just want to let someone know you love them, this one fits the bill!
If you noticed, the layout is basically the same for each card. The base is an A2 (4 1/4 x 5 1/2) with a piece of Designer Series Paper cut to 4 1/2 x 3 1/4. The options are endless for this set. I hope you will add it to your collection before it is gone! Don’t forget to share your designs over on my Facebook Page or in the comments.
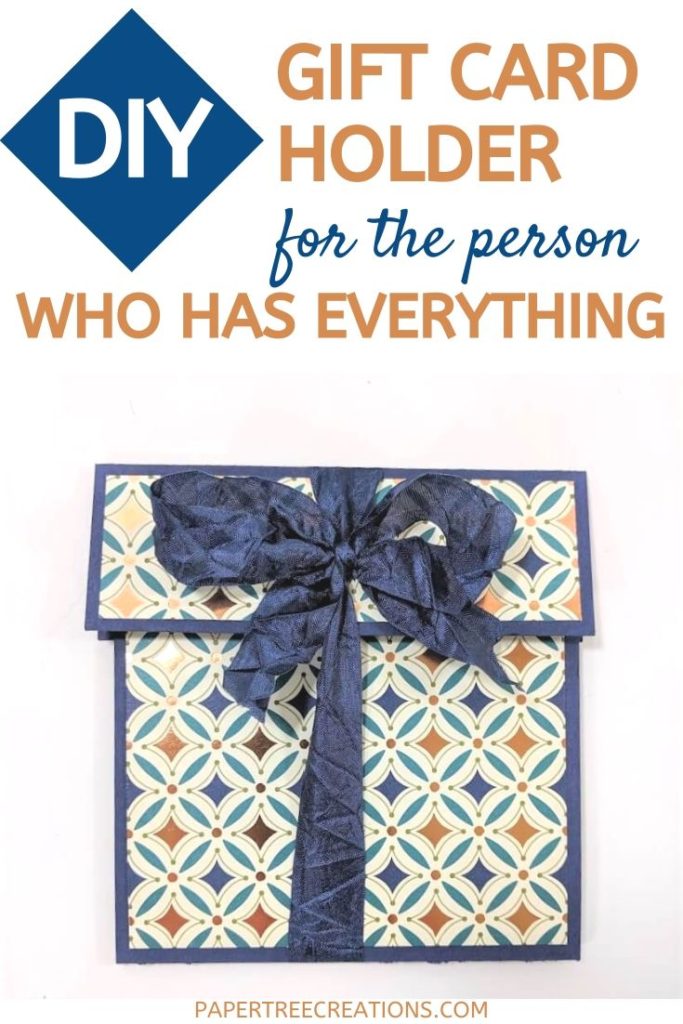
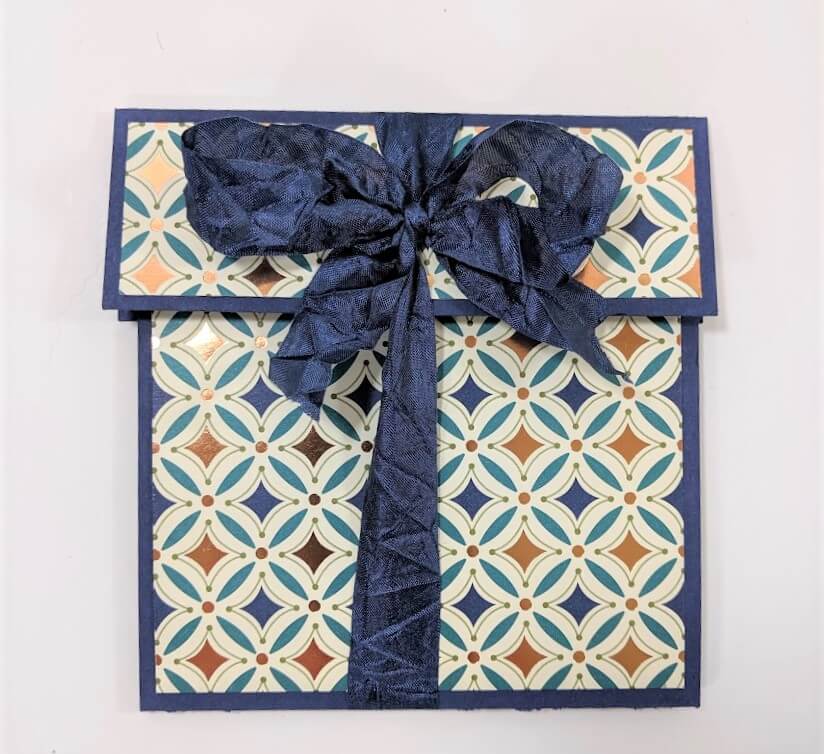
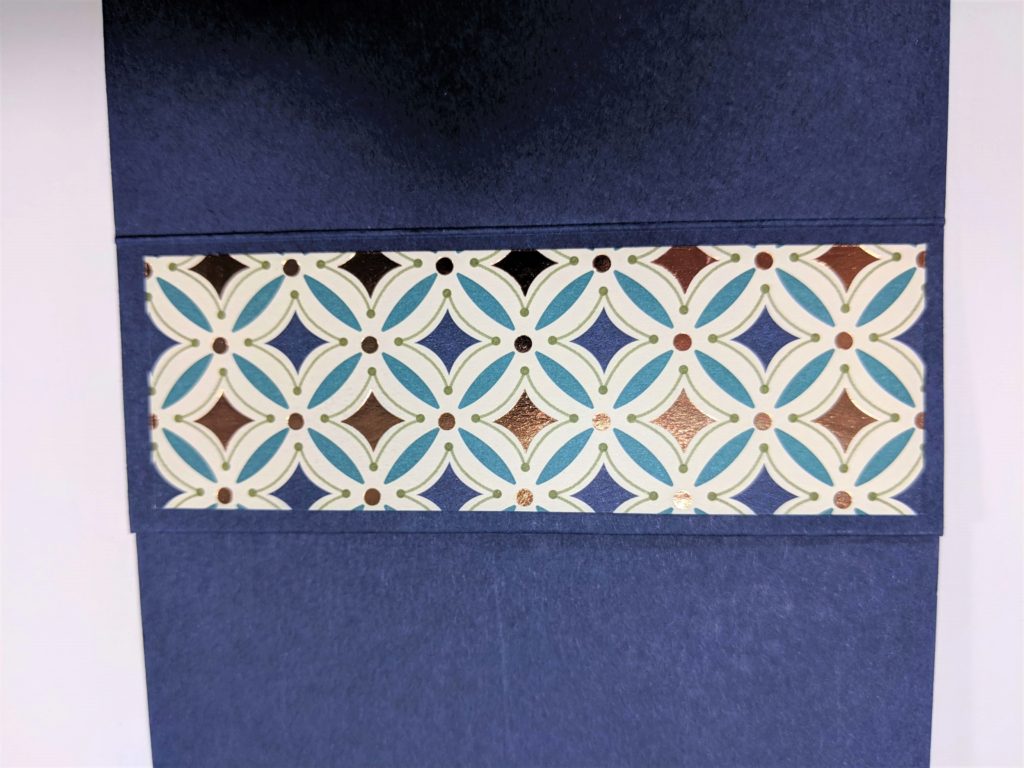
Here is a great gift card holder for that person (or persons!) in your life who has everything. We all have them. And we get them gift cards because we love them and want to do something for them. Here is a fun way to package that gift card! Keep reading for a DIY tutorial on how to make this cute gift card holder.
Gift Card Holder Tutorial
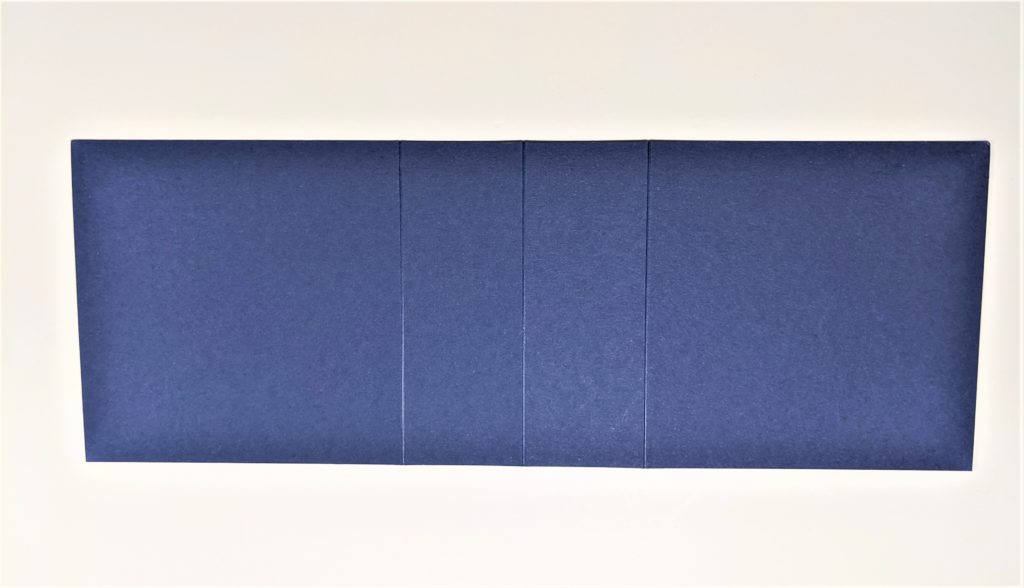
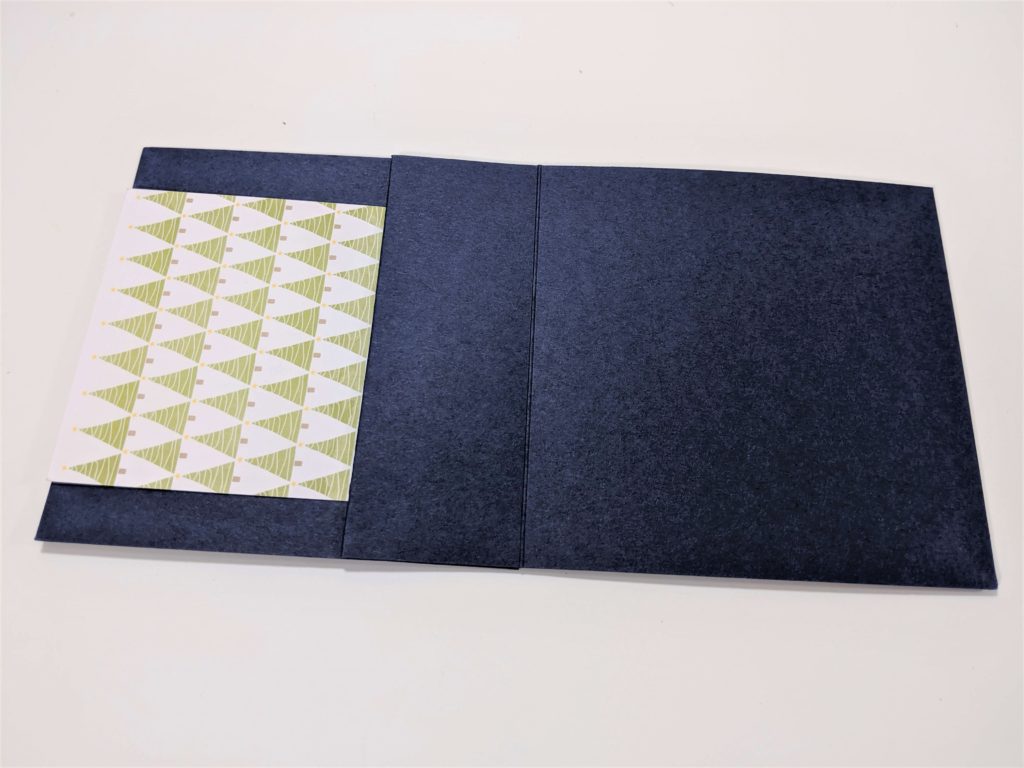
1. Cut desired color Cardstock (cs) to 4″ x 11″. Score in the horizontal position at 4″, 5 1/2″, and 7″.
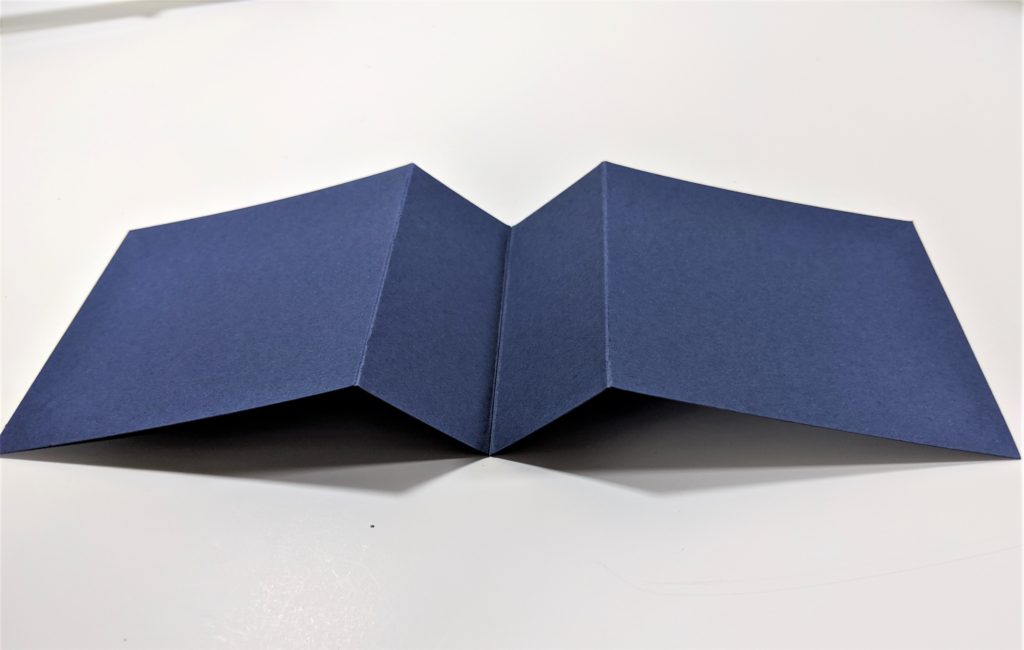
2. Fold each score line as follows: Valley fold on the 4″ score, mountain fold on the 5 1/2″ score, and valley fold on the 7″ score.
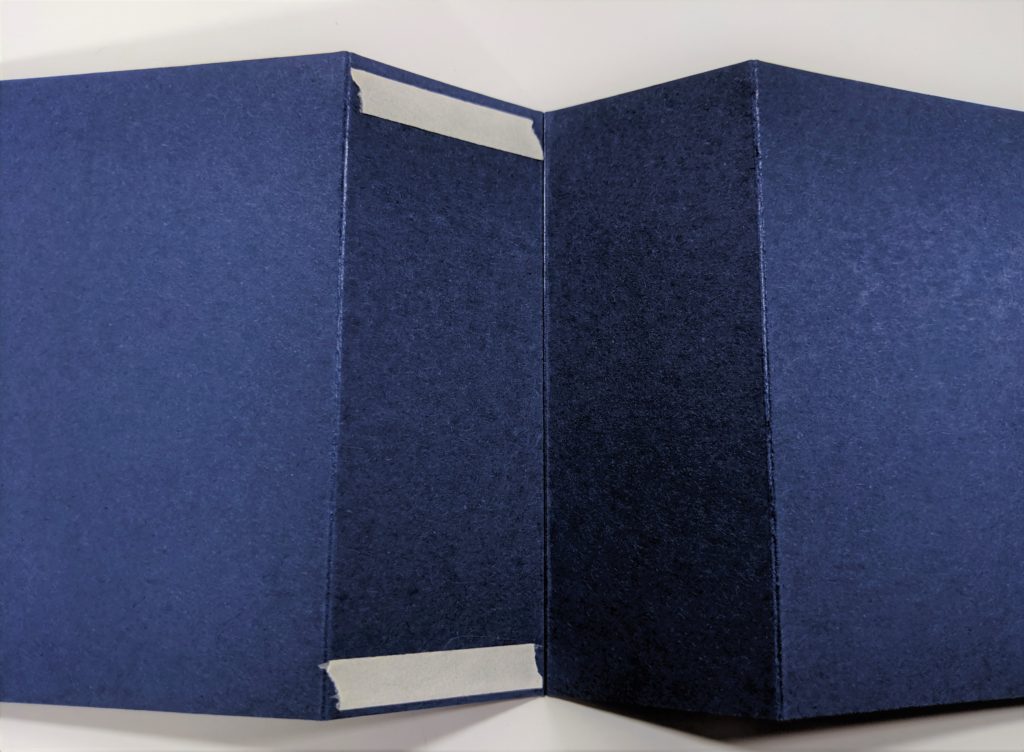
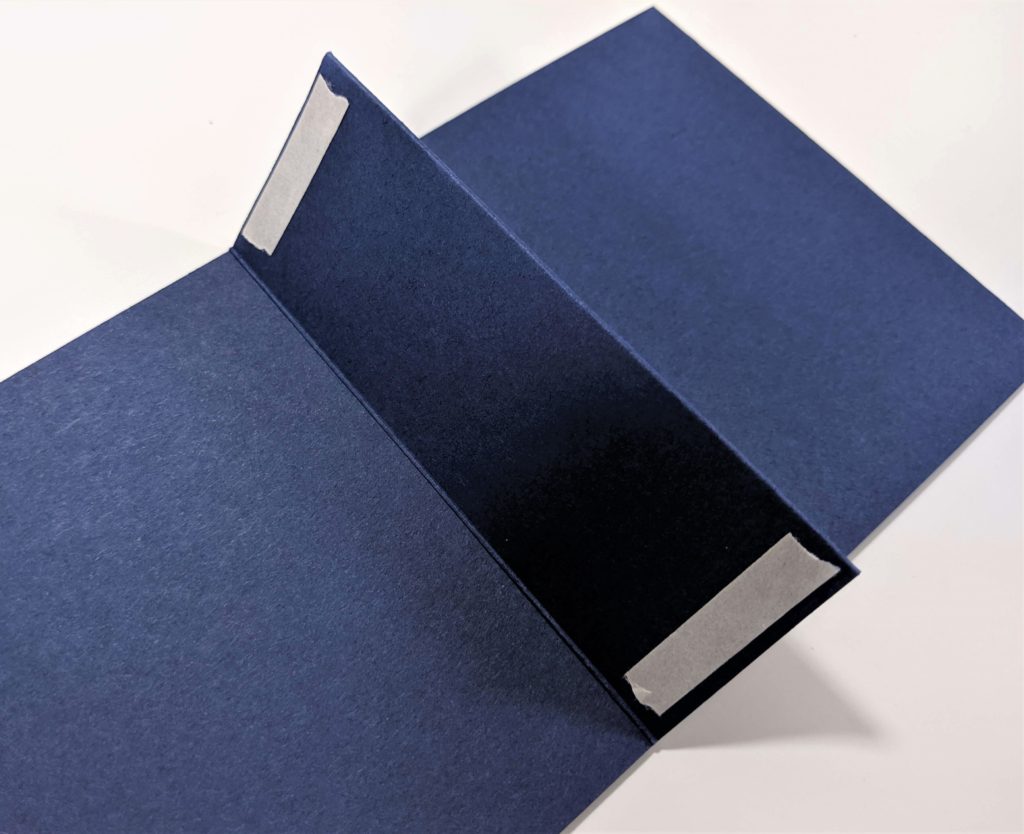
3. Using Tear and Tape, adhere on the edge of the two undersides of the mountain fold. Using the Tear and Tape, make a pocket. It is important to use a strong adhesive when making these. Regular adhesive is not strong enough to hold it together. Fold to form your 4″ x 4″ present bottom card base with the tuck in fold on the inside of your card.
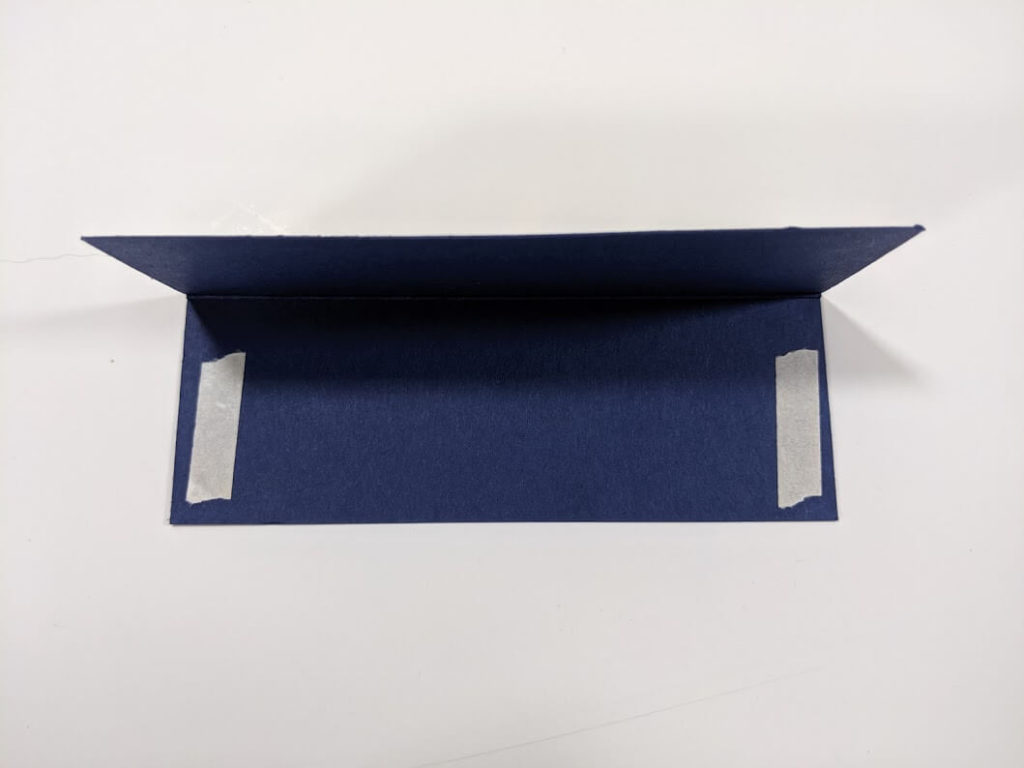
4. For the present top, cut matching cs to 3″ x 4 1/4″. In the vertical position, score at 1 1/2″ and fold. Using Tear and Tape, adhere the inside of the present top to the upper back of the present bottom. The fold of the present base is at the bottom. In the picture below, I put my tape a little too close to the sides. Remember that the top of the present is a little bigger than the bottom.
You can change the height of your present by where you attach the present top.
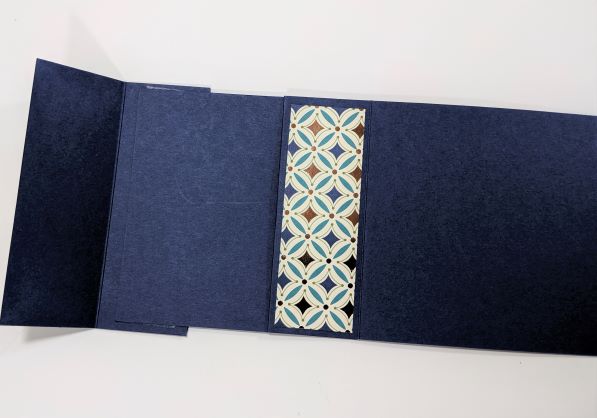
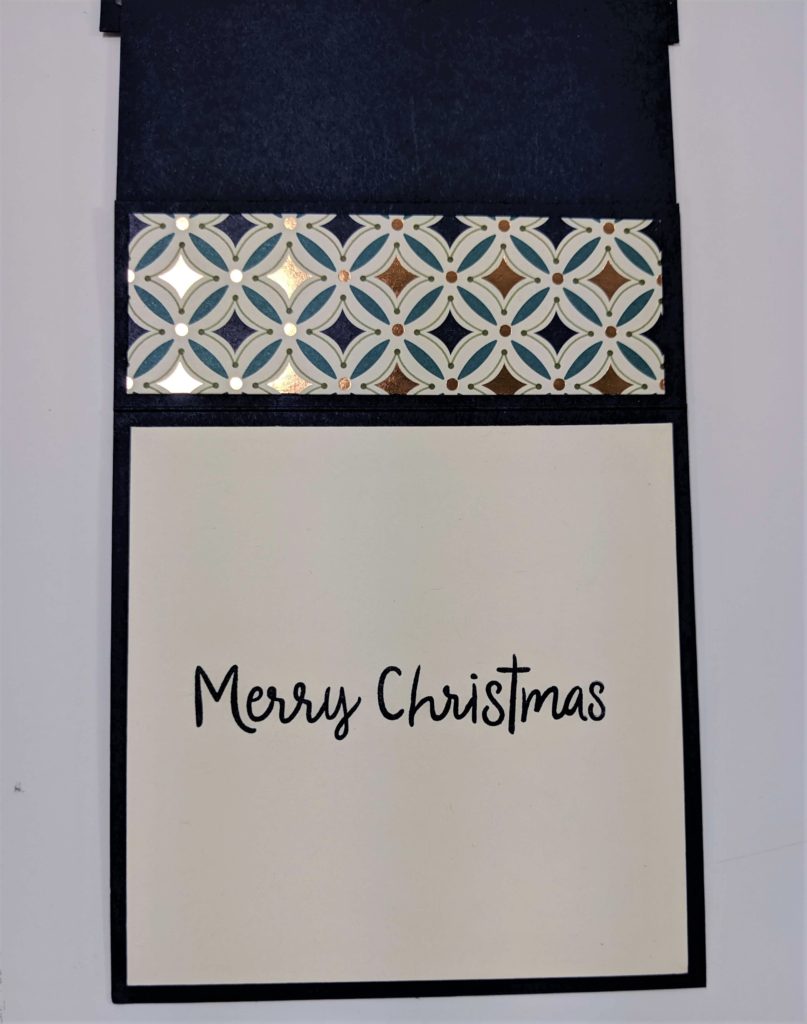
5. Cut and adhere the Designer Series Paper of your choice to 3 3/4 x 3 3/4 (for present bottom), 4 x 1 1/4 (for present top), and 3 3/4 x 1 1/4 (for inside the present).
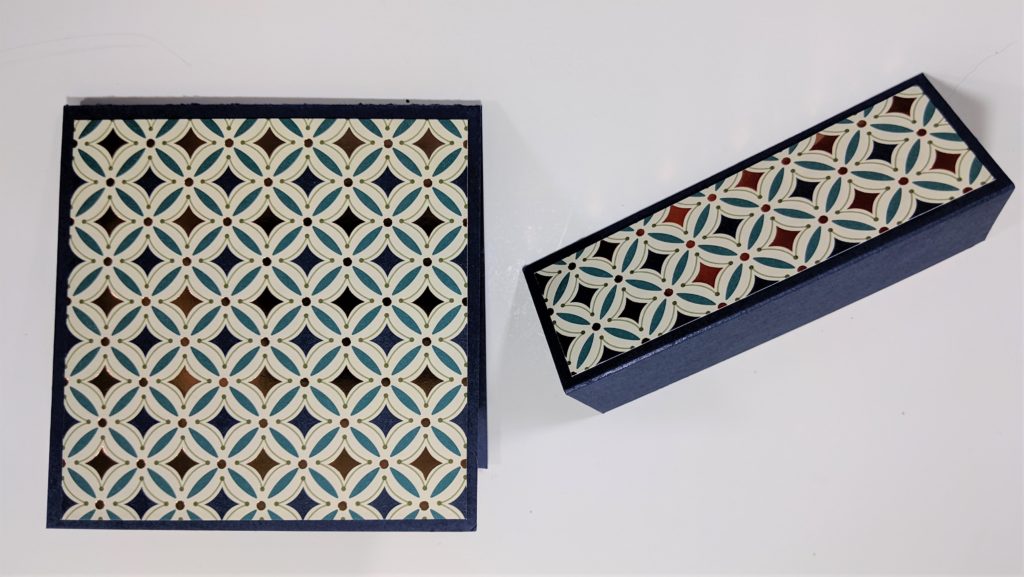
6. Stamp your greeting on a piece of 3 3/4 x 3 3/4 piece of Whisper White of Very Vanilla cs. Glue to the inside of the present and tie it up with a length of ribbon and you have a cute gift card holder!
These are great for so many different occasions, such as birthday, graduation, wedding, or any other one you can think of. They are fun and easy to make and you can still give “a present” to your recipient. Have fun making them and if you have any questions, don’t hesitate to ask!
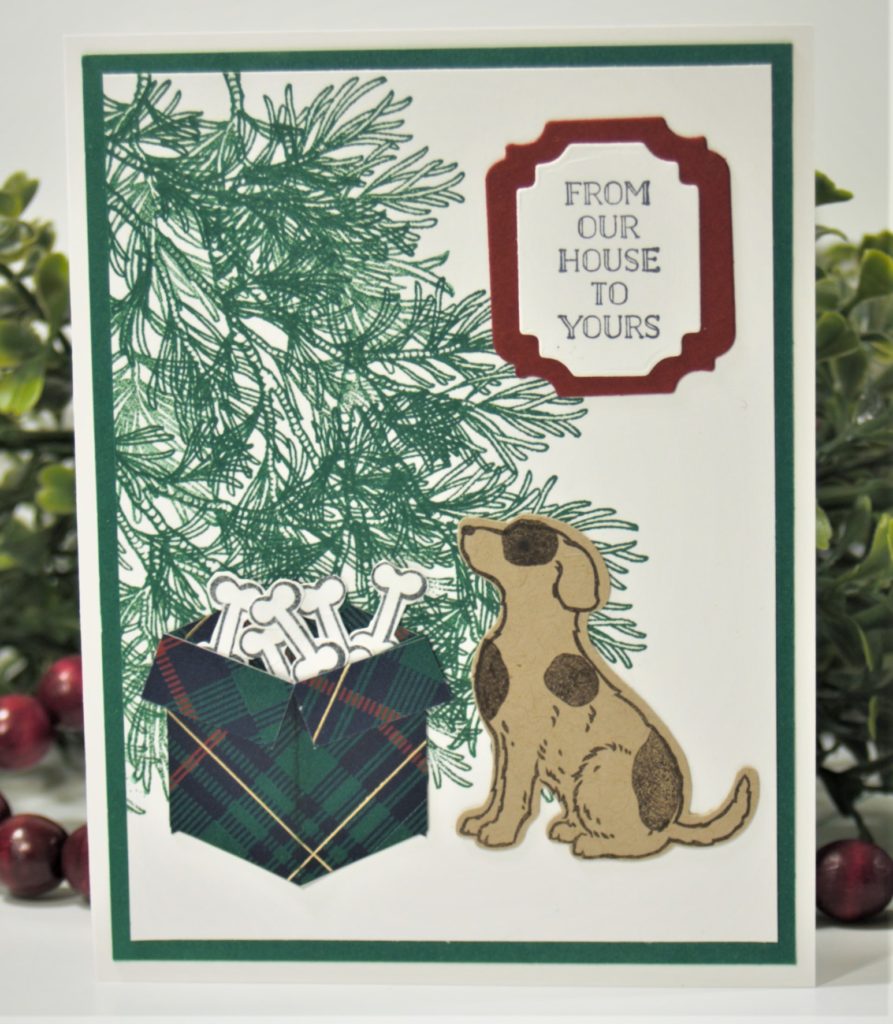
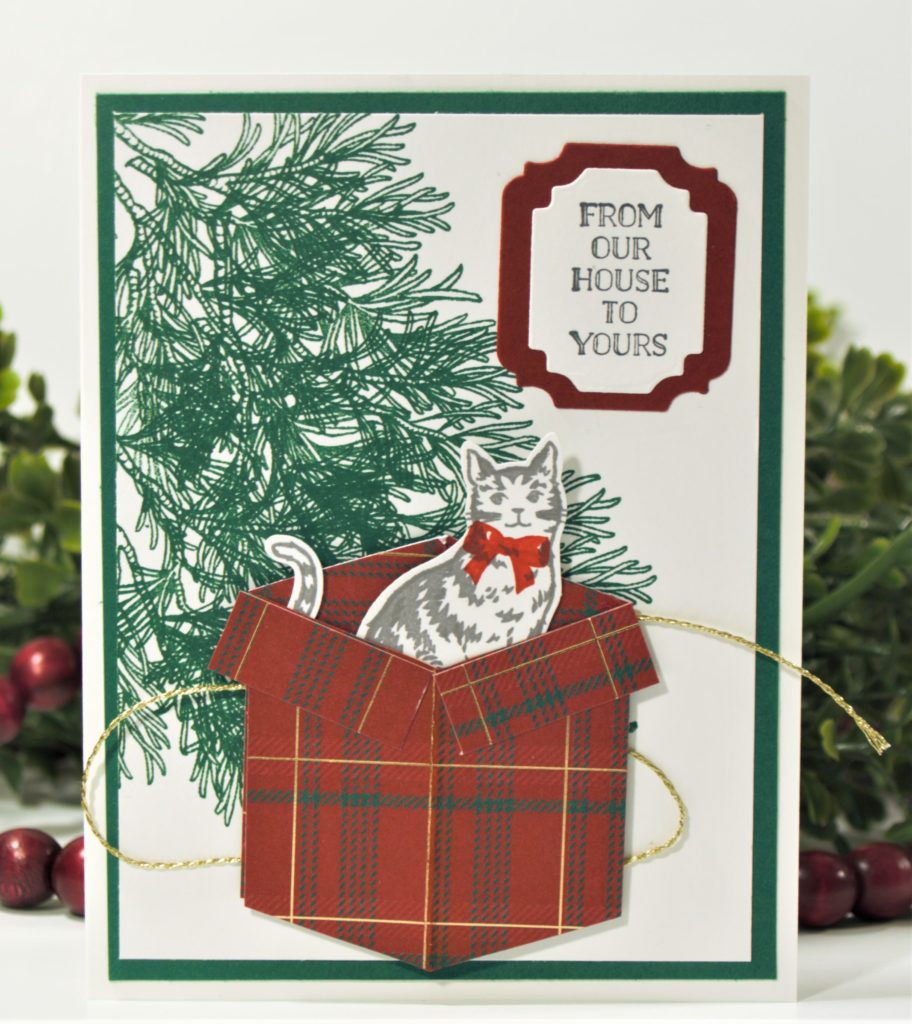
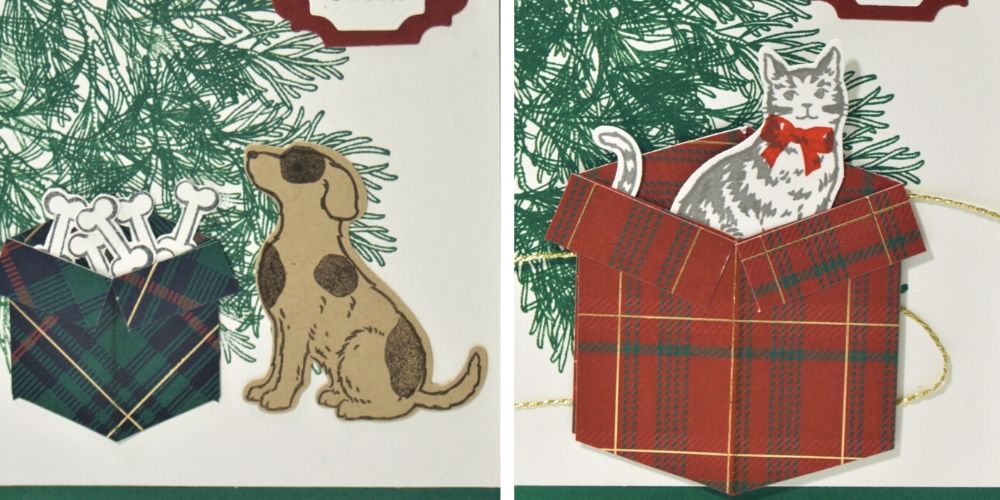
Many of us have pets that are like part of the family, and we don’t want to forget them when sending out our Christmas cards. Sometimes we even include them in our pictures we send. But for those of us who don’t want to try to get them to co-operate for the picture, here are cards that you can use with either a cat or dog.
I included a tutorial on how to make a box/present to put on the front of your cards. You can use it as a Christmas present or a birthday present on your own cards.
The greeting for both cards are from Itty Bitty Christmas and the die cuts for it are the Ornate Frames Dies. I am happy to report that both of these will be carrying over!
How to Make the Christmas Tree Background
1. Using the stamp set Peaceful Boughs, stamp the bigger branch in Shaded Spruce Ink, forming the shape of a Christmas tree on the 3 3/4 x 5 piece of cardstock. I mentioned that this is one of my favorite stamp sets in a previous post. This is another way to use it with just the stamp. And I haven’t even gotten to the pine cone yet!
2. Fill in some branches with the smallest branch stamp until you get a tree you like. Leave some space at the bottom so it doesn’t look like the cat or dog are sitting in the tree!
I did add an extra spot on the dog by just inking the one spot and adding it where I thought it would look best.
2. Punch out the images with the matching Cat Punch or the matching Dog Punch. If you don’t have the matching punches, you can fussy cut them with scissors.
3. For the dog card, stamp a bunch of bones and fussy cut them out.
How to Make the Tuck-in Present for Your Card
Do you remember the first time you learned how to draw a 3-D box? I remember thinking it was so cool and drew them endlessly for a while. This box took me back to that time, and I had so much fun making them. I hope you enjoy it too!
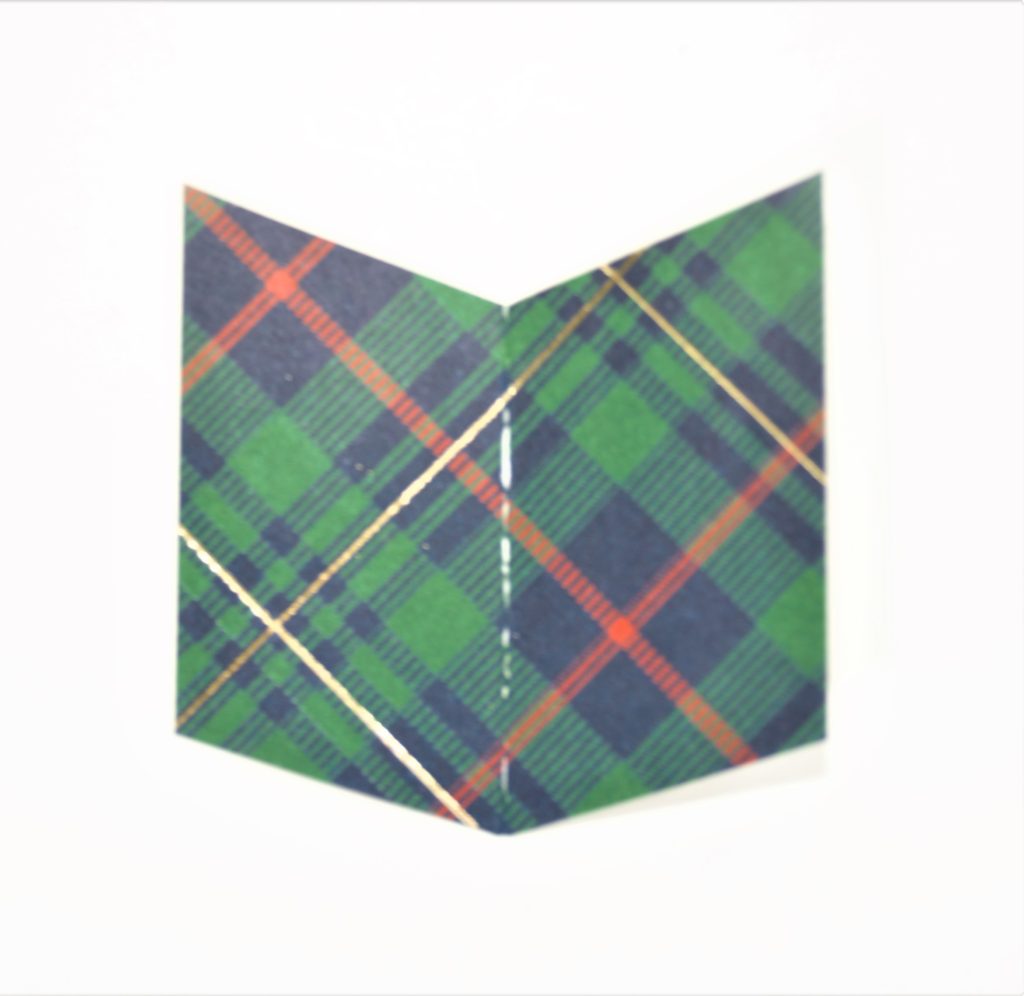
1. To make the tuck-in box, take two 2 1/2 inch squares of paper. If you want a smaller box like I made in the dog card, use two 1 1/4 inch pieces for the box. I used the Wrapped in Plaid Specialty Designer Series Paper for both projects.
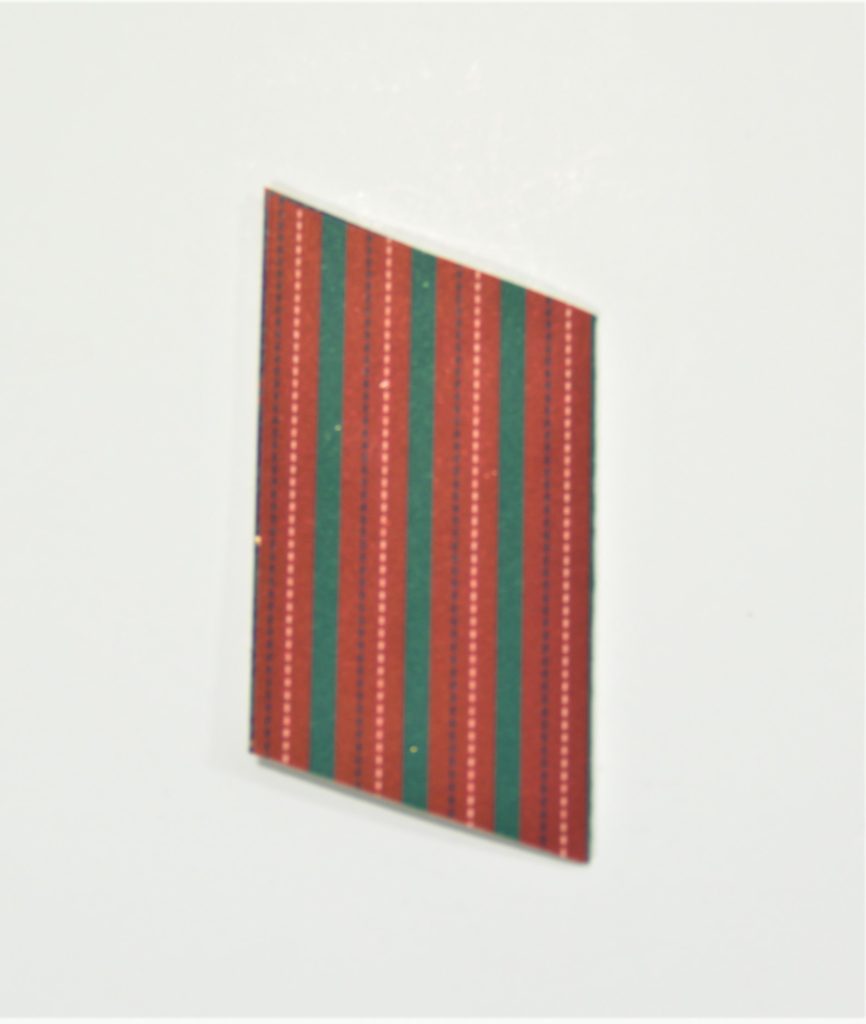
2. Fold them in half with the design you want on the inside. If you look at my pictures, I wanted the green plaid to be what was displayed for my present, so I folded it with the red stripes on the outside. I know it’s confusing, but bear with me!
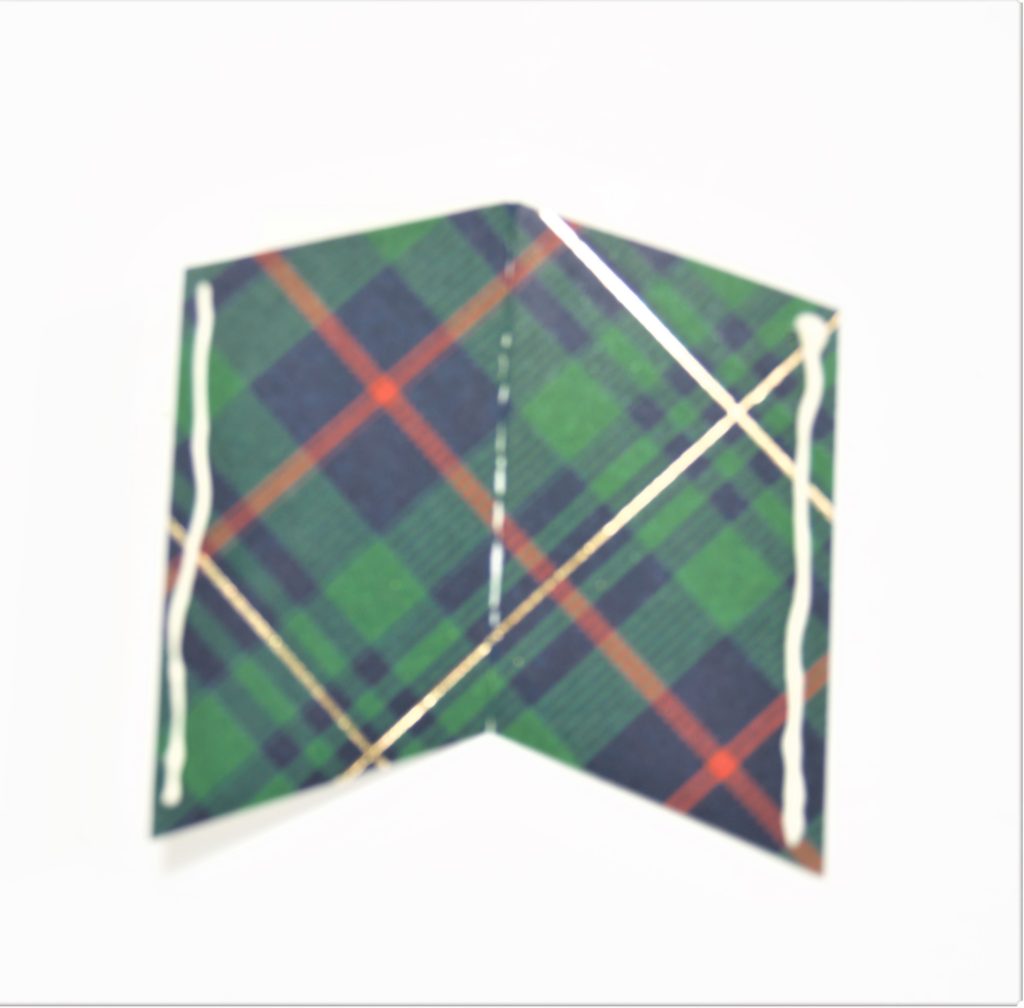
3. Trim the edges of the squares at an angle (however sharp you want) so they look like a book when opened. Save the scraps as you’ll be using them for the present’s flaps later on.
Image 1: Folded and trimmed. Image 2: Open like a book.
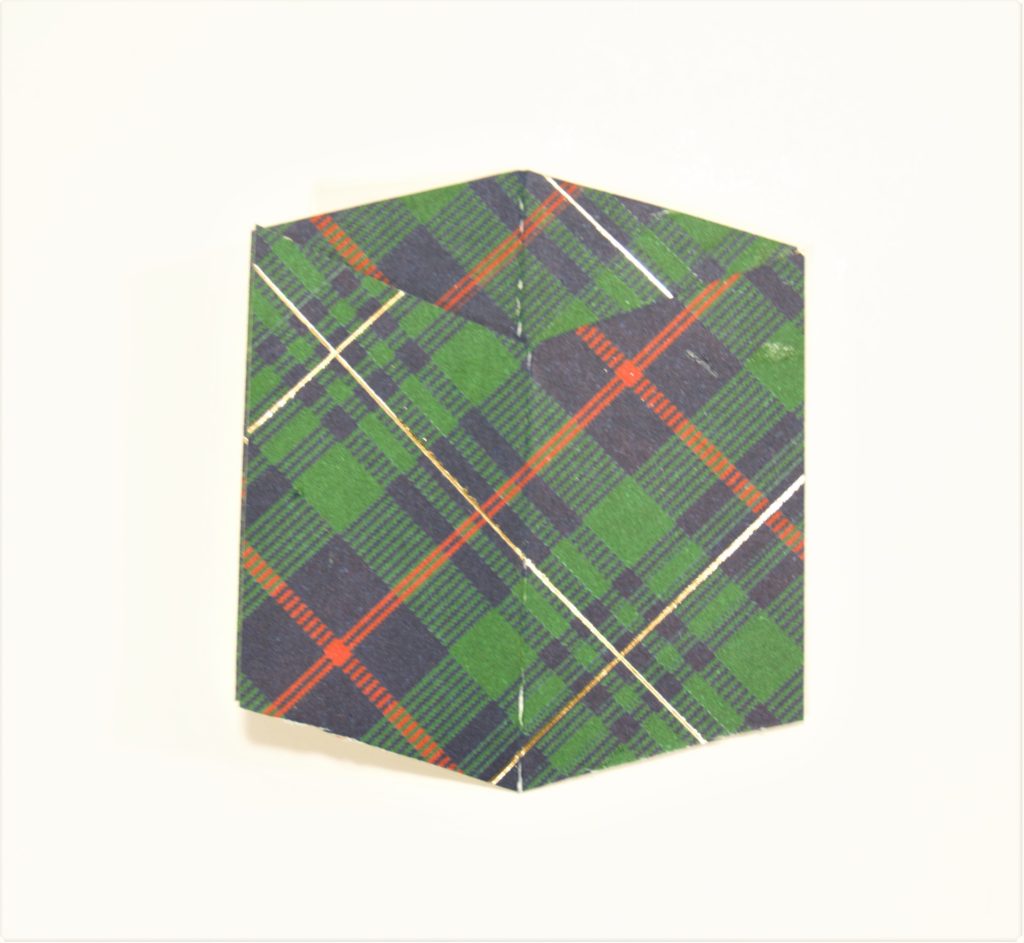
4. Put a line of glue on the left and right edges of ONE of the squares (the one with the pointy edge up). The glue should be on the side of the paper that you want to be showing in your finished product.
5. Take the other square (the one with the pointy edge down) and place it on top of the first square, matching the points with each other so it looks like this:
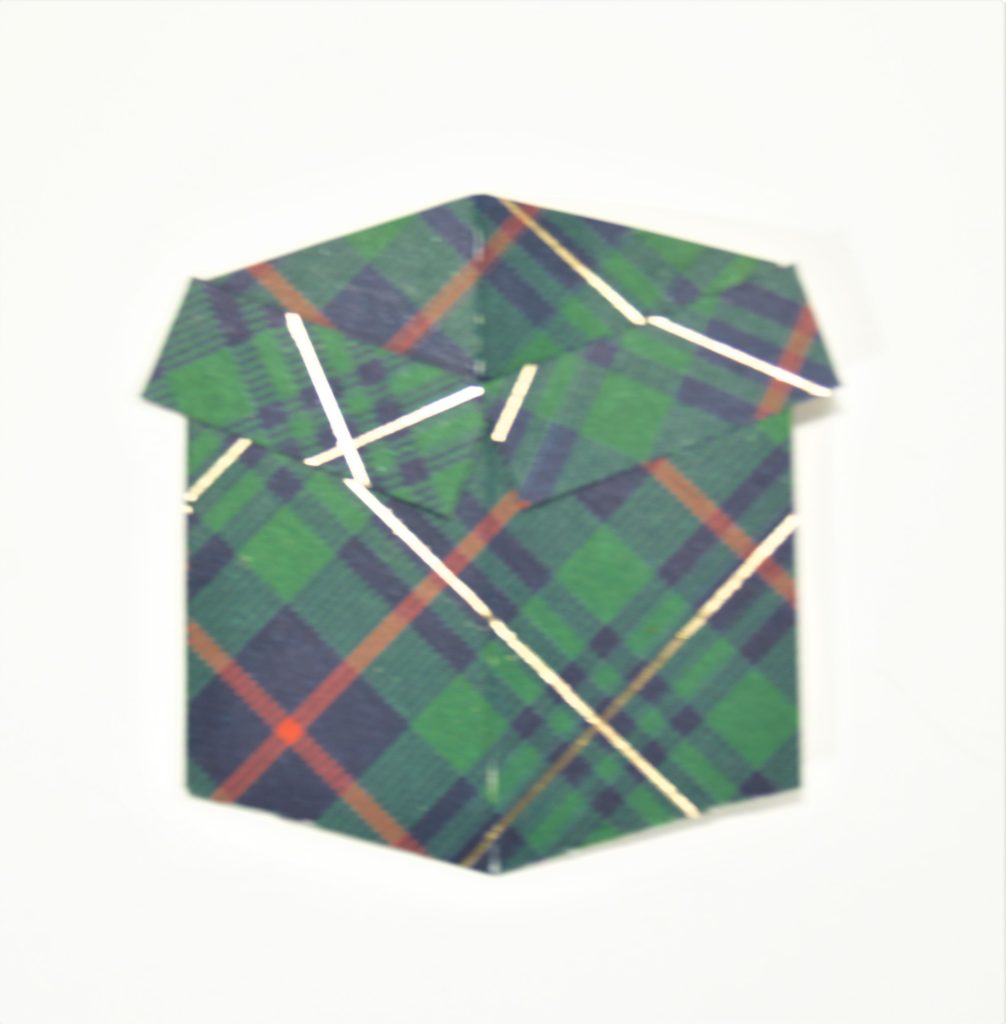
6. You’re almost done! Now, take the scraps you saved while you were trimming your squares. Trim two pieces of paper that are 1/2 x 1 1/4 inches. These are the flaps for your present.
7. Glue them to the box to make the flaps, like in this picture:
And your shiny new tuck-in present box is done! Now you can spruce it up by adding in dog bones or your cat—or whatever else you want to stick in it! Just use a little bit of glue and arrange them however you want!
I hope you enjoy making these cards! If you do, please share them with me on my Facebook Page.
Do you have that hard to buy for crafter in your life? It seems like they have everything they need, yet you know they would love more craft supplies. Or someone you know would love to get into papercrafting but is just starting out. Even someone who you just don’t know what to get. I have the answer for you! A subscription to the Paper Pumpkin subscription box from Stampin’ Up!
It is a once a month box that has all the supplies you need to make either cards, gift packaging, or sometimes even home decor. Each month you receive your box that has a stamp set, at least one ink spot, and all the paper, trim, and embellishments you need to make the project. It is always a surprise! You never know what you will be getting, although they do give out hints. Here is a year’s worth of Paper Pumpkins so you can get an idea of what you can get.
The kit ships around the 10th of each month and offers a fun, easy craft. It is perfect to do with a child or grandchild too. You get to spend quality time with them while making a useful product.
This box is a great reason to get together with friends every month. You’ll all get the same kit, and it’s a fun and easy way to spend an hour or two chatting over coffee. You can even challenge each other to come up with alternate designs!
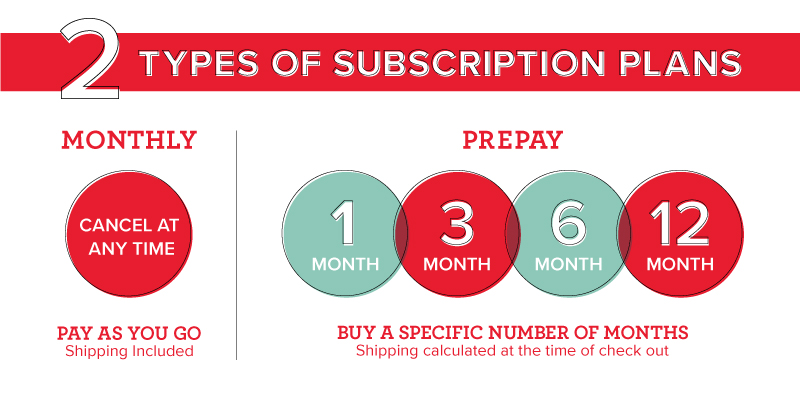
The cost is very reasonable at $22.00 per month and includes the shipping. Or you can buy 1, 3, 6, or 12 month subscriptions but the shipping is added to the price. The subscription can be stopped at any time, or just skipped if you don’t want it for a month. It is very portable too, so you can take it with you if you are going to be waiting for someone at an event or even the Dr’s. office.
Paper Pumpkin is the perfect gift for so many people in your life. So don’t wait. Go to Paper Pumpkin now and subscribe.


")


")


")


 Designer Series Paper")
")


")