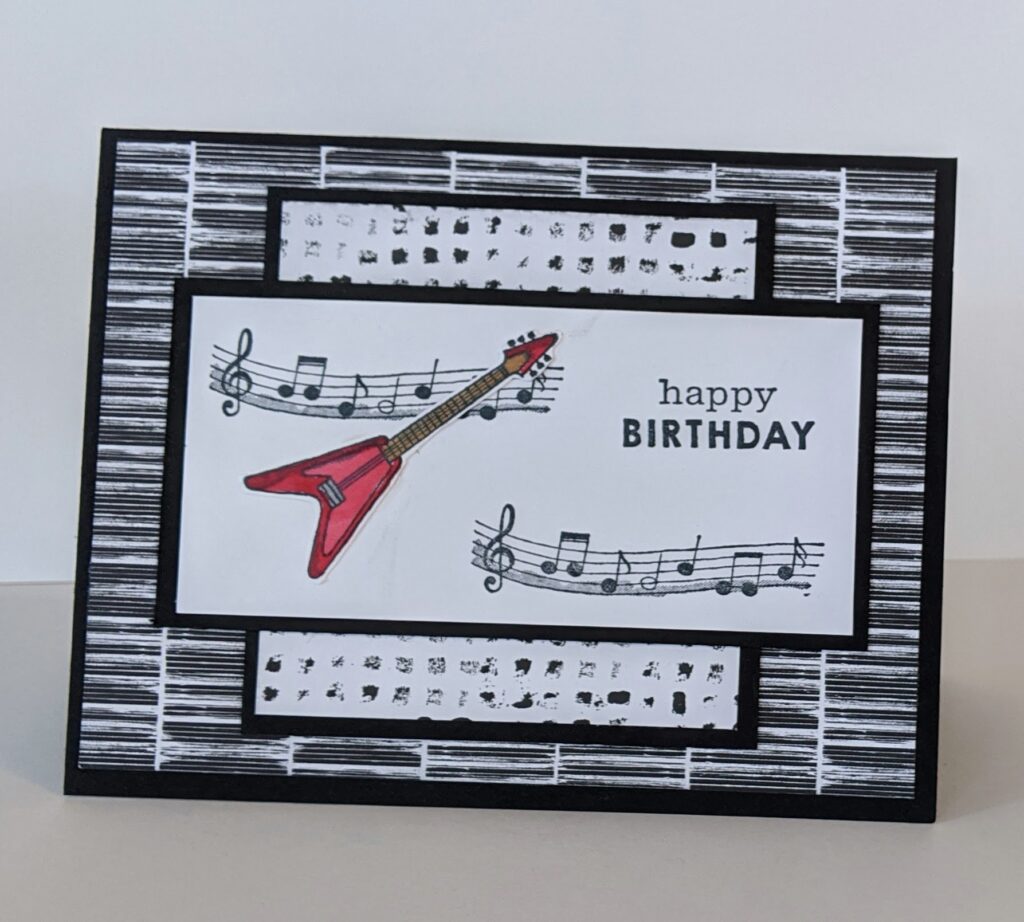
I’ve been wanting to play with the Enjoy the Rhythm stamp set and the Rock and Roll Designer Series Paper for awhile, and when I saw the challenge over at Cardz 4 Guyz, I knew I had the perfect opportunity. I’m not sure if playing a guitar is actually a sport but my brother plays and I wanted to make this card for him.
I love black and white cards with a pop of red. I think they are classy looking. And I loved the sketch over at Sweet Sketch Wednesday. Actually, I love both of them. So be sure to check out both of those challenges.
The nice thing about this card is you don’t need a lot of supplies either. Thanks for checking it out.
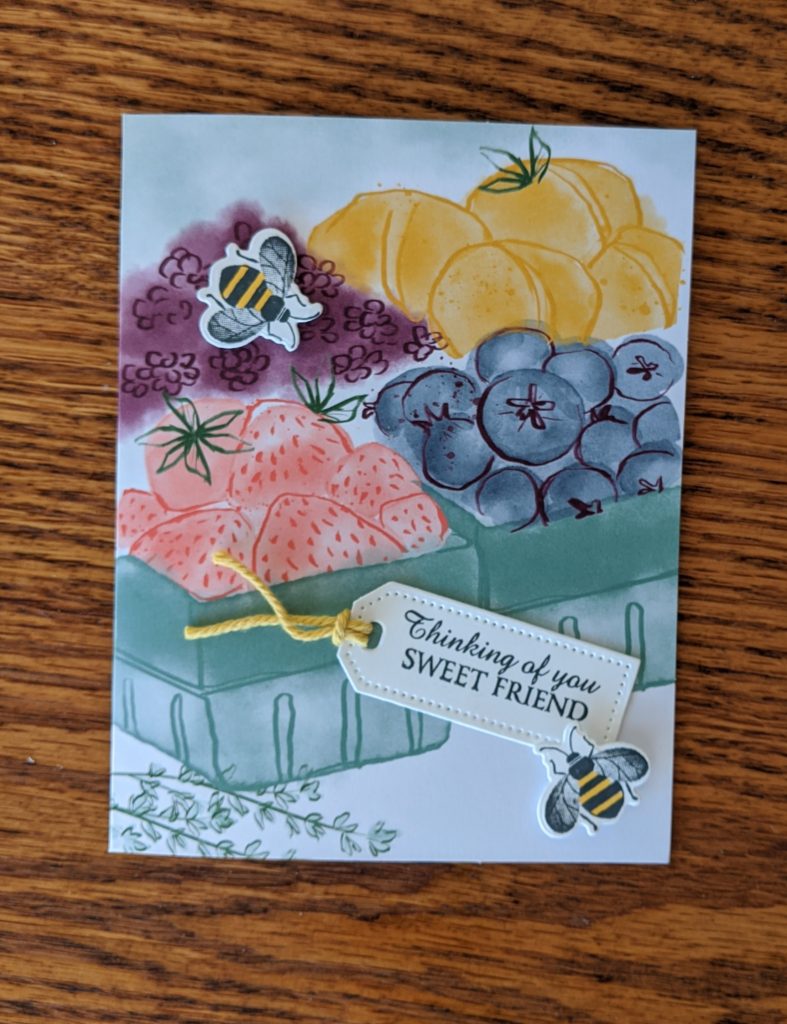
I started my Paper Pumpkin subscription back up again. I had collected quite a few of those red boxes and hadn’t opened them. I found myself in need of some room and in a creative funk, so I opened one up and got to work. I was surprised to find myself enjoying them again. This is the first one I have done since I started again.
I thought the bees would be cute on the fruit. Although I really don’t like bees, I do like stamps of them! There are some cute ones in the Honeybee Home bundle. I’m excited to work on some of the other cards in this kit. One background is so pretty I don’t think I will even make the recommended card. Or maybe just one.
Paper Pumpkin is a great way to get you mojo flowing again. If you are interested, you can go here and sign up. It has a lot of bang for your buck and I don’t think you’ll regret it.
I am still having fun playing with the March 2020 Paper Pumpkin. You can get so many different cards from this months kit. I love the extra stamp set that came with it. If you go join my PaperTree Creations Community page on Facebook, you can see a card I made to send to my church family to let them know I missed being with them on Sunday.
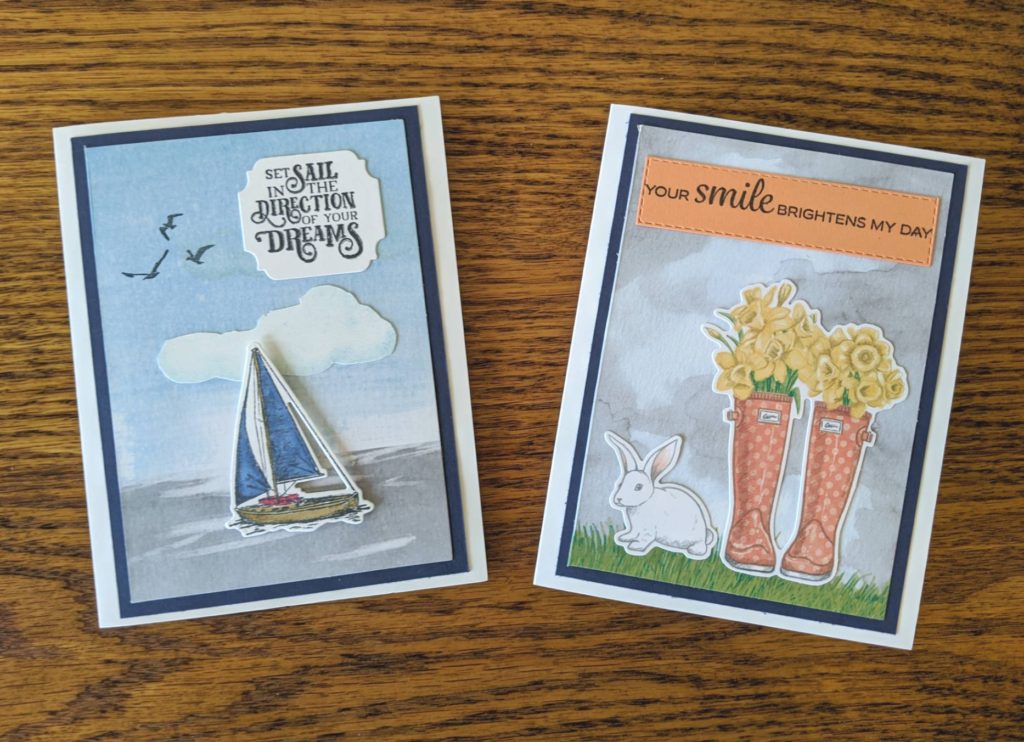
Here are two more cards I made.
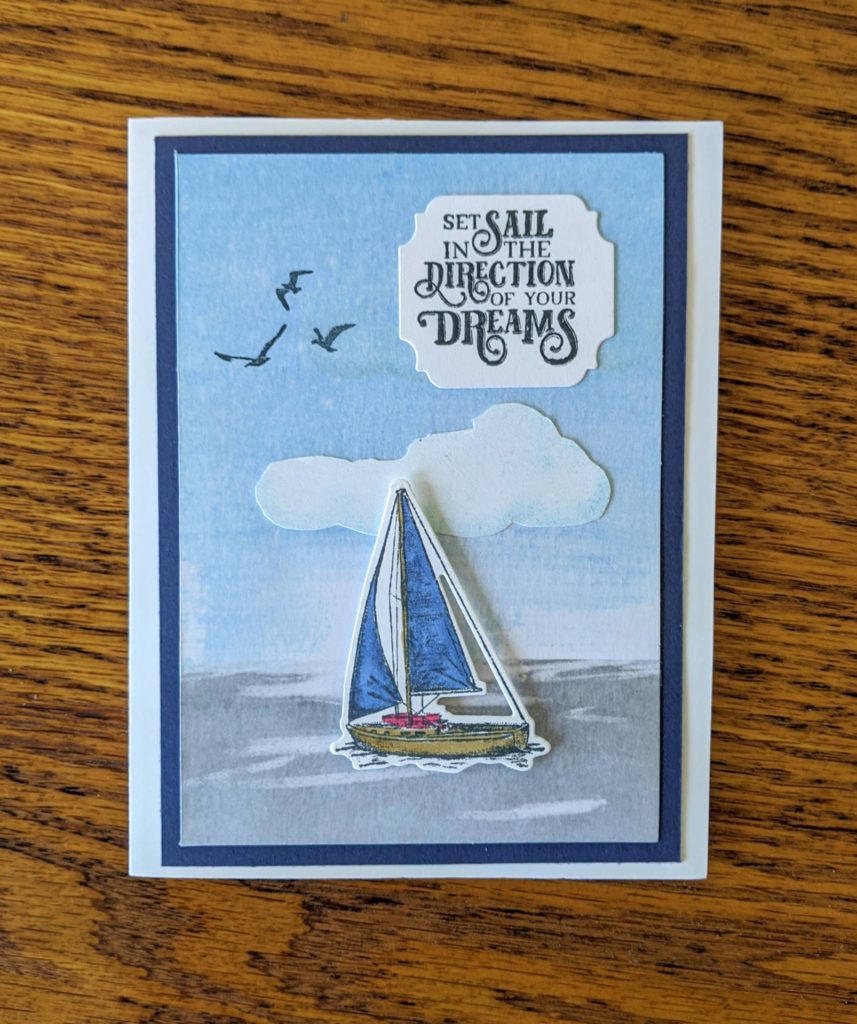
When I first saw this card base, it reminded me of the sea. Out came the Sailing Home bundle. I wanted to make it a A2 card, so I cut the front off and matted it in Night of Navy before putting it on a Whisper White base. I colored the sailboat with Stampin Blends, fussy cut a cloud by stamping off first with Balmy Blue, and stamped my sentiment. I really like how it turned out.
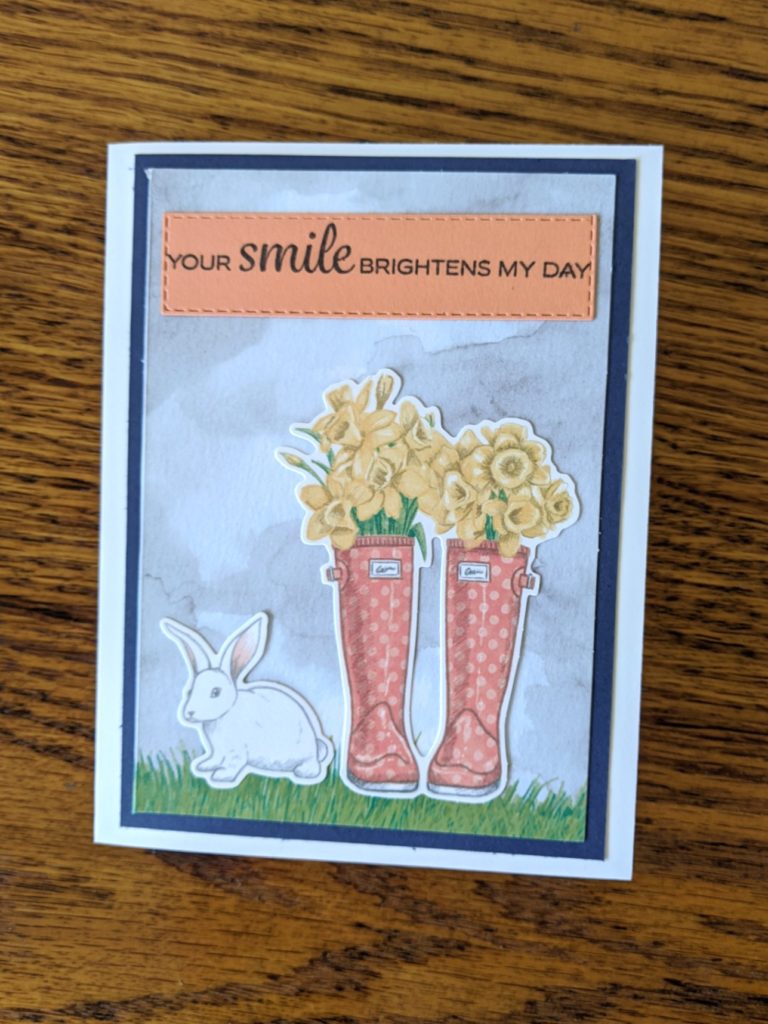
The next one changes the sentiment and layout a little (had to use that bunny again!), but is mostly supplies from the kit. This was such a great kit! I made this one an A2 card too.
I know I will still be making other cards from this kit. I haven’t used half the supplies yet! Just love when you can get so much out of it.
Next month’s Paper Pumpkin looks awesome. Here is a teaser video. Don’t forget to sign up before April 10th to get the next Paper Pumpkin.
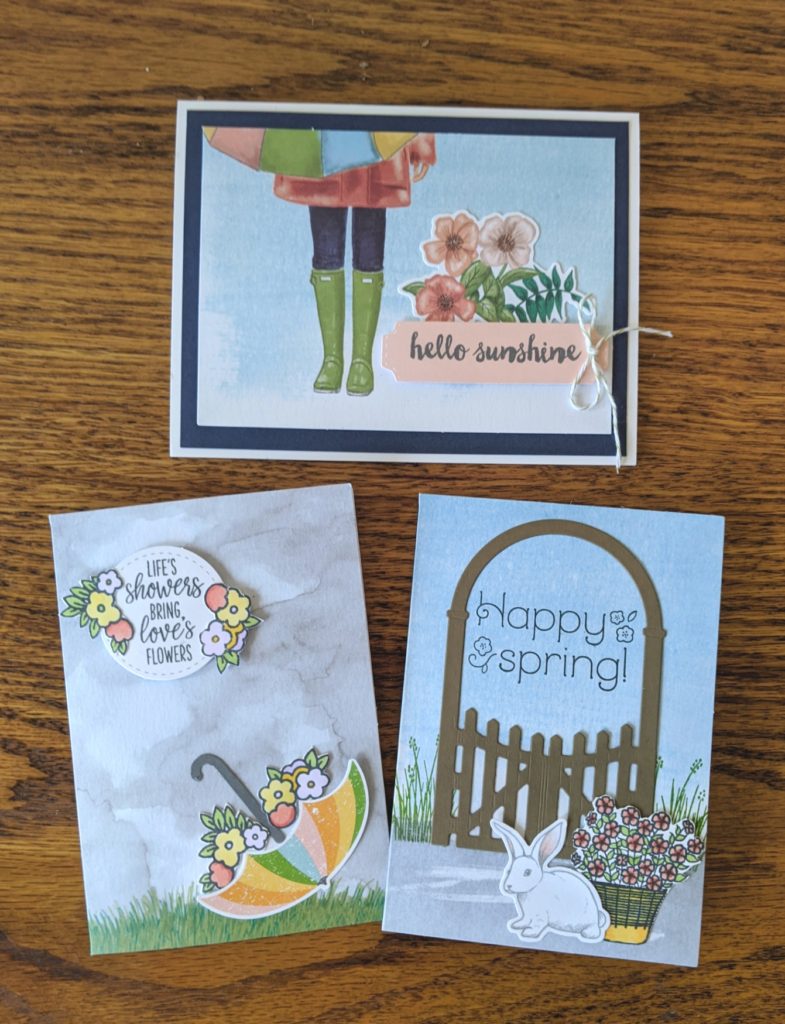
Have you seen the March Paper Pumpkin? So cute! I love the bright colors they used in this one. Around here, at this time of year, it’s usually gloomy as we wait for the first flowers to pop up. So the spring look is much appreciated!
For the first card, I went digging in my past Paper Pumpkin stamps till I found a couple stamps that I wanted to use. I can’t remember which months they’re from but I though they worked.
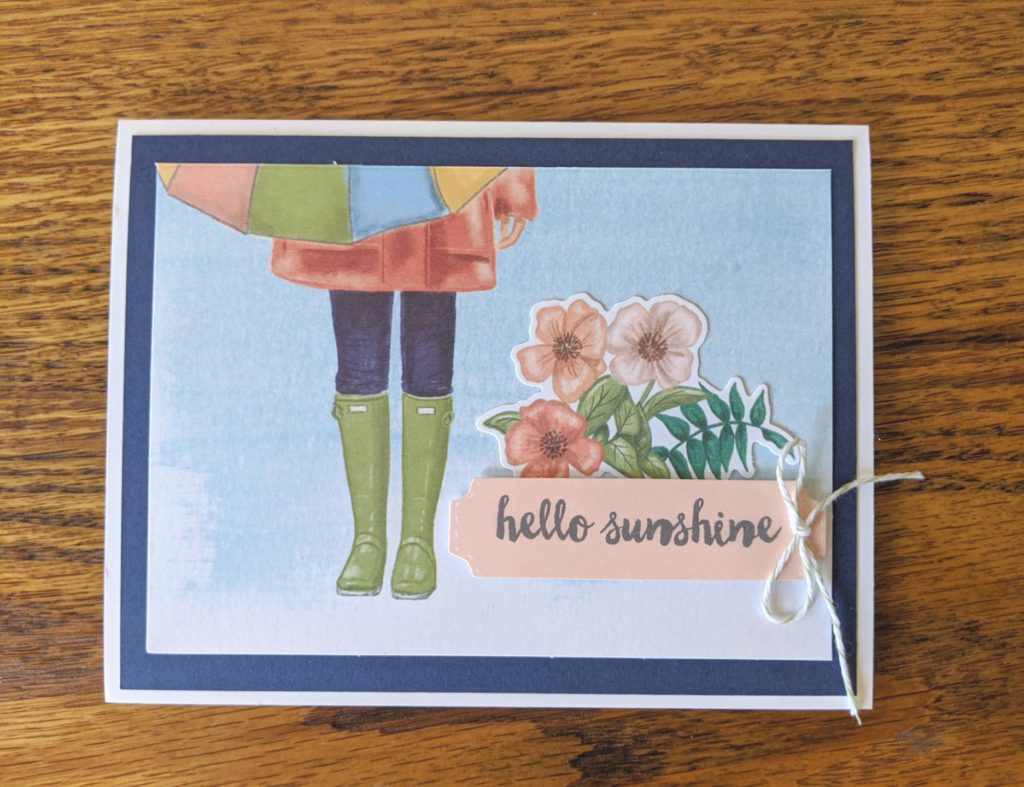
I love the “Hello Sunshine” sentiment for this card. It’s always nice when you can put your umbrella down. It fit perfectly on one of the tags that came with the kit too. I used the flower embellishments and some of the twine that came with the kit to finish it off.
The other thing I did was to cut the card in half and mount it a piece of Night of Navy and then on an A2 card base. A very cheerful card!
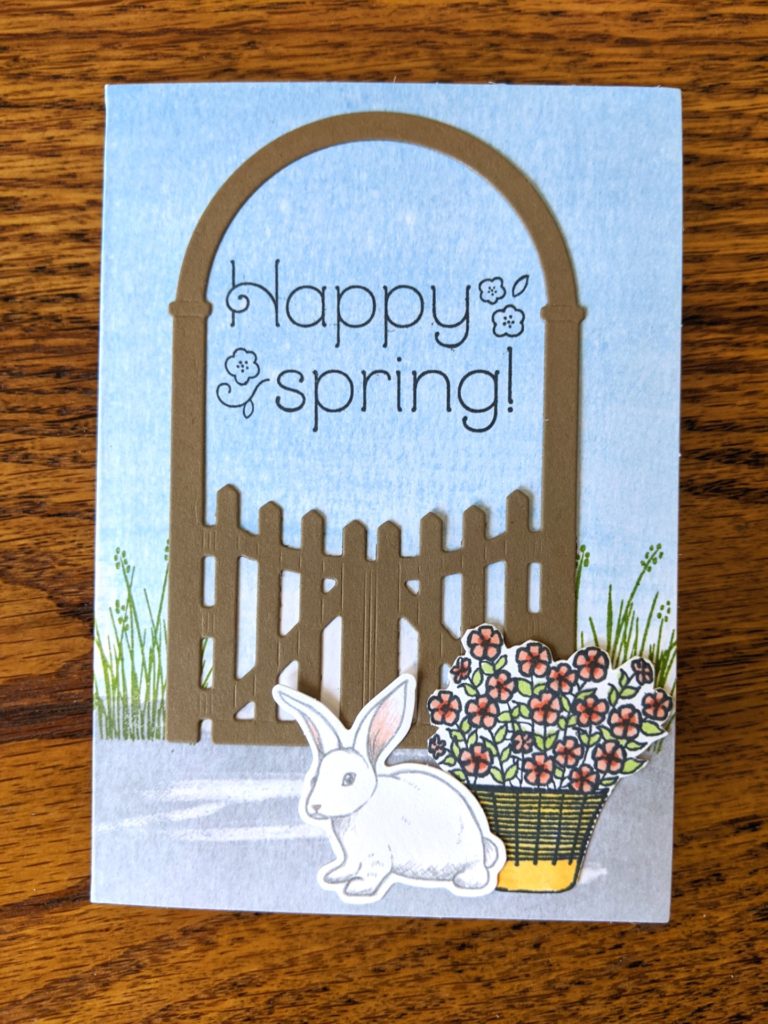
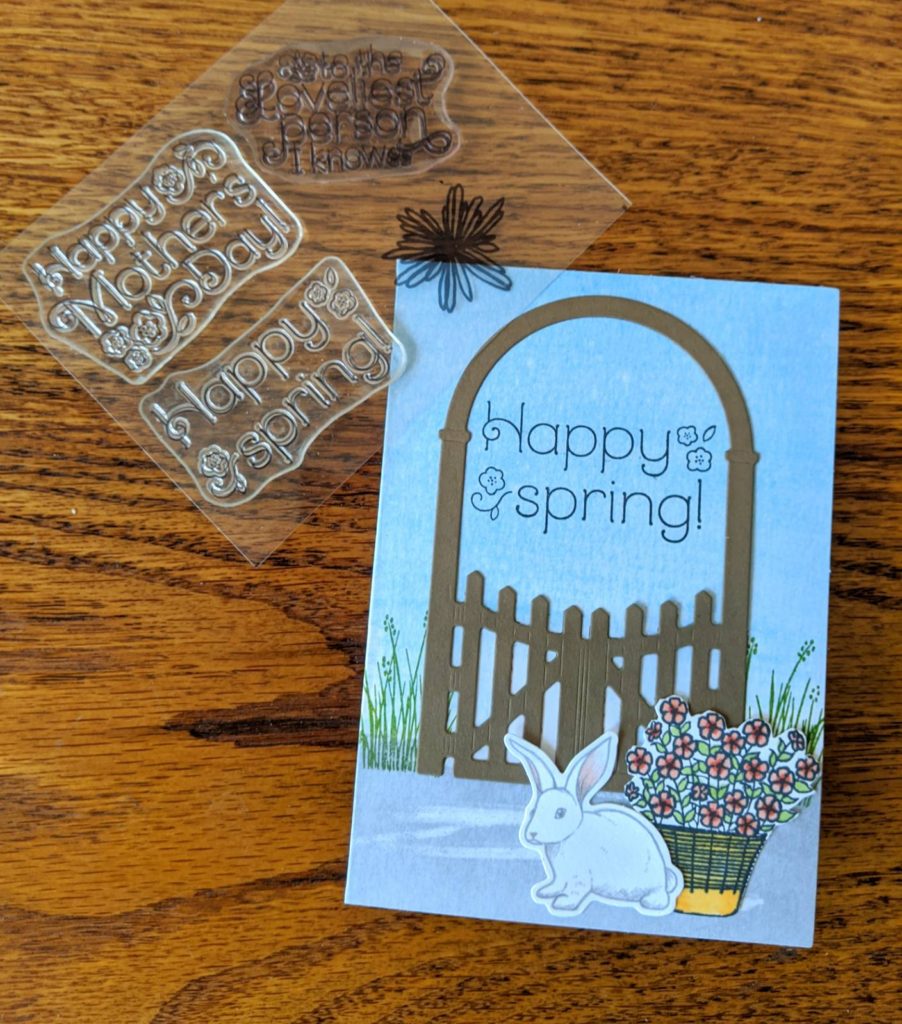
I had to use that darling bunny in a card. Since bunnies like to go into the gardens, I decided to use the garden gate to put behind him with the basket of flowers..
I used another old Paper Pumpkin stamp for this one too. Since today is the first day of Spring, I thought it was appropriate.
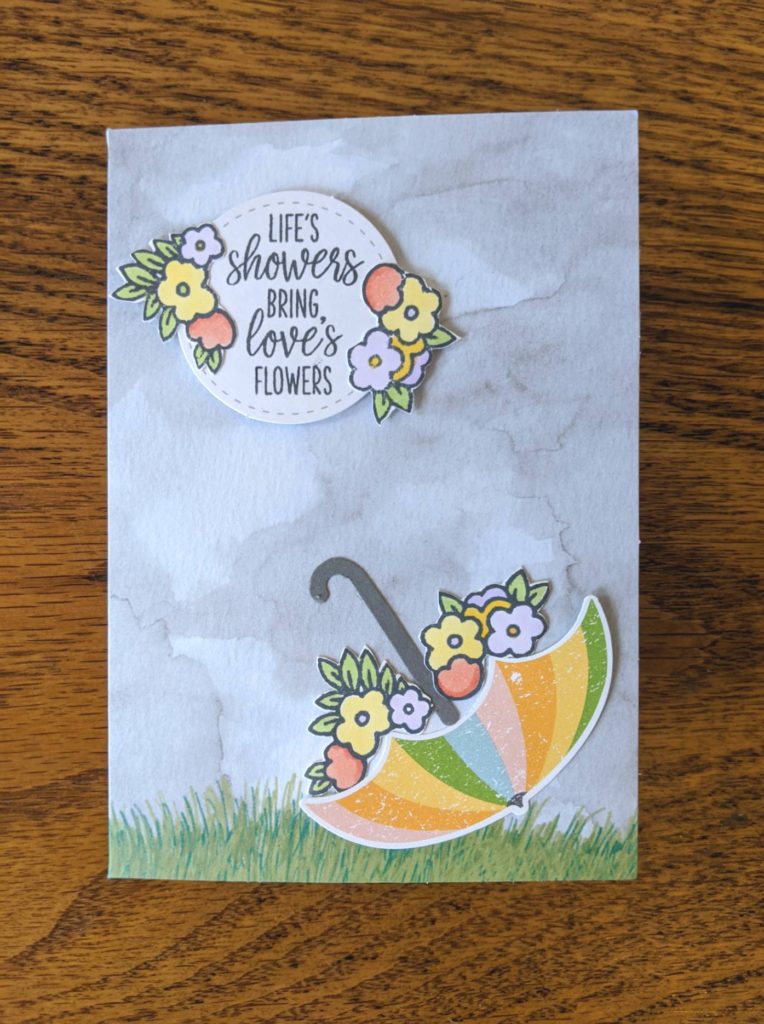
My last card for now uses the umbrella punch and that wonderful coordination product paper that is available till the end of the month.
I used the umbrella punch to cut out the colorful umbrella from the Pleased as Punch paper. Only a few more days to get this paper so don’t wait too much longer.
I hope you enjoyed these alternatives! If you don’t subscribe to Paper Pumpkin, sign up here to start getting your creativity in a box. You won’t regret it!
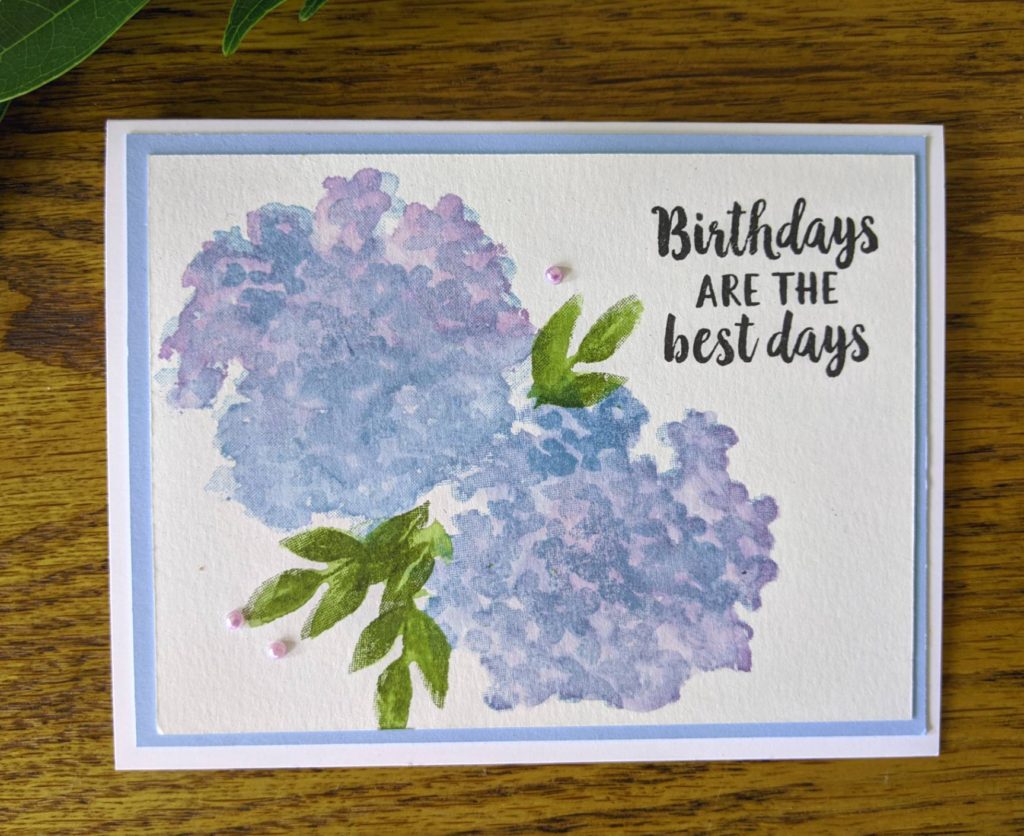
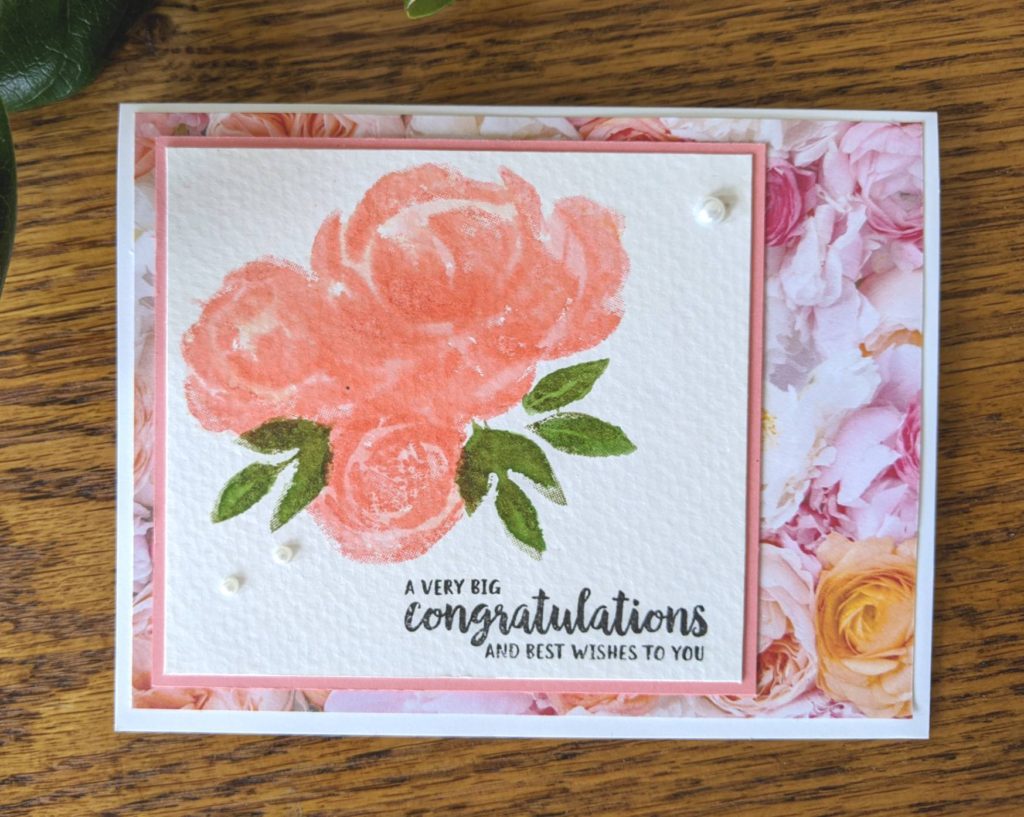
I have been having fun with a watercolor technique I learned recently, and I knew when I saw the Beautiful Friendship stamp set that I had to try it with these stamps. I had used it with the Timeless Tulips in one of my classes and loved the look so much, I had to try it with more images. So here are the results!
I used Highland Heather and Balmy Blue for the hydrangea flower and Pear Pizzazz and Old Olive for the leaves. On the rose I used Flirty Flamingo and Petal Pink.
We had so much fun in the class that I made a YouTube video to show those who missed the class how to do it. I hope you’ll go watch and try this fun technique.
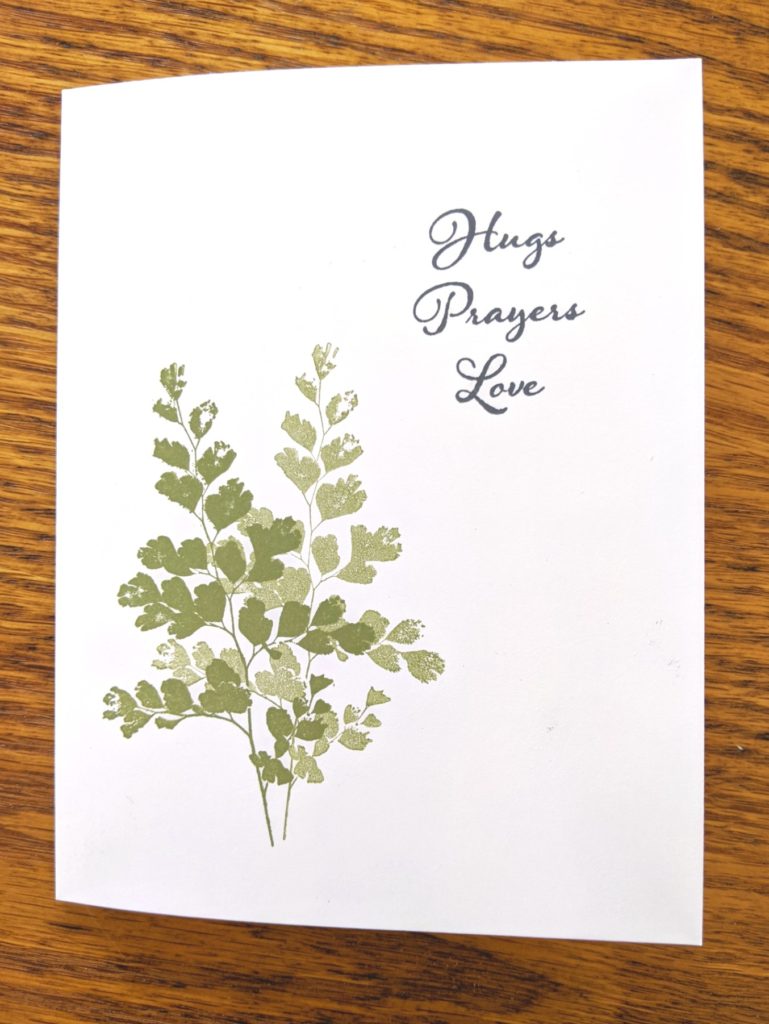
I love simple cards. They can bring out the beauty of a single stamp and sentiment like nothing else. The clean lines are uncluttered and elegant and, well, simple. They are quick and easy to make for those last minute occasions when you want to send a handmade card.
Simple Card
This card was made by stamping the leaves, then without re-inking, stamping them again to achieve some depth. A sentiment stamped in the upper corner finishes it for a clean and simple look. #simplestamping
Stepped-Up Card
Sometimes you want to dress it up though. Maybe you have extra time to create, you have that gorgeous paper you bought that you just have to use, or you want to add a little more. Here is the same basic card with some Designer Series Paper, some layers, and a frame die cut.
Fancy Card
Or maybe your creative juices are really flowing or you want to try a new technique. You can add lots of layers, ribbon or twine, or embellishments. The sky is really the limit!
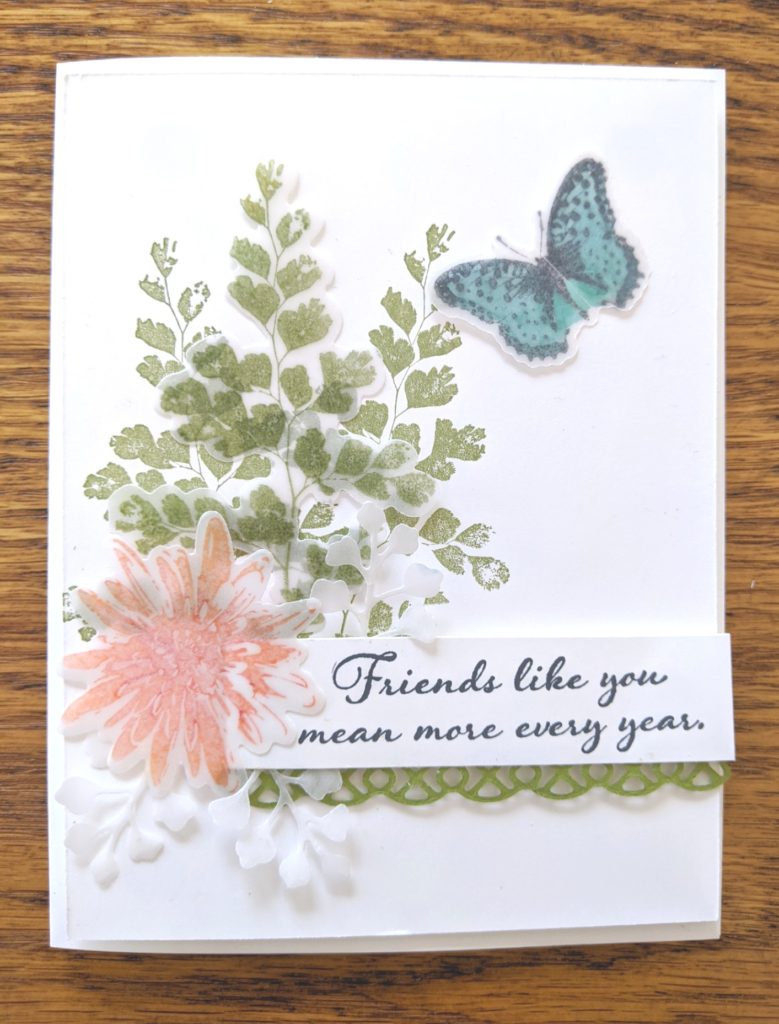
On this card I used vellum to stamp the leaf, flower, and butterfly, then colored them with Stampin Blends. I also cut some additional leaves out of vellum and popped it up . It is still the same basic design, but dressed up.
I really like how you can achieve a variety of looks with one stamp set. And I love the Positive Thoughts stamps. I was so happy when they came out with the coordinating die, Nature’s Thoughts. I was debating whether to purchase the stamps, but when the dies came out, it was a no brainer for me. If you like them too, hurry, because they are only available for a limited time!
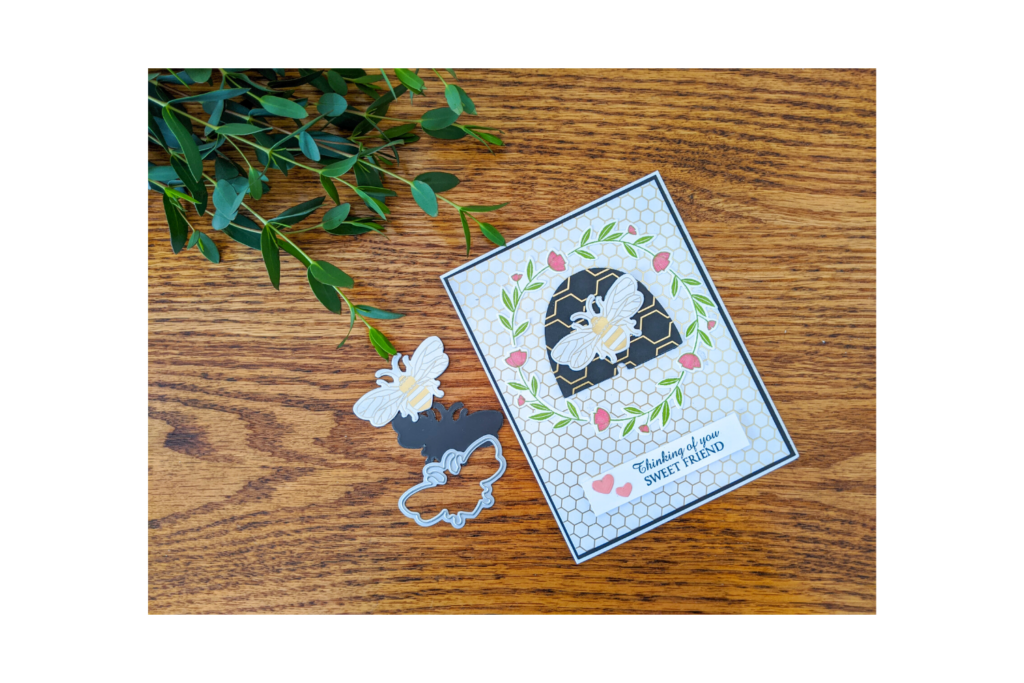
I had so much fun making the magnetic embellishment for this card. There is always some leftover magnetic sheet when I cut them for my dies, and I hate not using them. I have made magnets with them before, and I decided it was time to put them on a card.
The magnetic sheets I use are actually vent covers that you can find at your local home improvement stores. They work well for keeping your dies together. And for making magnetic embellishments!
When you cut the bee out, make sure you have the white side up, and for the hive, the magnetic side up. This way the magnets will be back to back so they stick together.
I usually run them through my die cut machine a couple times to ensure that they cut through. You may need to take scissors or a craft knife to some of the area if it didn’t cut all the way through. I haven’t had too many problems though. Just be careful when removing them from the sheet. Especially around delicate areas like the bee’s antenna. They can rip easily.
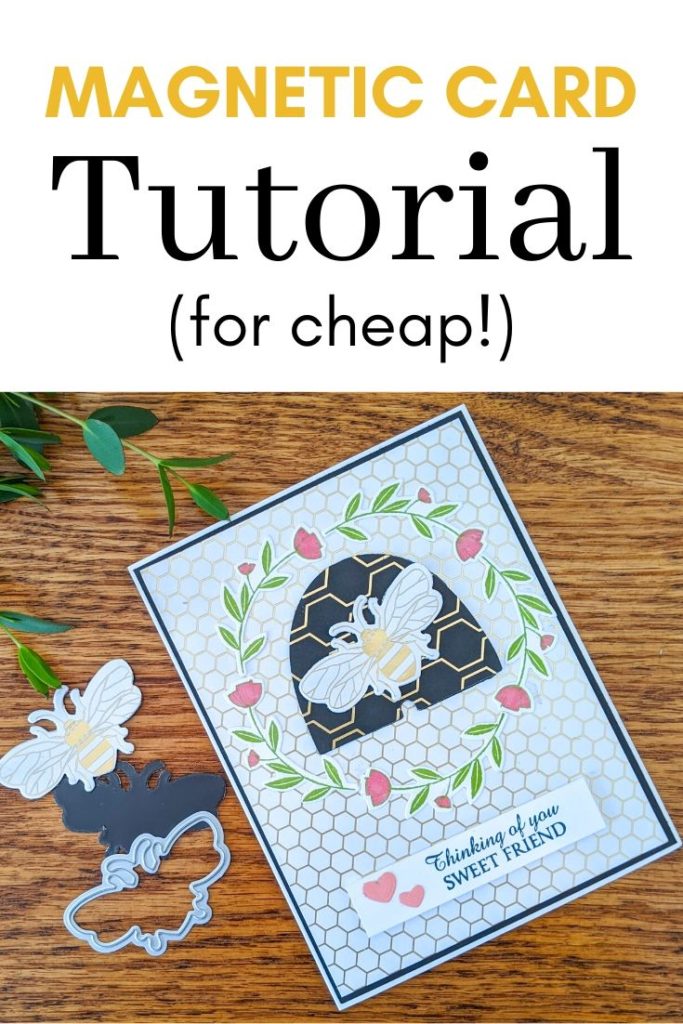
Here is a video I made showing how to make the bee and hive.
Video Tutorial
I cut the bee and hive out of the Golden Honey Specialty Paper that is one of the free products you can get with a purchase during Sale-A-Bration. Just put a little tombow glue on the paper and glue them on and you have your magnetic embellishment to go on your card.


")