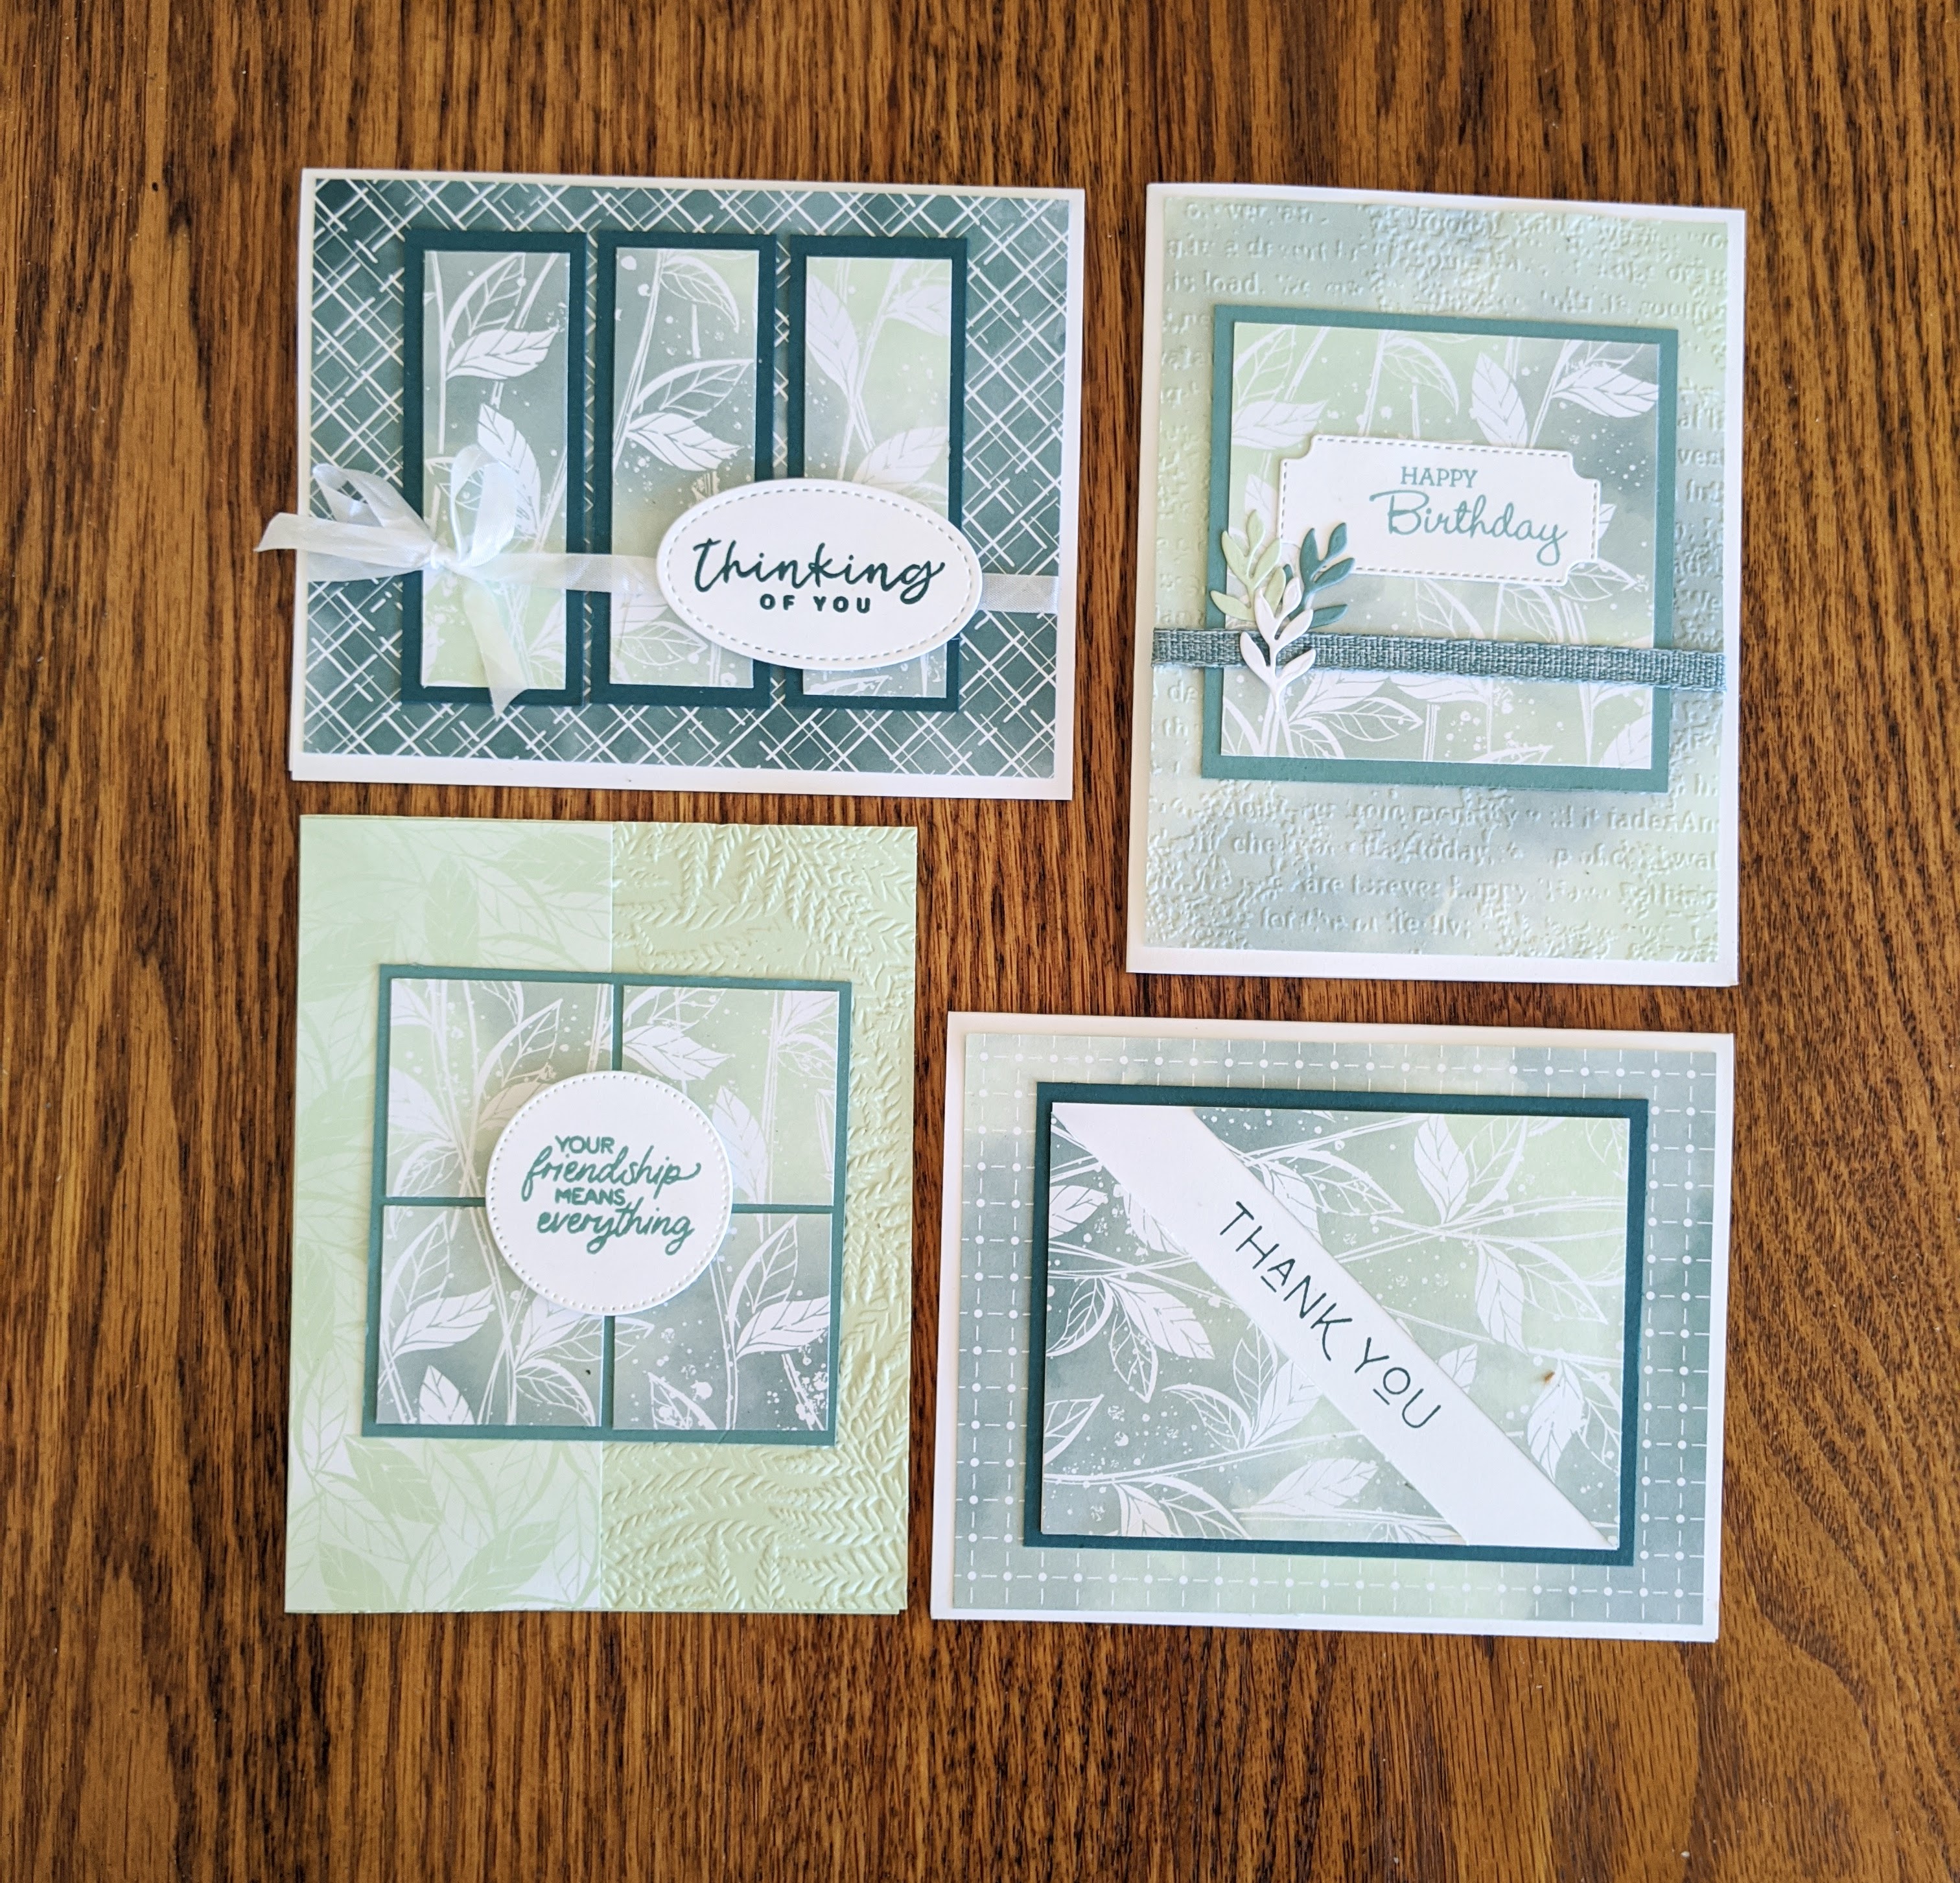
I’m sharing the other two cards I made with the 6×6 One Sheet Wonder. If you missed the first one you can go here to see the other two cards. This is a fun and easy way to get four cards out of one piece of 6 x 6. Here is a picture of the way to cut them.
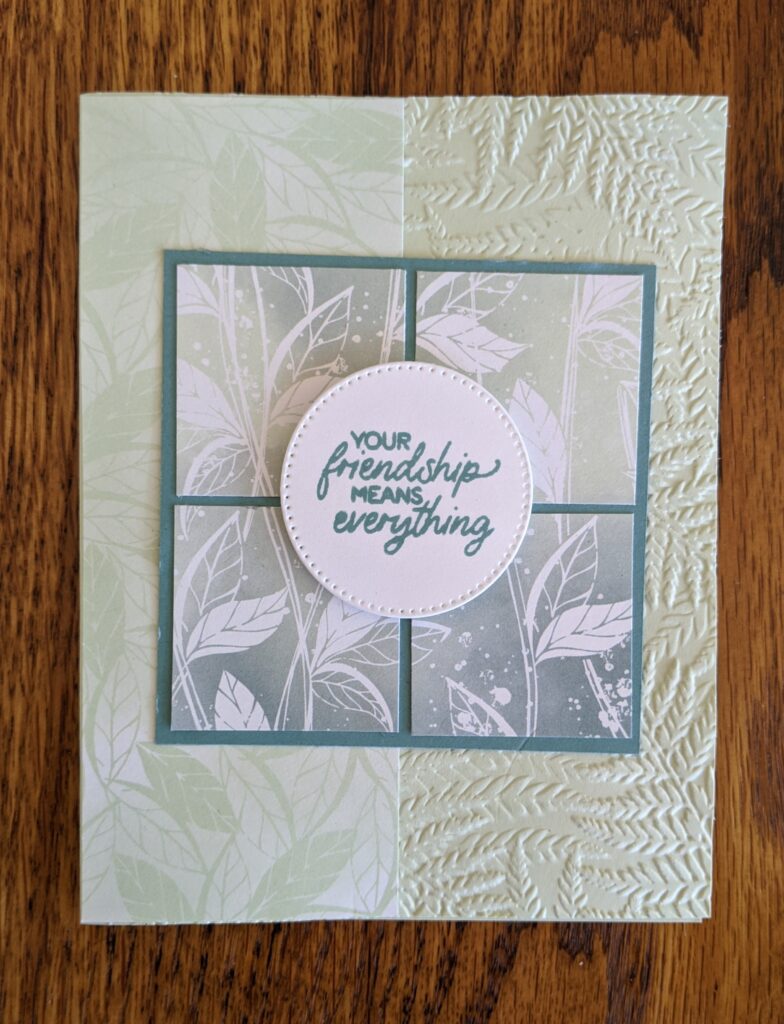
For the next card, I took one of the 3 x 3 squares and cut it into four equal size squares of 1 1/2 x 1 1/2. I mounted them on a piece of 3 1/4 x 3 1/4 in Lost Lagoon cardstock, leaving a little space between them. Using the Fern Embossing Folder, emboss a 5 1/2 by 4 1/4 piece of Soft Sea Foam and mount on a 8 1/2 by 5 1/2 piece of Soft Sea Foam cardstock scored in half at 4 1/4. I used a piece of DSP to cover half of the front but that is optional. Stamp your sentiment on Basic White cardstock using Lost Lagoon Classic Stampin Pad and die cut using the circle from the Stylish Shapes dies.
Supplies
Lost Lagoon Classic Stamping Pad
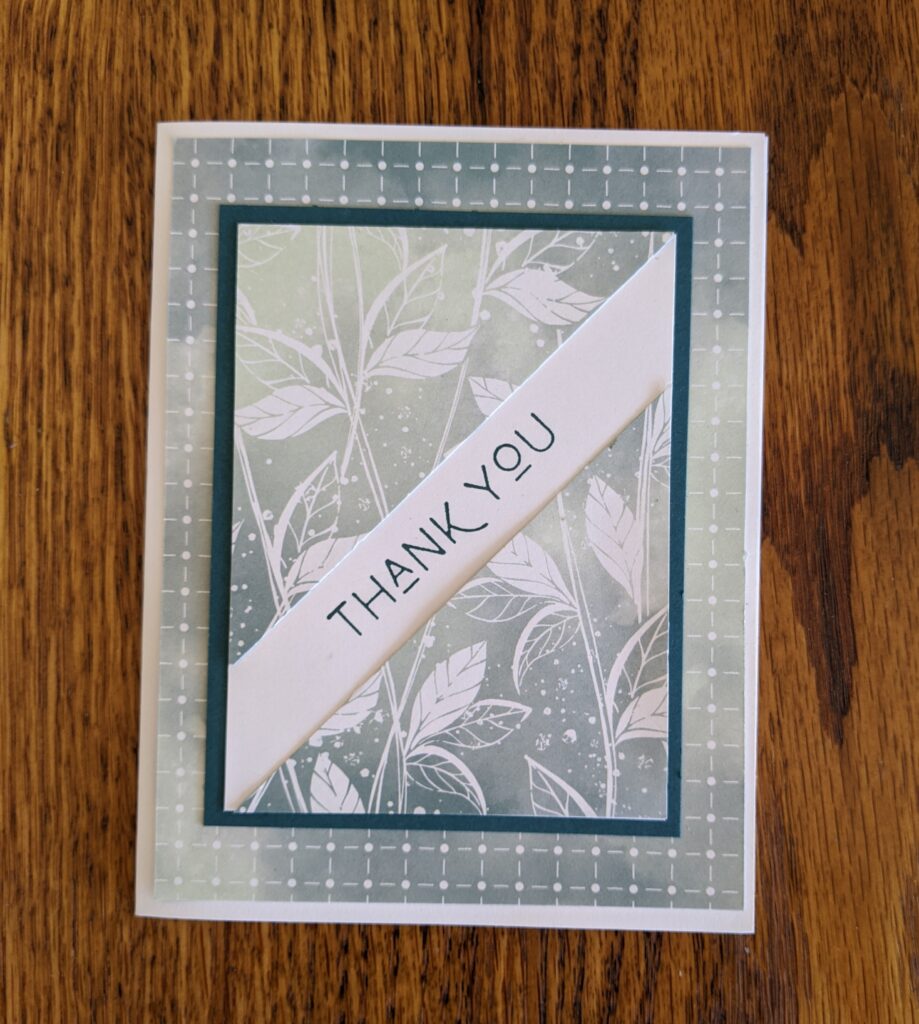
The last card is very simple too. Take your last piece of 3 x 3 DSP and cut it diagonally. Mount it on a piece of 3 x 4 Basic White CS, leaving and about a 1″ space between them. Mount that on a piece of of 3 1/4 x 4 1/4 Pretty Peacock CS. Using a coordinating piece of 5 1/4 by 4 DSP Mount on a card base of Basic White CS measuring 8 1/2 x 5 1/2 scored in half at 4 1/4. Stamp the sentiment in Pretty Peacock in the white space between the DSP.
Supplies
Pretty Peacock Classic Stampin’ Pad
Earthen Textures – for the sentiment
I hope all this makes sense and you will try this One Sheet Wonder. I know I really enjoyed doing it!