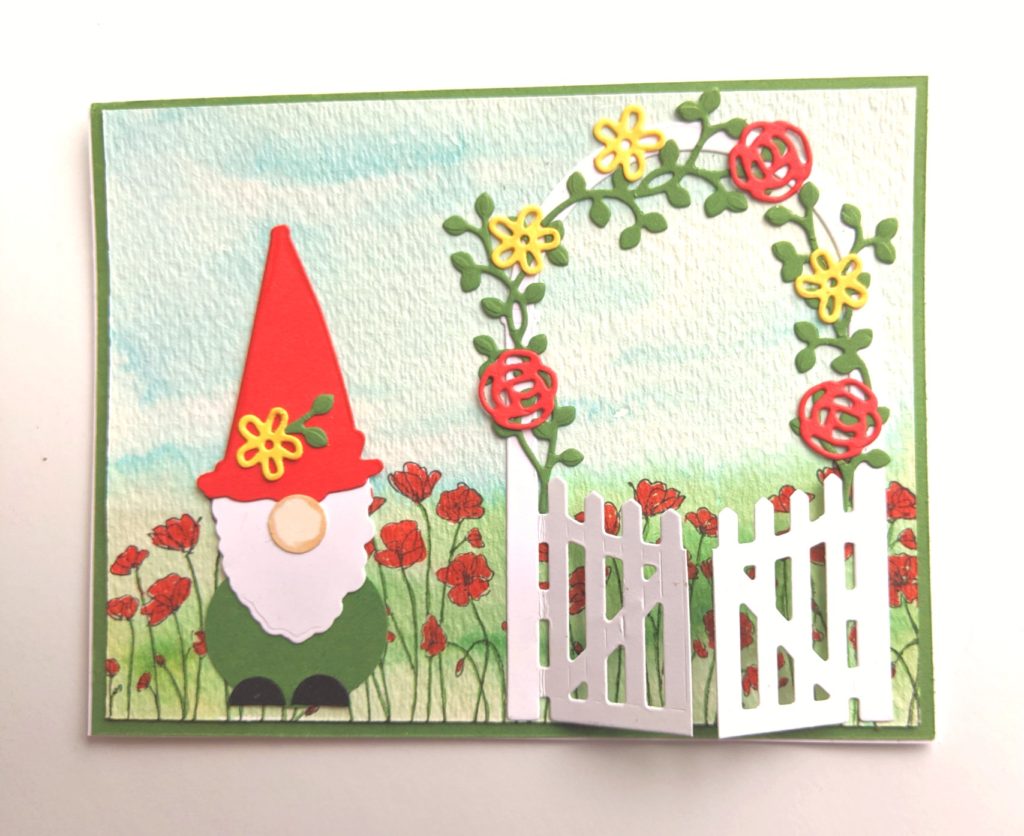
As promised in this blog post, here is the tutorial for making the Garden Gnome card. It was so much fun and I think he is just adorable! You can stamp a sentiment in the space in the middle of the arbor or on a strip of cardstock and place it on the top left, above our little gnome. I left mine blank so I can add the appropriate sentiment when I decide to send him out.
Card Tutorial
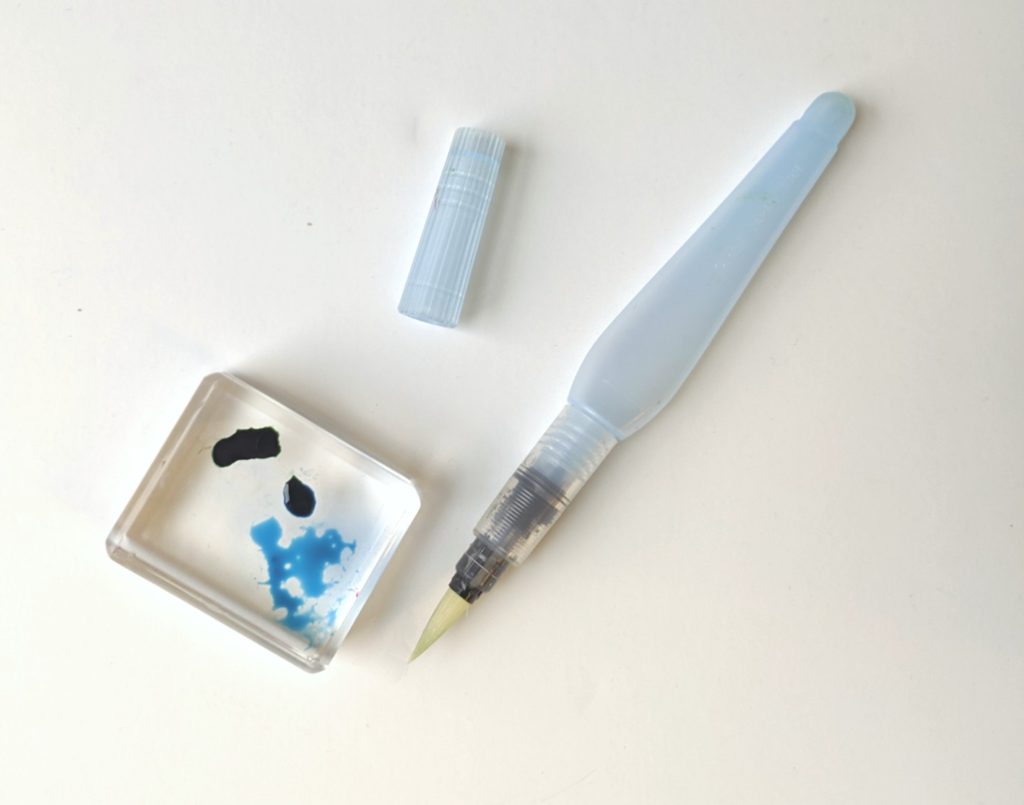
Cut a piece of water color paper to 4″ x 5 1/4″. Put a drop of Balmy Blue ink and Garden Green Ink on a block or surface that won’t absorb it.
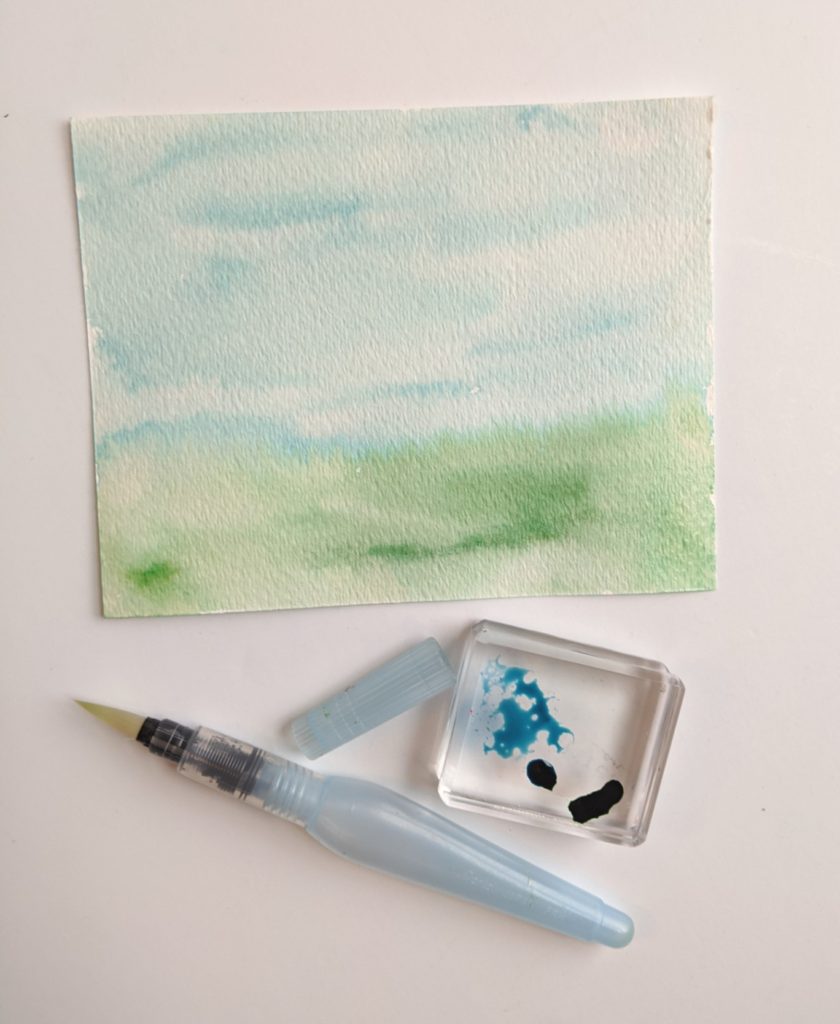
2.Using a Watercolor Brush, do a wash of blue for the sky and a wash of green for the grass. The intensity of the color depends on how much water you use.
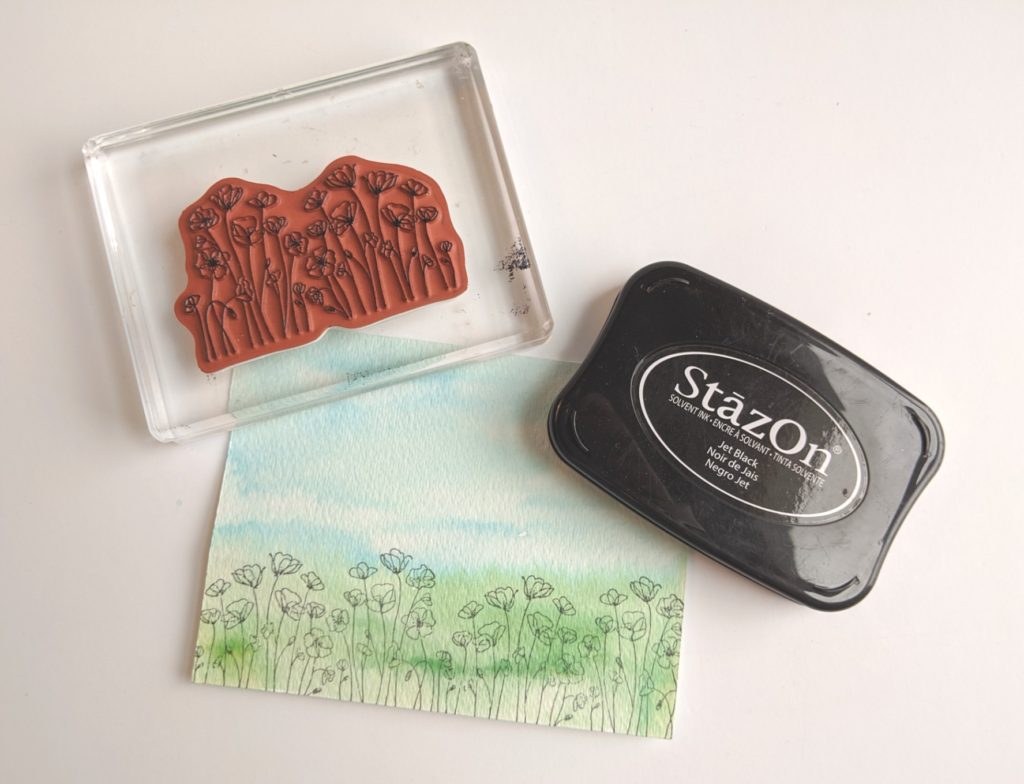
3. Stamp the flower image from Painted Poppies in black ink. I used Stazon for this card because I was using Stampin’ Write markers to color with.
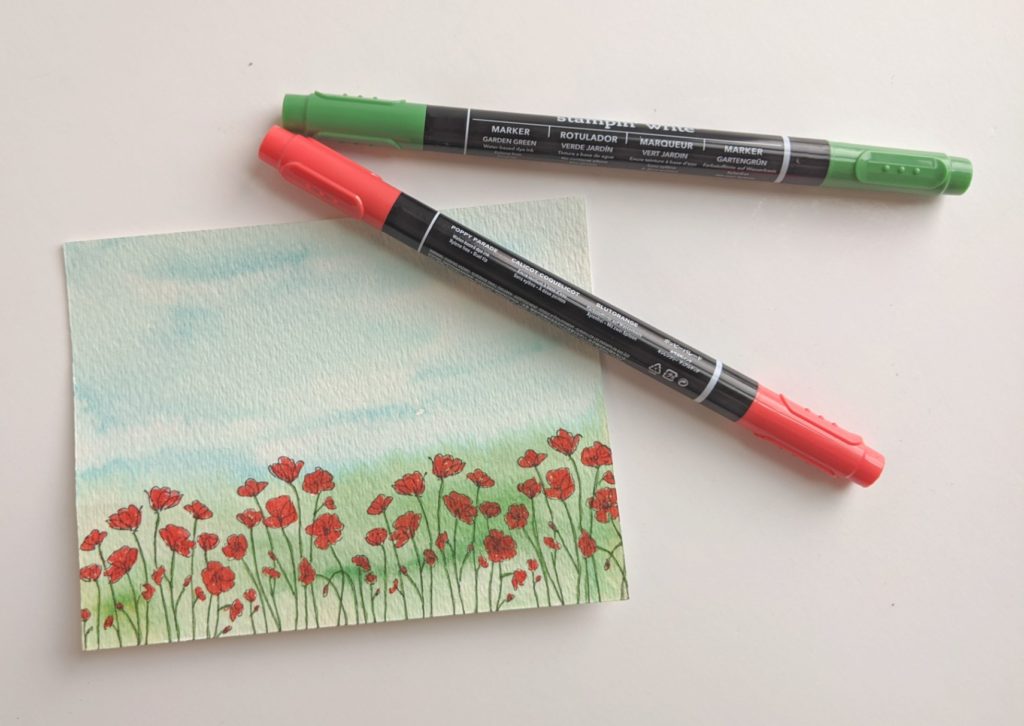
4. Color the flowers with Poppy Parade and use Garden Green Stampin Write Markers to trace the stems.
5. Die Cut the gate from the Garden Gateway Dies in Whisper White, the flowers from Poppy Parade and Daffodil Delight, and the leaves from Garden Green Cardstock.
6. Make the Garden Gnome following the instructions from this blog post.
7. Glue on the gate (I snipped up the middle of it so the gate would open), flowers, and leaves. Add the gnome. Mount on a piece of Garden Green Cardstock (4 1/8 x 5 3/8) and glue to your A2 card base (8 1/2 X 11, scored at 4 1/4)
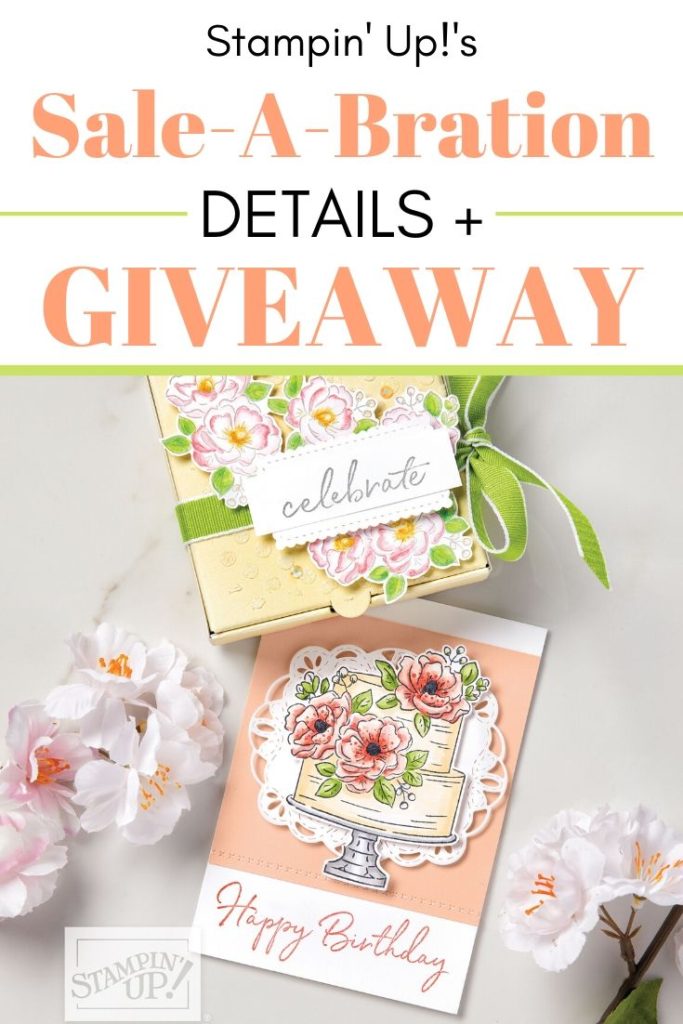
If you are looking for a simple card to make for any occasion, look no further. The Painted Poppies set is awesome for this. And if you buy the bundle before March 31, 2020, it qualifies you for a free Sale-A-Bration item.
Check out my blog post here for information on Sale-A-Bration and a Giveaway I am doing.
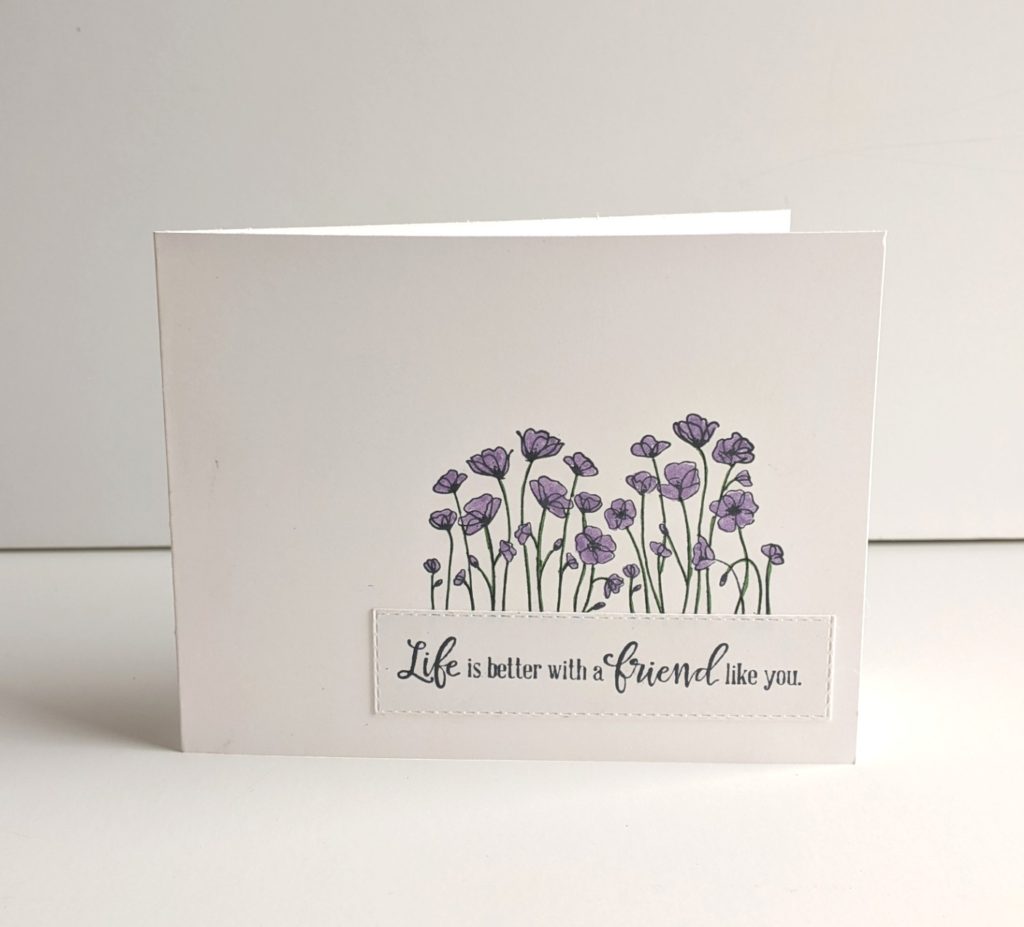
For this card, stamp the poppies on the card base. Because it is a one-layer card, color it using Stampin’ Write Markers. They don’t bleed through the paper like the alcohol markers do. The colors in this card are Garden Green and Highland Heather.
Stamp your sentiment of choice and adhere it and you have a simple and beautiful card. That easy.
This is a great layout for a quick card. You can use any type of stamp or sentiment for endless ideas and occassions.
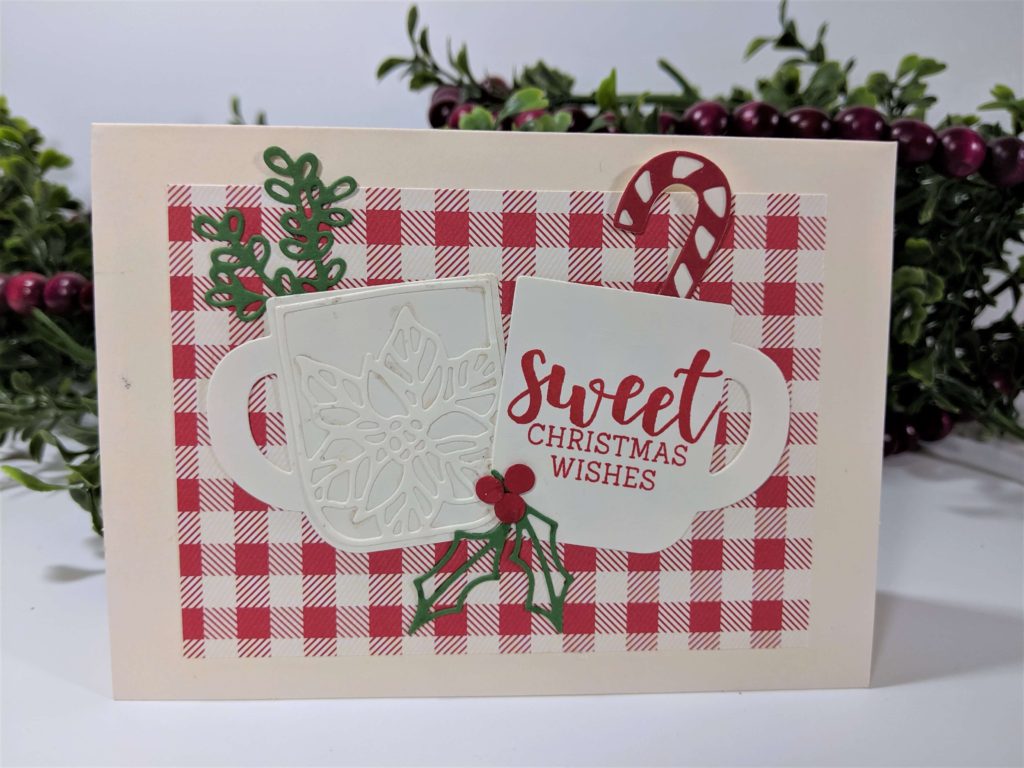
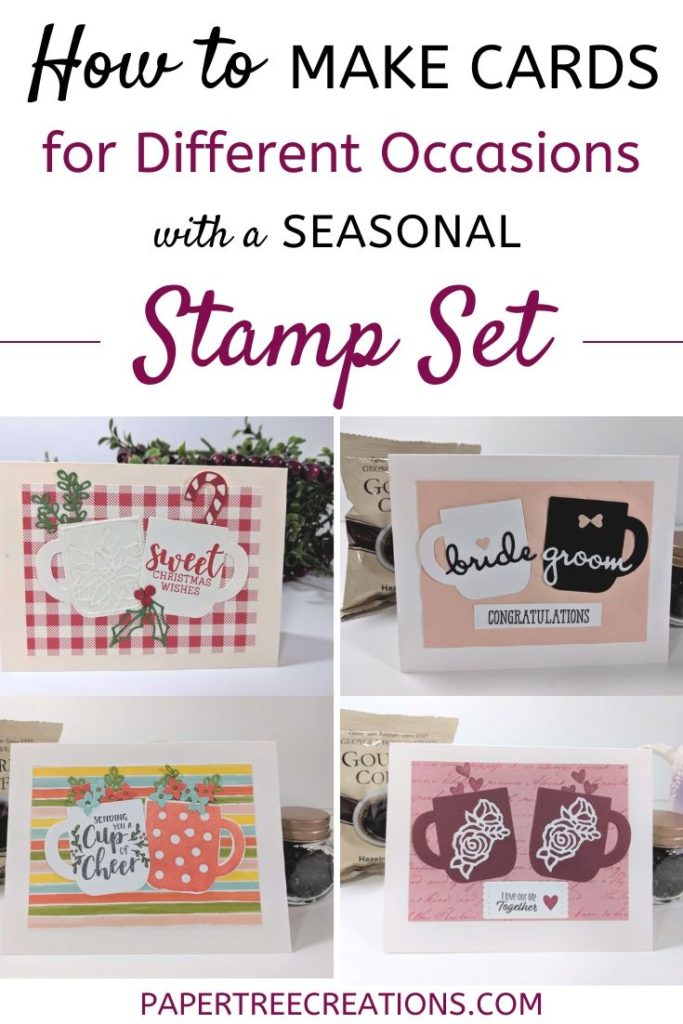
I just love when you can get more than one card occasion from a seasonal stamp set. And the stamp and die setCup of Christmas lends itself to that. Since we all know coffee and tea lovers, this is a great set to add to your collection. But hurry because this is retiring at the end of the year!
Christmas Card
I used this set in my last card class to make a Christmas card. It turned out really cute. The candy cane and the greenery that come with the set add just the right amount of pop and color to the card. Give this to a coffee or tea lover with their favorite brew. Hot chocolate would work too.
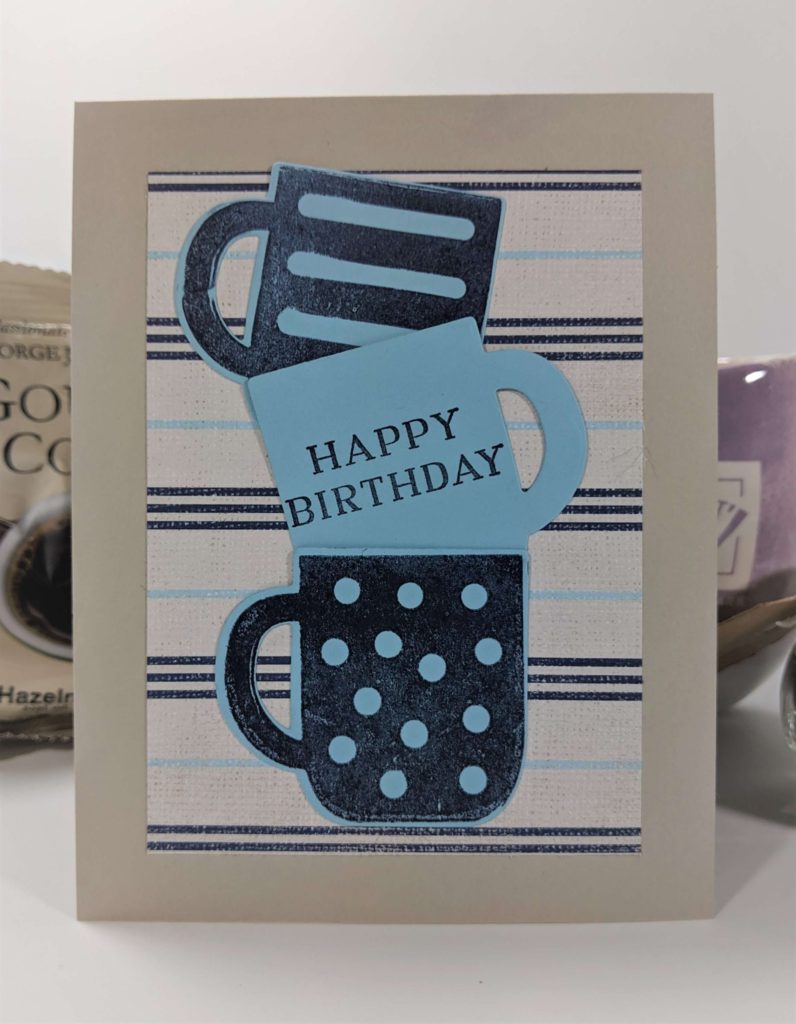
While I was playing with that card, I started to think of other ways to use it. Using the same simple layout, I came up with the following ideas.
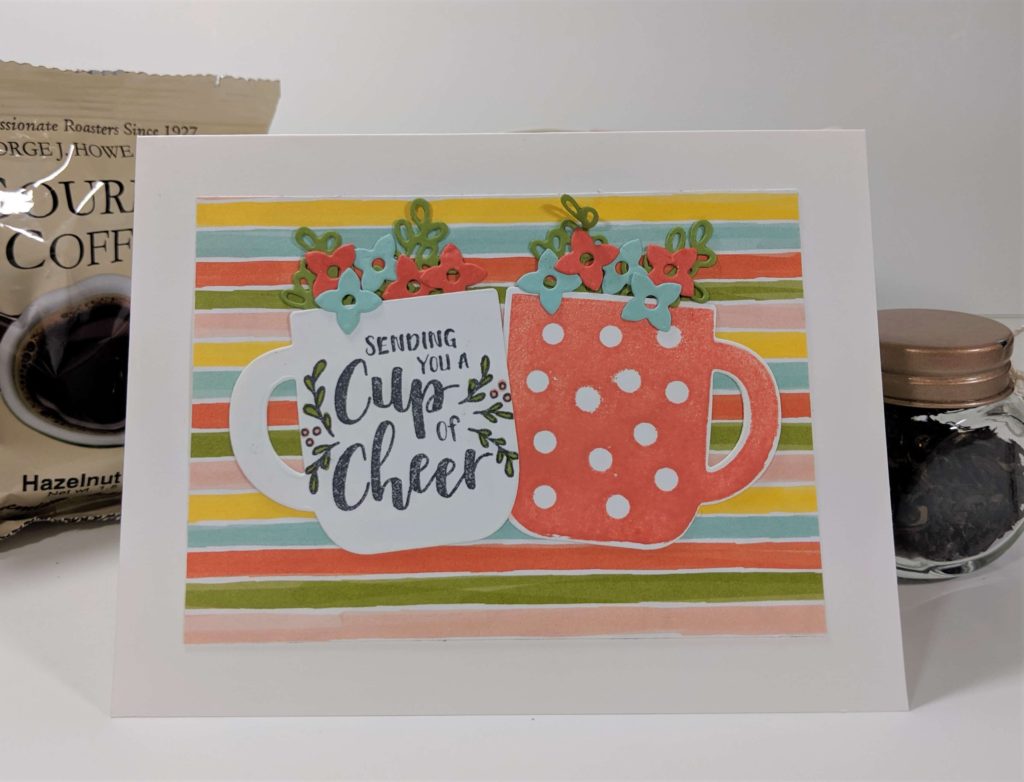
Cheer Someone Up Card
The saying “cup of cheer” that comes with the set doesn’t have to be Christmas. You can send someone cheer anytime of year! So I put a few flowers in it and have a card to send to cheer someone up.
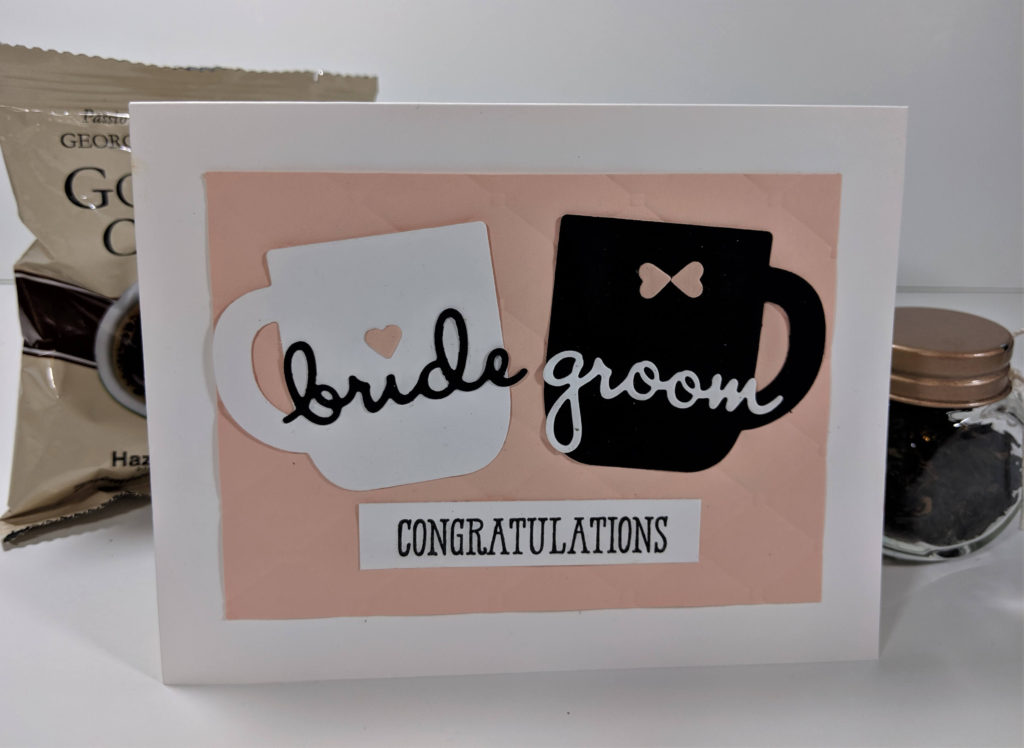
Do you have a couple getting married that are coffee or tea lovers. Make them a mug wedding card! I just was at a wedding where they gave out tea samples to all the guests. If I would have know they were tea lovers, I would have given them this card!
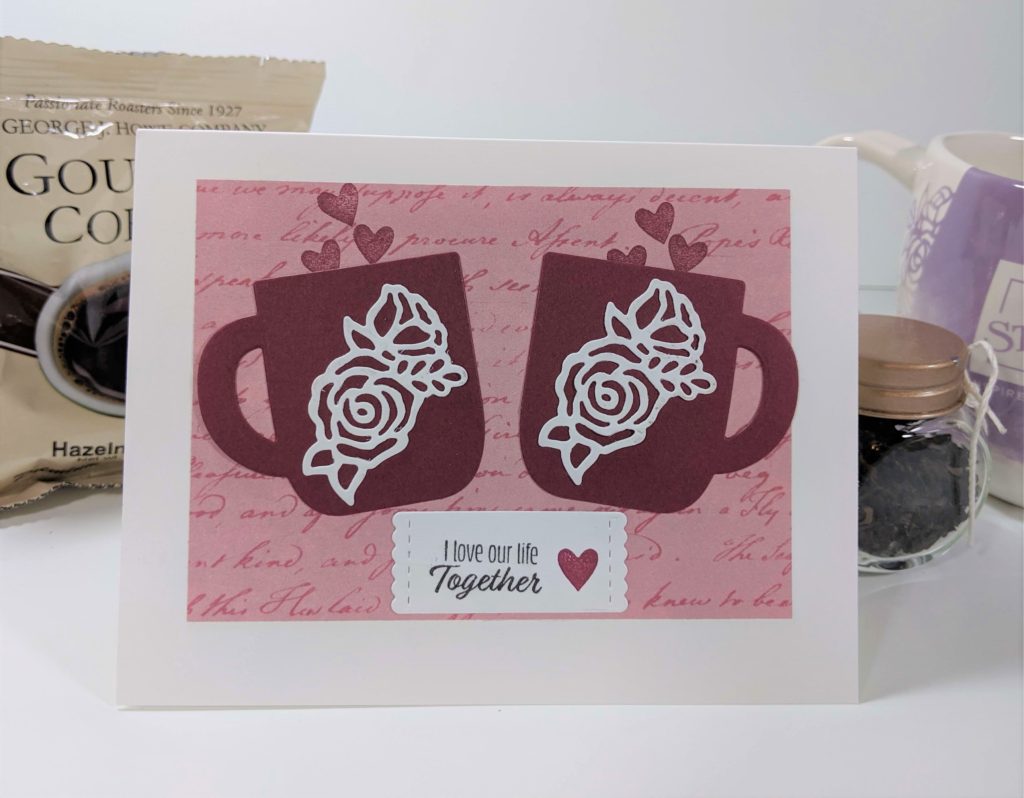
And for those of us who are getting a head start on those Valentine cards or if you just want to let someone know you love them, this one fits the bill!
If you noticed, the layout is basically the same for each card. The base is an A2 (4 1/4 x 5 1/2) with a piece of Designer Series Paper cut to 4 1/2 x 3 1/4. The options are endless for this set. I hope you will add it to your collection before it is gone! Don’t forget to share your designs over on my Facebook Page or in the comments.
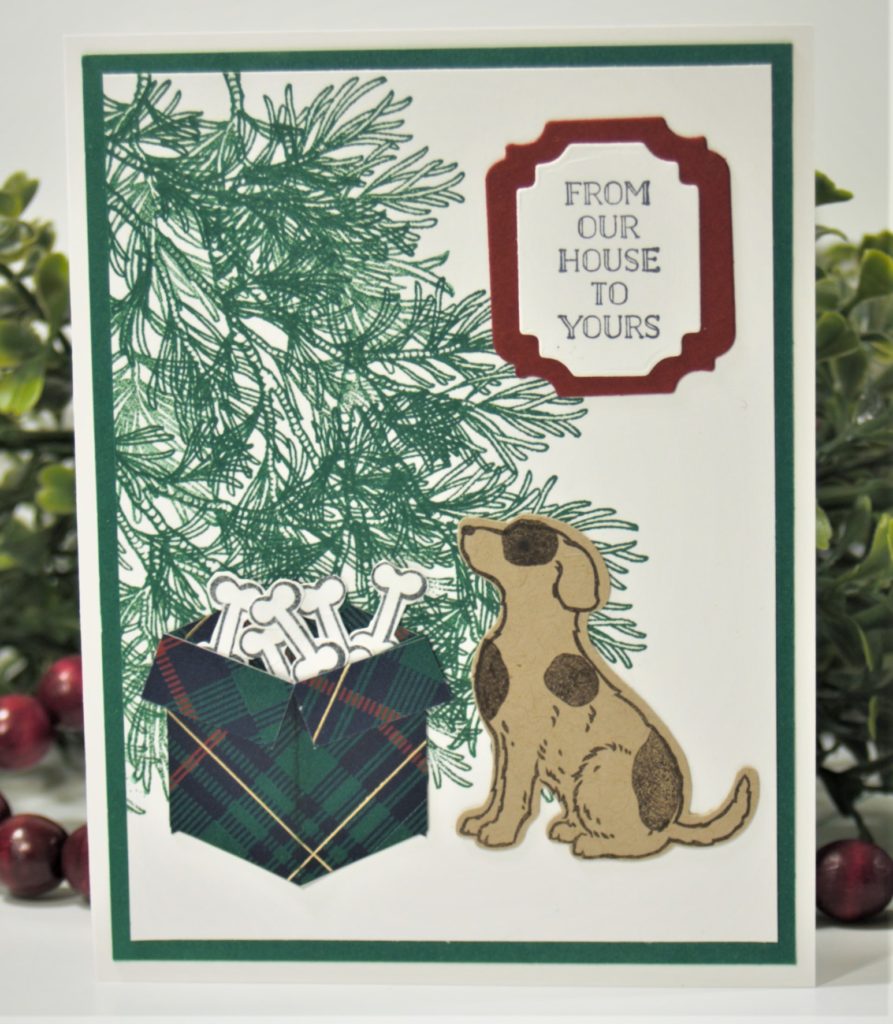
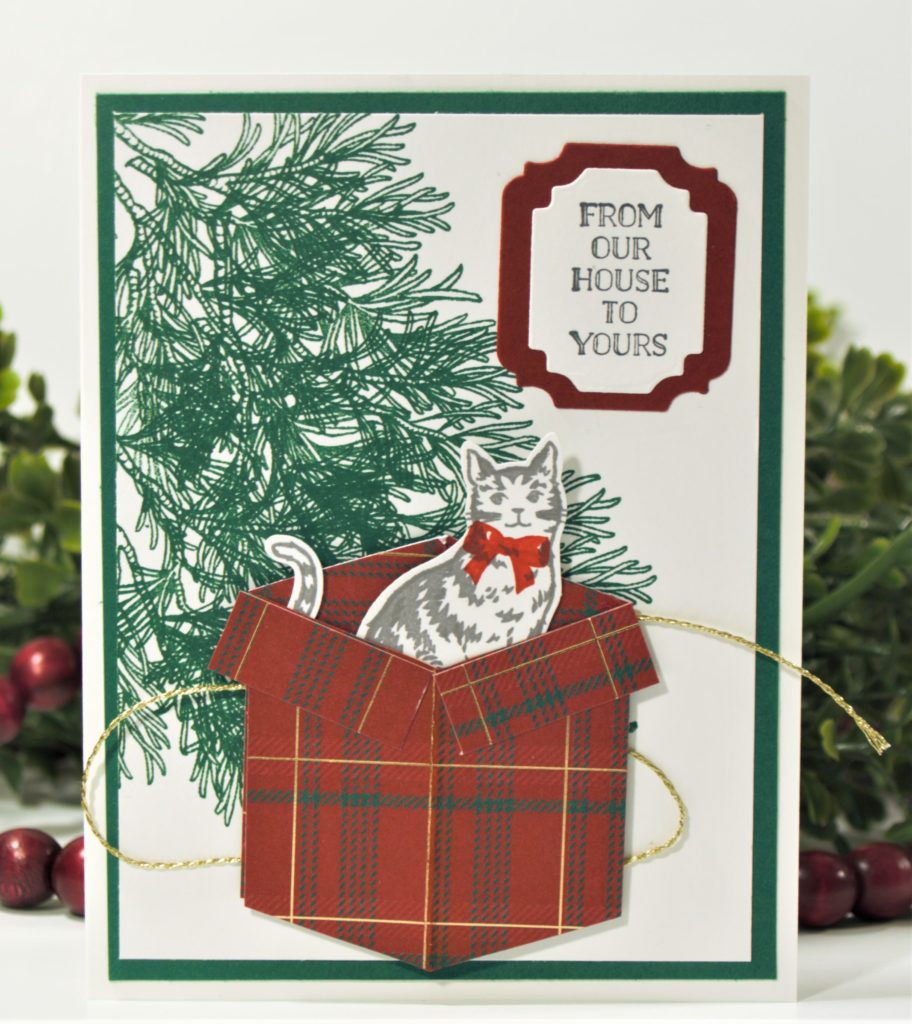
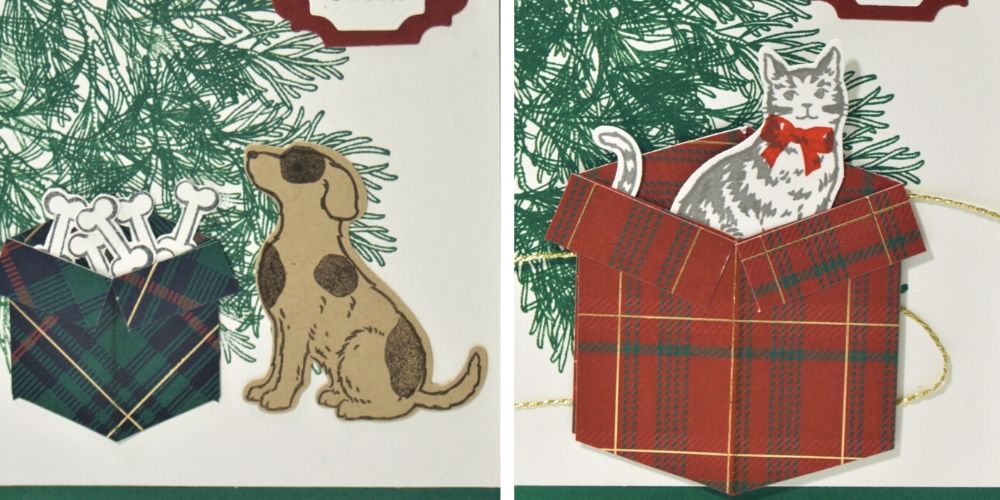
Many of us have pets that are like part of the family, and we don’t want to forget them when sending out our Christmas cards. Sometimes we even include them in our pictures we send. But for those of us who don’t want to try to get them to co-operate for the picture, here are cards that you can use with either a cat or dog.
I included a tutorial on how to make a box/present to put on the front of your cards. You can use it as a Christmas present or a birthday present on your own cards.
The greeting for both cards are from Itty Bitty Christmas and the die cuts for it are the Ornate Frames Dies. I am happy to report that both of these will be carrying over!
How to Make the Christmas Tree Background
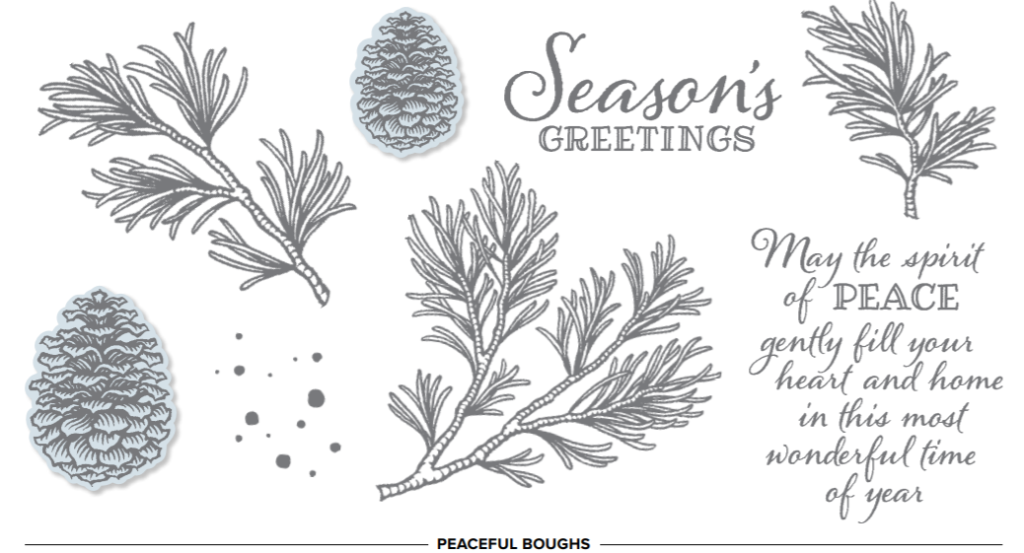
1. Using the stamp set Peaceful Boughs, stamp the bigger branch in Shaded Spruce Ink, forming the shape of a Christmas tree on the 3 3/4 x 5 piece of cardstock. I mentioned that this is one of my favorite stamp sets in a previous post. This is another way to use it with just the stamp. And I haven’t even gotten to the pine cone yet!
2. Fill in some branches with the smallest branch stamp until you get a tree you like. Leave some space at the bottom so it doesn’t look like the cat or dog are sitting in the tree!
I did add an extra spot on the dog by just inking the one spot and adding it where I thought it would look best.
2. Punch out the images with the matching Cat Punch or the matching Dog Punch. If you don’t have the matching punches, you can fussy cut them with scissors.
3. For the dog card, stamp a bunch of bones and fussy cut them out.
How to Make the Tuck-in Present for Your Card
Do you remember the first time you learned how to draw a 3-D box? I remember thinking it was so cool and drew them endlessly for a while. This box took me back to that time, and I had so much fun making them. I hope you enjoy it too!
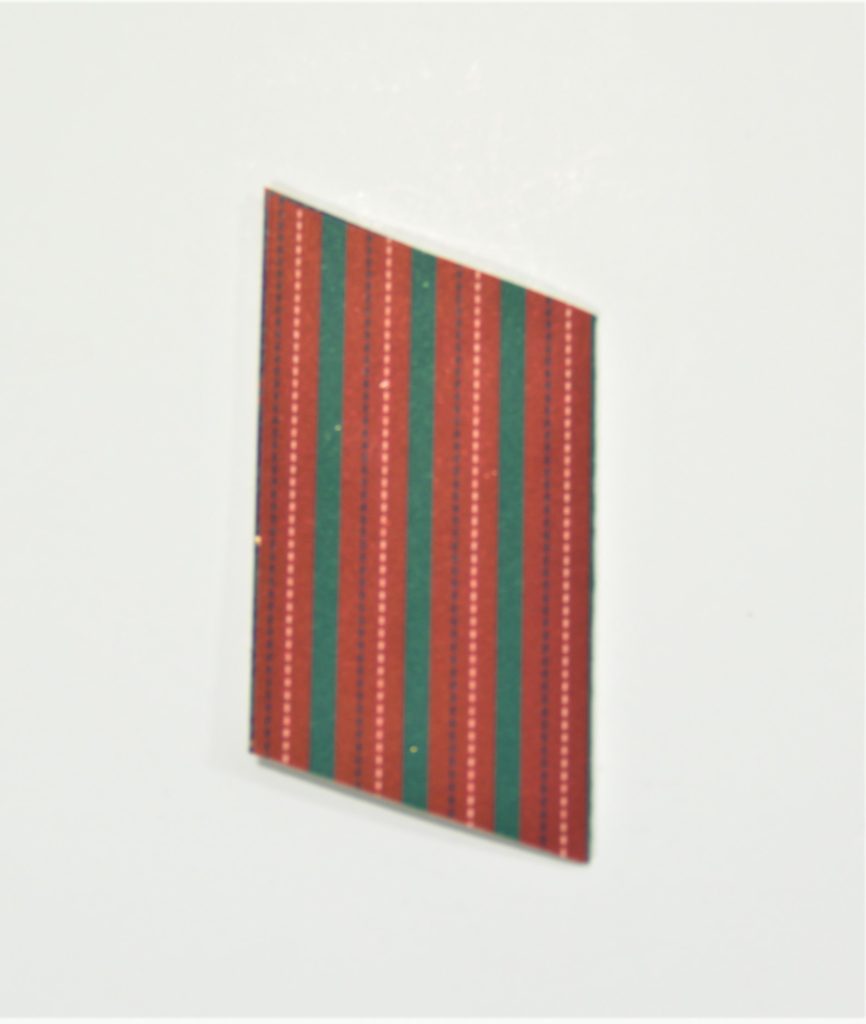
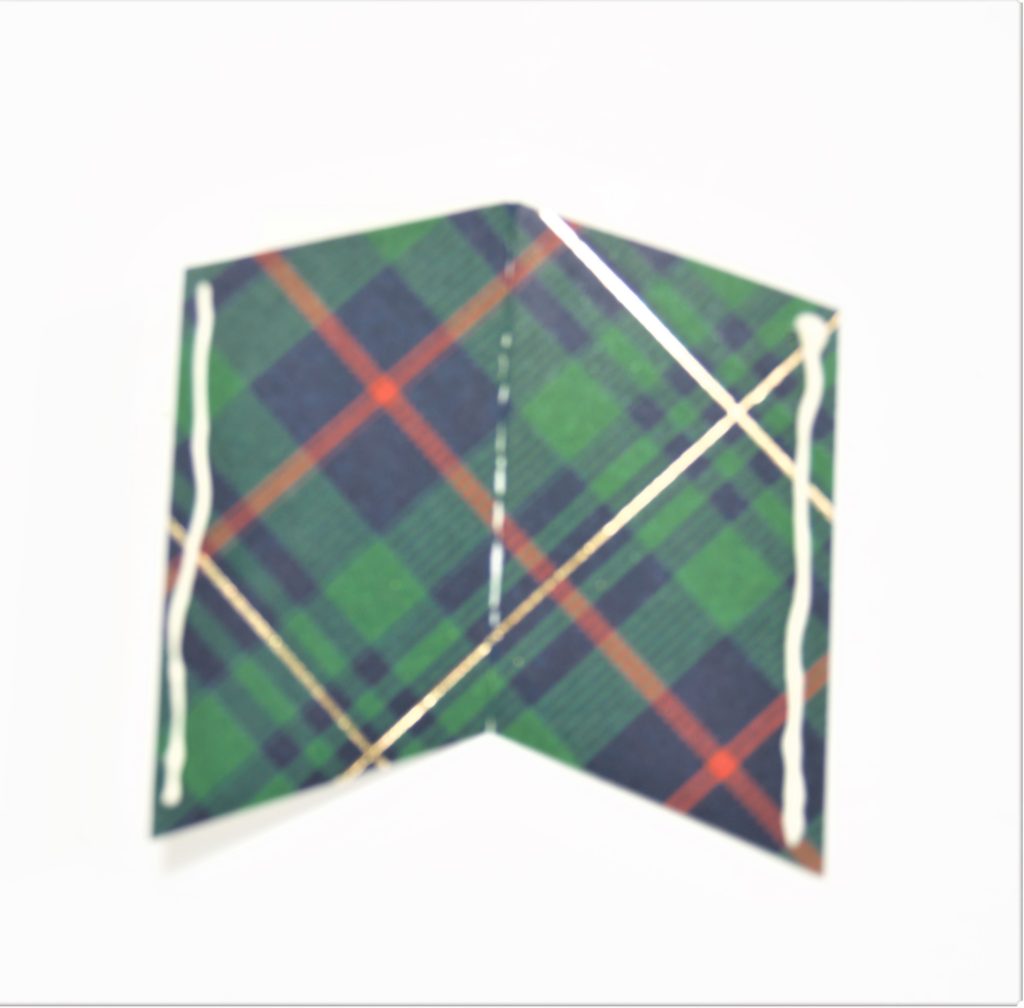
1. To make the tuck-in box, take two 2 1/2 inch squares of paper. If you want a smaller box like I made in the dog card, use two 1 1/4 inch pieces for the box. I used the Wrapped in Plaid Specialty Designer Series Paper for both projects.
2. Fold them in half with the design you want on the inside. If you look at my pictures, I wanted the green plaid to be what was displayed for my present, so I folded it with the red stripes on the outside. I know it’s confusing, but bear with me!
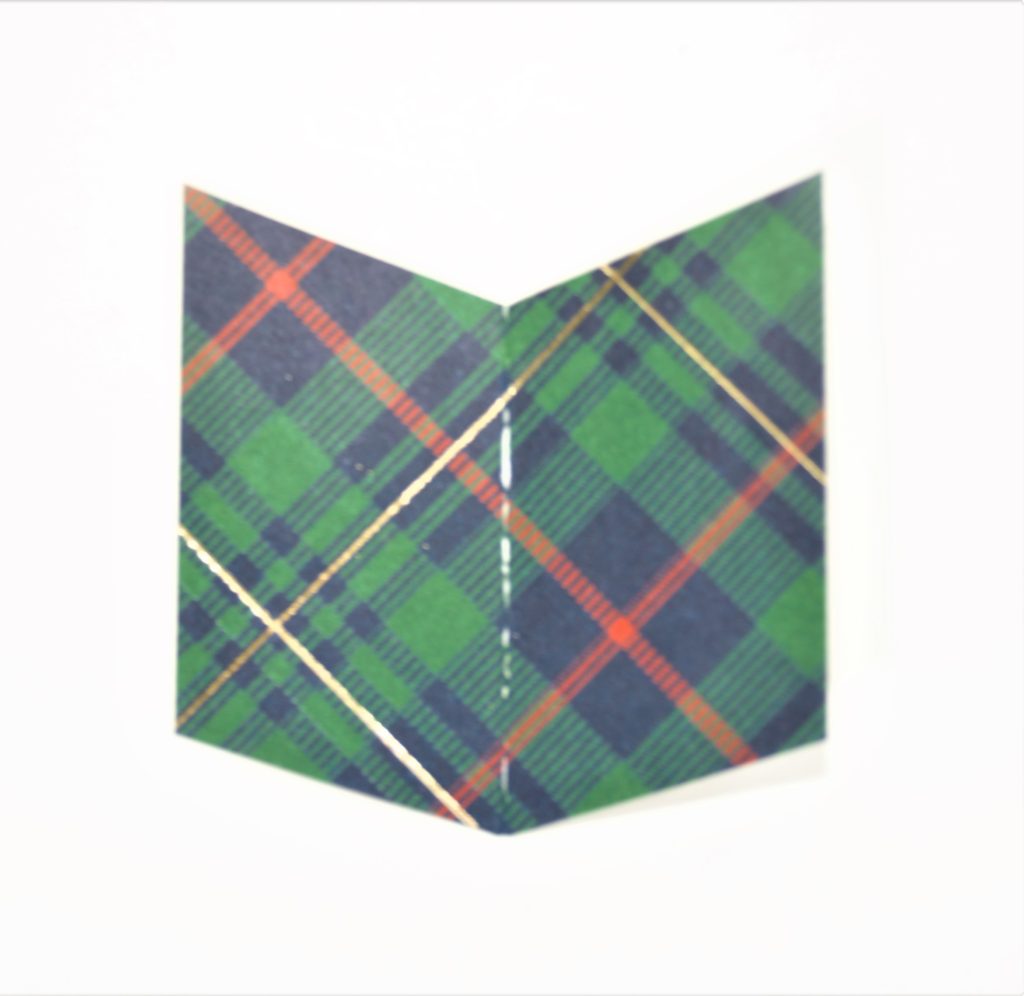
3. Trim the edges of the squares at an angle (however sharp you want) so they look like a book when opened. Save the scraps as you’ll be using them for the present’s flaps later on.
Image 1: Folded and trimmed. Image 2: Open like a book.
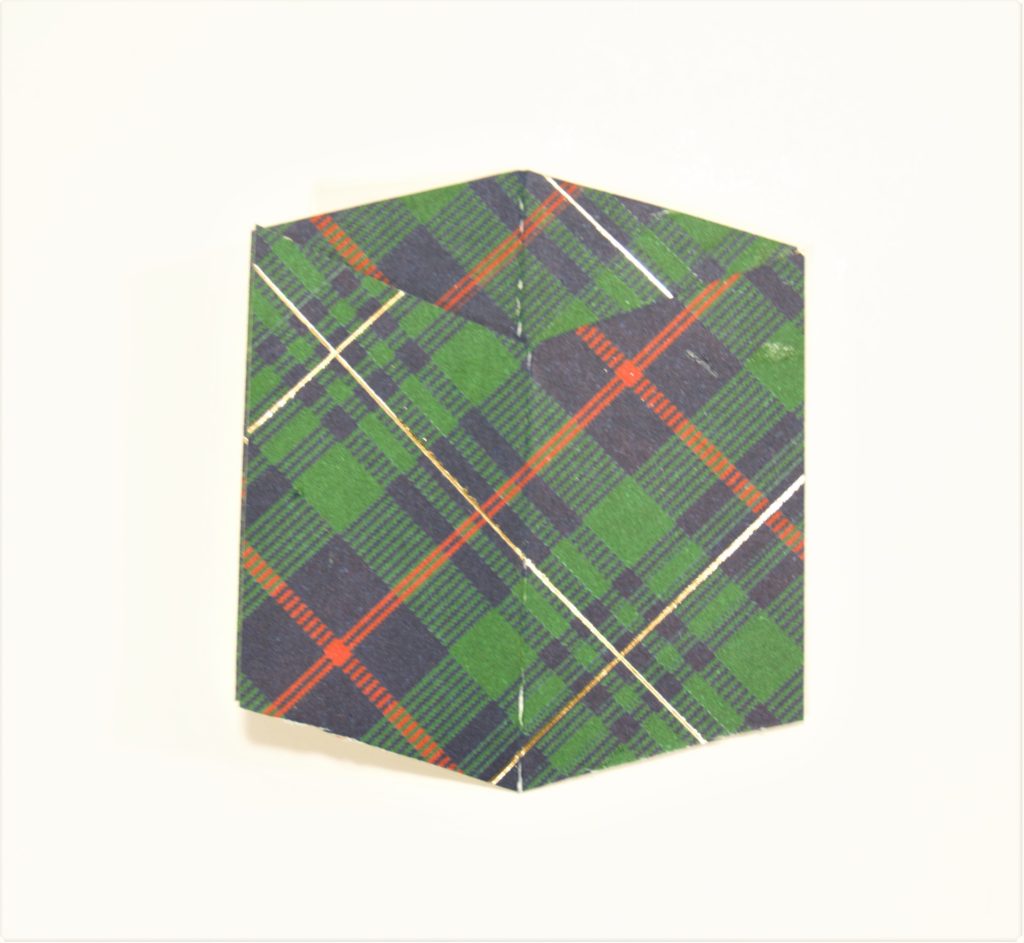
4. Put a line of glue on the left and right edges of ONE of the squares (the one with the pointy edge up). The glue should be on the side of the paper that you want to be showing in your finished product.
5. Take the other square (the one with the pointy edge down) and place it on top of the first square, matching the points with each other so it looks like this:
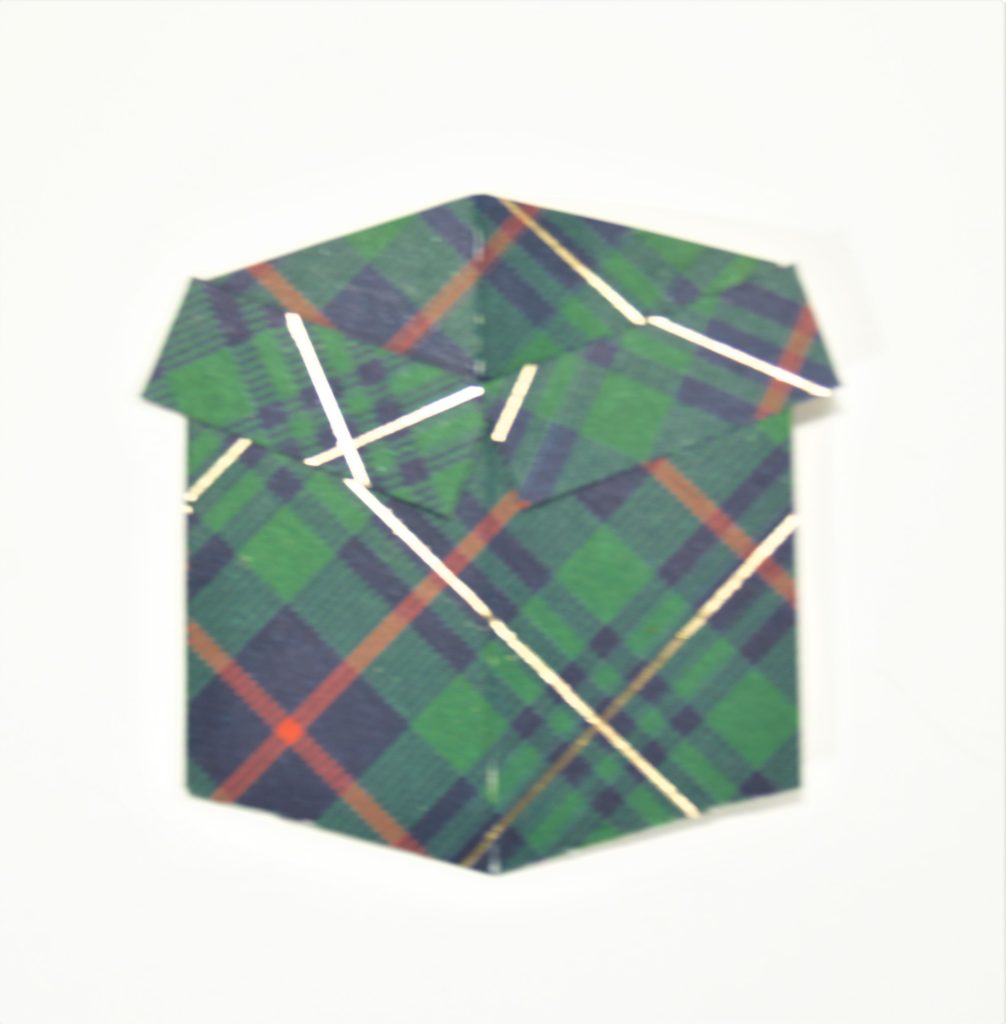
6. You’re almost done! Now, take the scraps you saved while you were trimming your squares. Trim two pieces of paper that are 1/2 x 1 1/4 inches. These are the flaps for your present.
7. Glue them to the box to make the flaps, like in this picture:
And your shiny new tuck-in present box is done! Now you can spruce it up by adding in dog bones or your cat—or whatever else you want to stick in it! Just use a little bit of glue and arrange them however you want!
I hope you enjoy making these cards! If you do, please share them with me on my Facebook Page.
It’s hard to choose Christmas stamp sets sometimes. There are so many out there, and they are so great that you just want to have them all! Visions of great Christmas cards dance through your head as you flip through the catalogs to pick the perfect sets that will wow your Christmas card recipients this year. Glitter or ribbon? Traditional colors or something different? Unique ones or all the same?
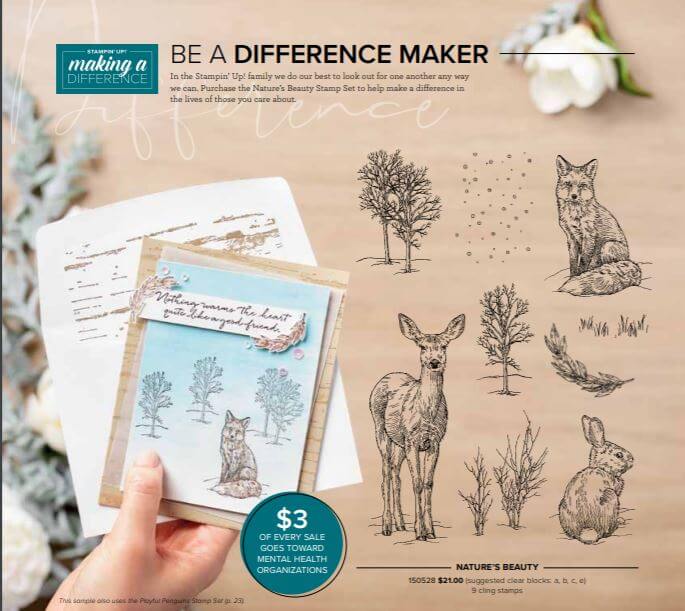
My favorite so far this year (that could change!) have been nature-themed ones. One of them is not even necessarily a Christmas stamp. But I knew when I first saw the catalog that it would be one of the first ones I bought. As a bonus, $3 from the purchase goes to help mental health organizations.
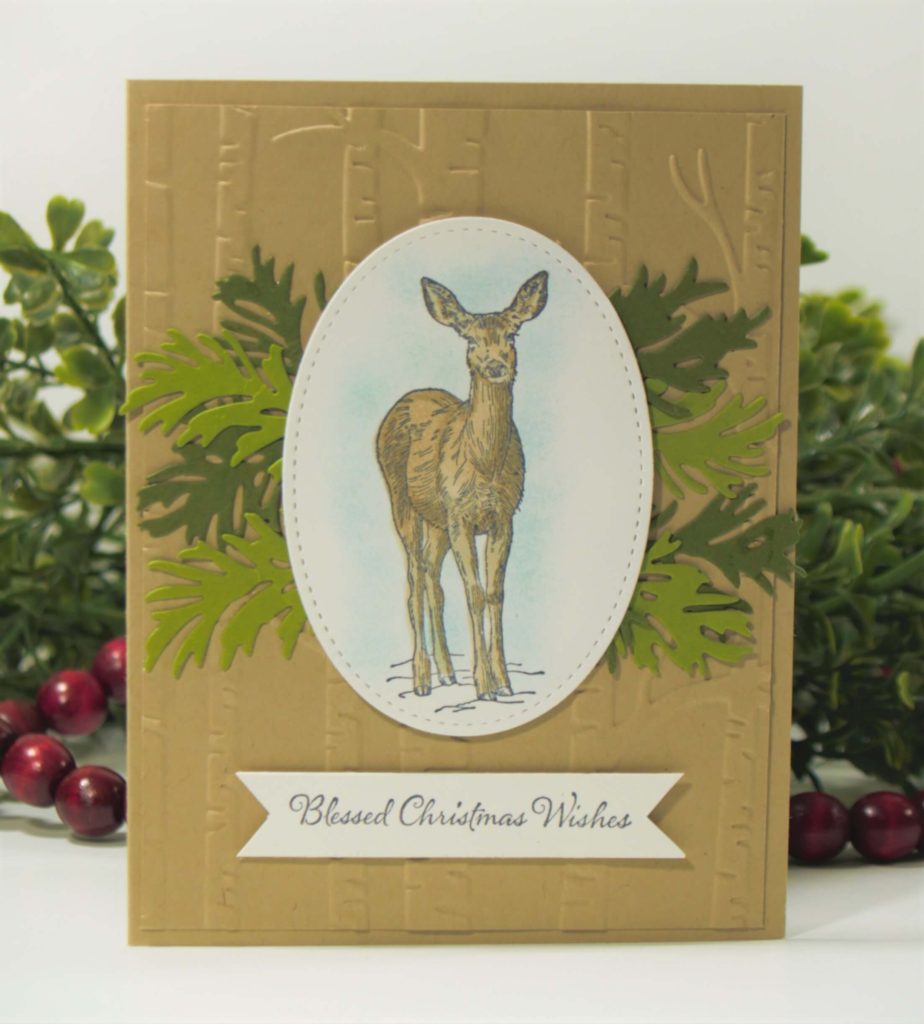
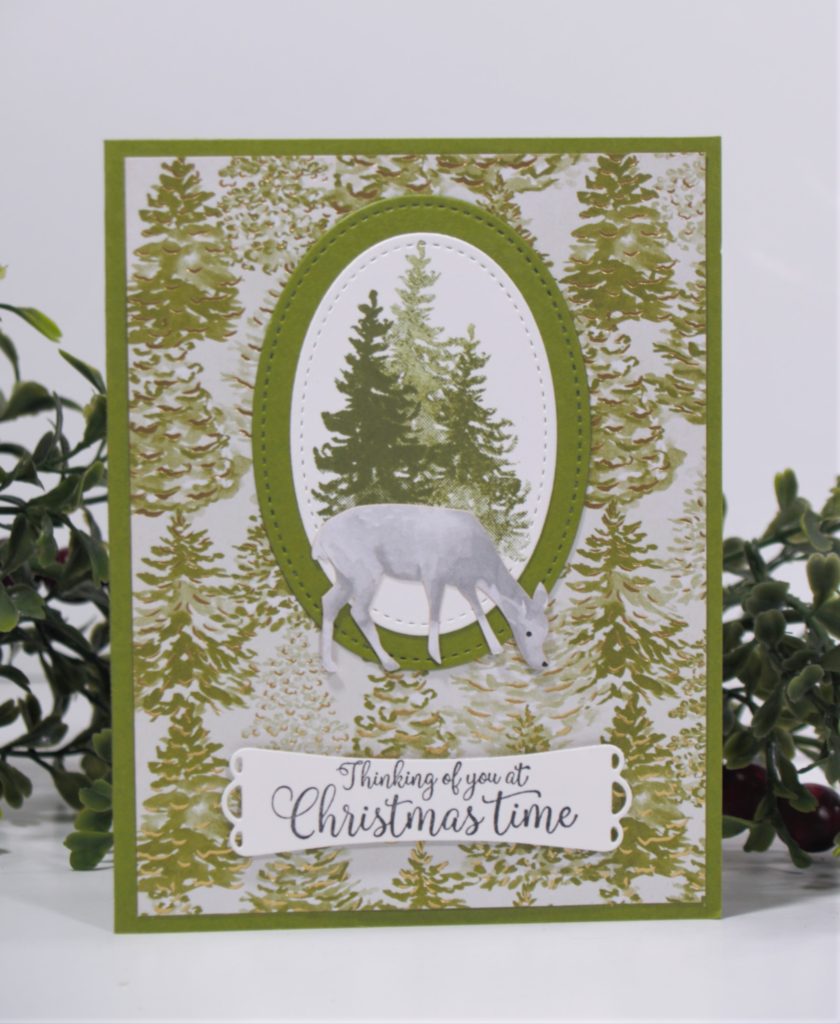
There are so many different things you can do with this set, and it’s perfect for those hard-to-design cards for men. Here is a card we did in my class in November. I love the layout, and the greeting could easily be changed to a birthday or thinking of you card.
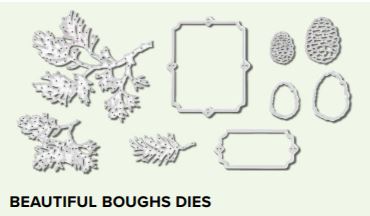
The leaves in the background behind the deer are from another set I like. The Peaceful Boughs Bundle is so much easier to use than the last one they had. The branches come out easier from the dies, and are perfect for so many different projects. They would look beautiful in a bouquet of flowers as well as the traditional Christmas look.
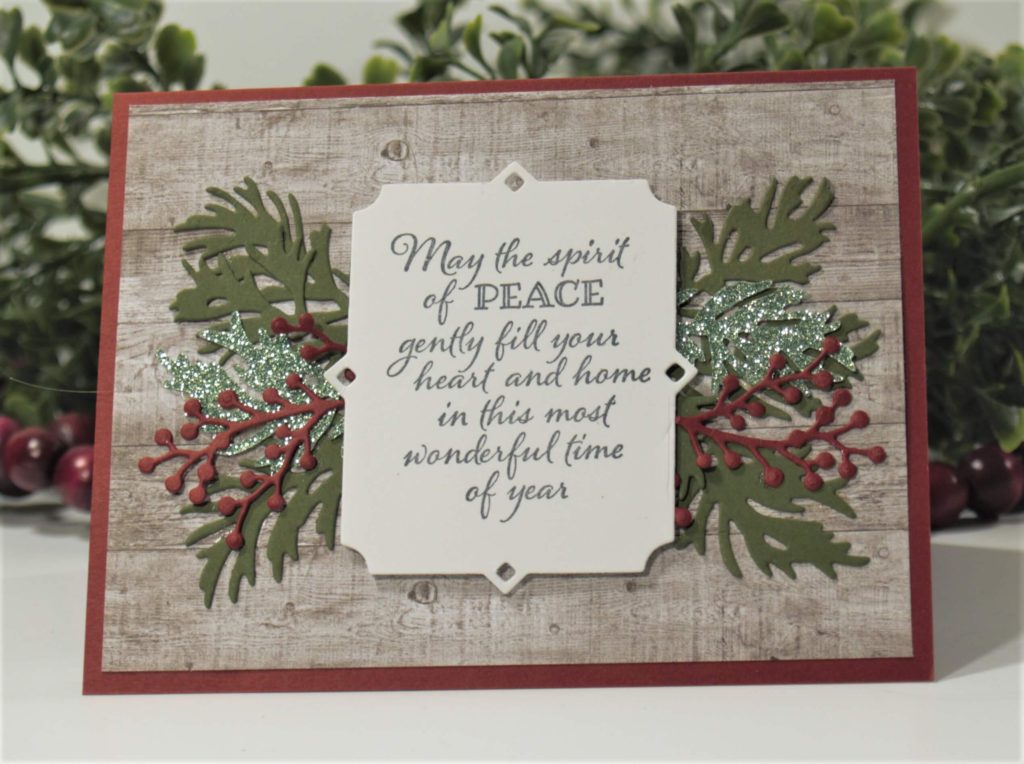
Here is a simple card I made using the die cuts and the Come to Gather Designer Series Paper. I love the woodgrain paper. It is perfect as the backdrop to this spray of greenery and gives it that farmhouse feel. I also used retired glitter paper to add some sparkle to the card.
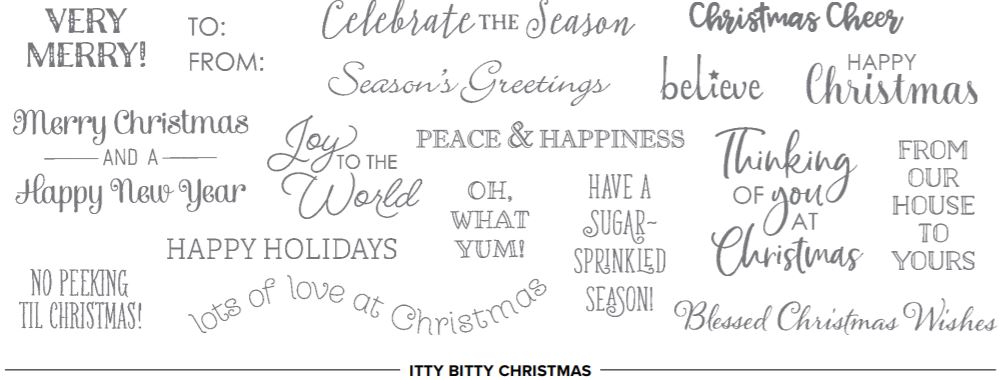
Finally, Itty Bitty Christmas makes the list. It comes in abundlewith some pretty cool die cuts as well. The stamps offer so many greetings to coordinate with all the different Christmas stamps you have, so it makes sense to add this one to your list. You can use it on cards, tags for gifts of food, or gift bags and tags. You could even decorate Christmas wrap with it.
I hope you will consider adding one of these stamp sets or bundles to your list this year. They are versatile and beautiful and I’m sure you will get many years of use out of them. I know I will be using them again!
Christmas is right around the corner, and sending out handmade Christmas cards is a great way to show your family and friends that you care about them. Stampin’ Up! is great about coming out with cute kits, especially around the holidays. And their Christmas card kit this year doesn’t disappoint.
I was excited to see the Christmas kit that Stampin’ Up! came out with this year. Although I loved last year’s kit, this one allows you to explore your creativity more. The Most Wonderful Time Product Medley offers just about everything you need to make lots and lots of cards this holiday season.
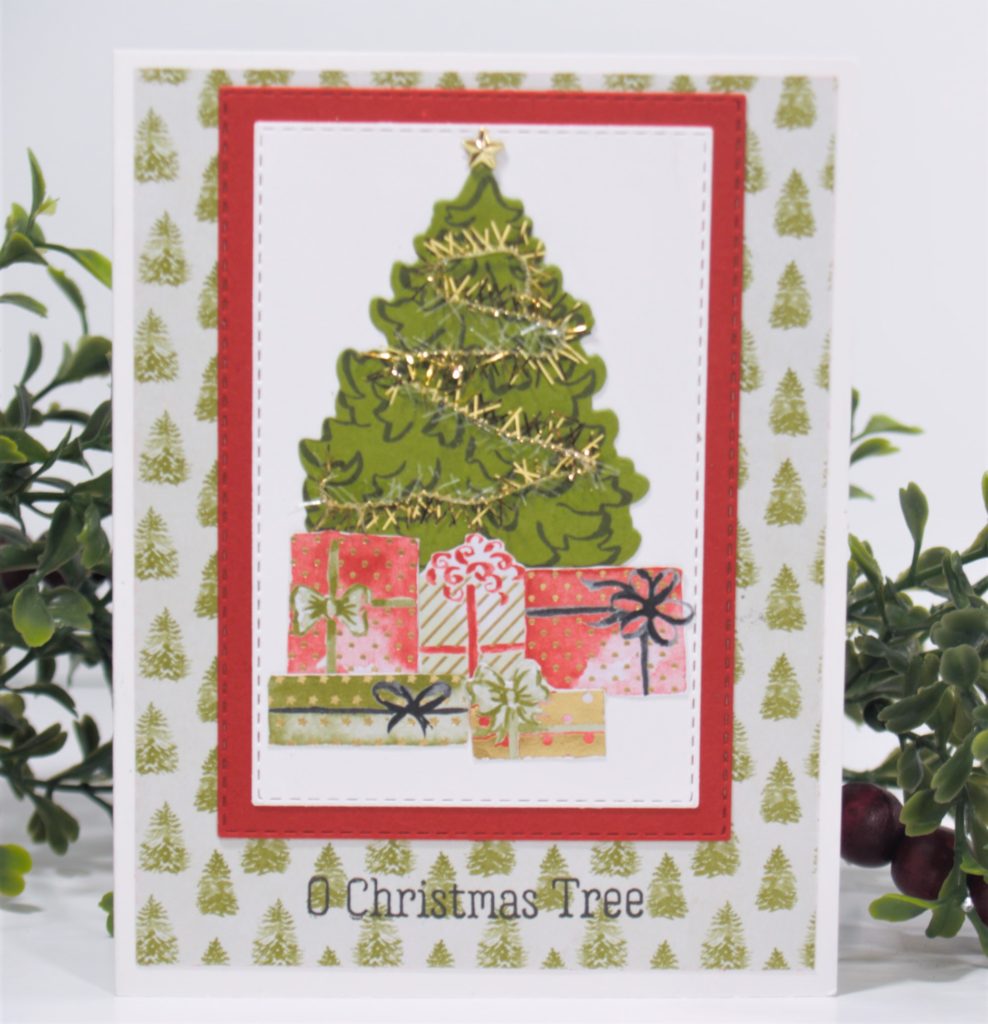
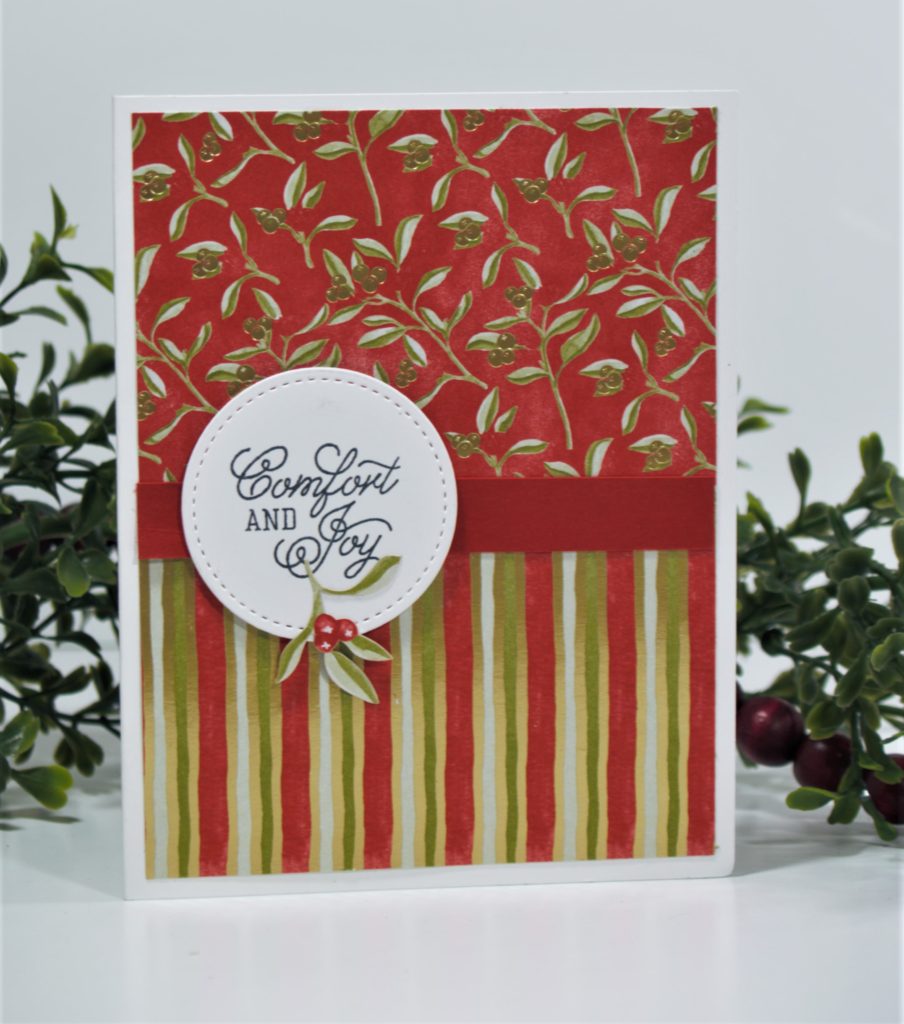
This kit offers 48 sheets of 6×6 paper (8 sheets each of 6 double-sided designs), an 11 piece photopolymer stamp set, a 6 piece die cut set, stickers, golden tinsel, and more! All you need to add is cardstock, ink, and creativity. And for some inspiration, here are some cards I made.
These two use some of the stickers in the kit. I have to admit, I was a little disappointed that the deer was not a stamp! There are a couple different designs of the deer, and I just love them.
For these cards, I used the tinsel and star embellishment on the Christmas tree, and the presents were cut out of the Designer Series Paper. There is a stamp and die cut for presents, but I wanted the different shapes and sizes in the paper. I am thinking birthday cards for those present stamps, though.
I’ll be having more fun playing with this kit. Everyone on my list might end up getting a unique card this year instead of a generic one from the grocery store. If you end up buying this kit, post it on Instagram and tag me @papertreecreation. I would love to see your work!
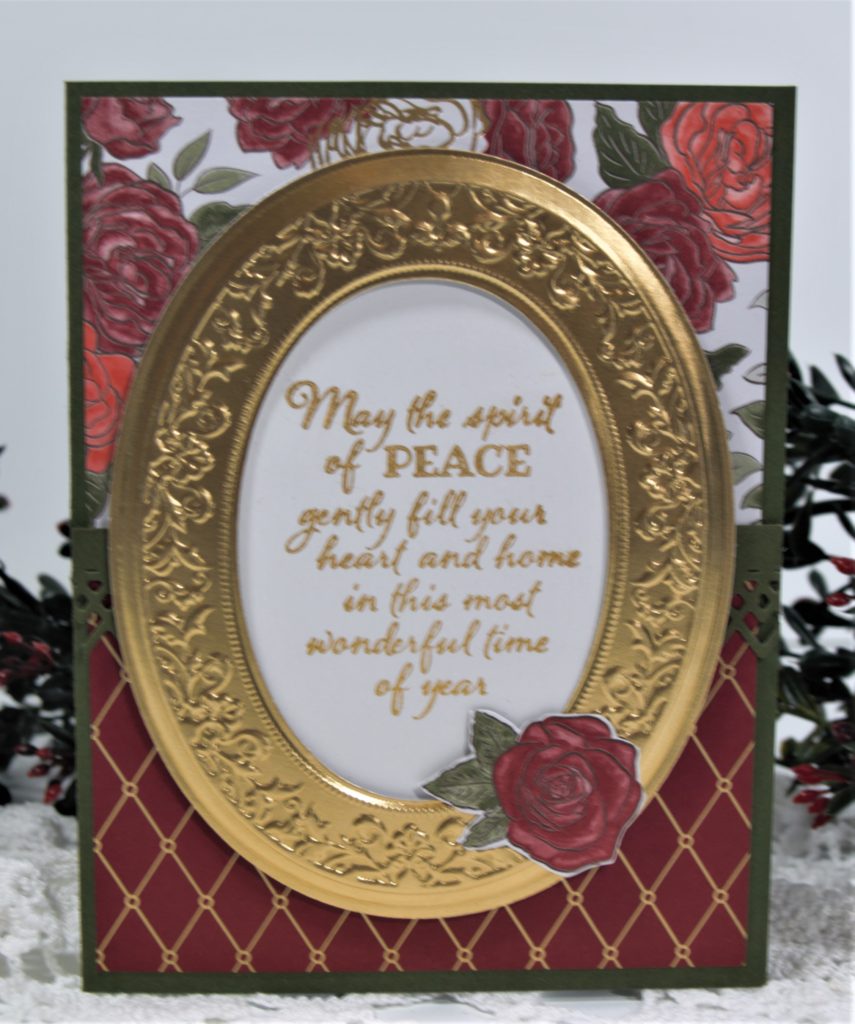
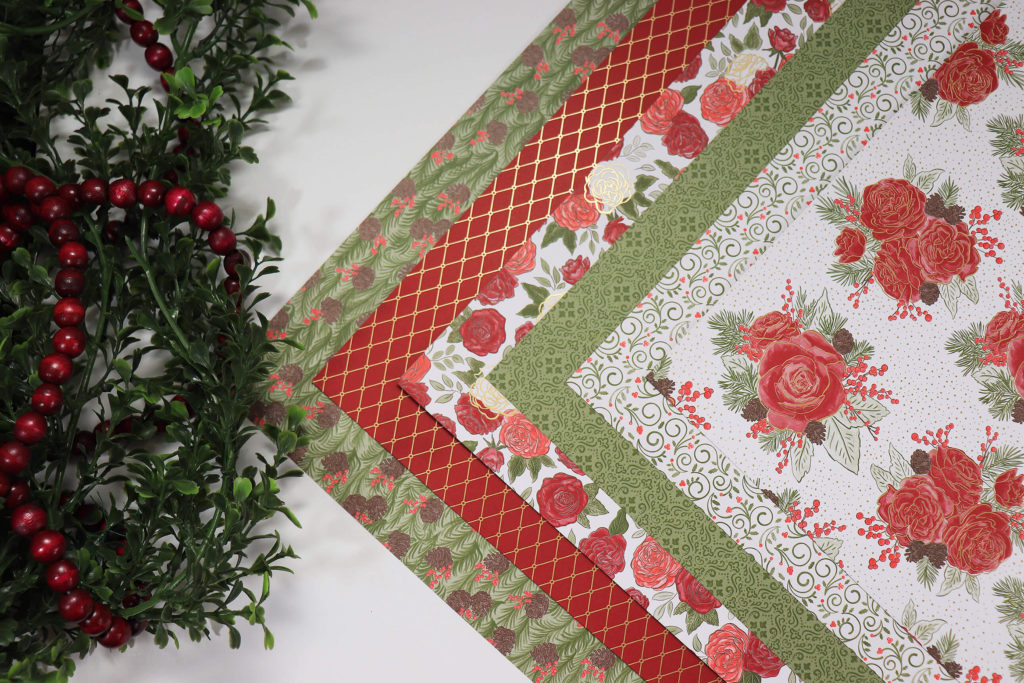
As I said in a previous post, the Christmas Time is Here Designer Series Paperis absolutely beautiful and pairs well with the Heirloom Frames! It doesn’t have to be used for holiday cards as I showed in my last post. It does make fabulous ones though. Here are a couple I made.
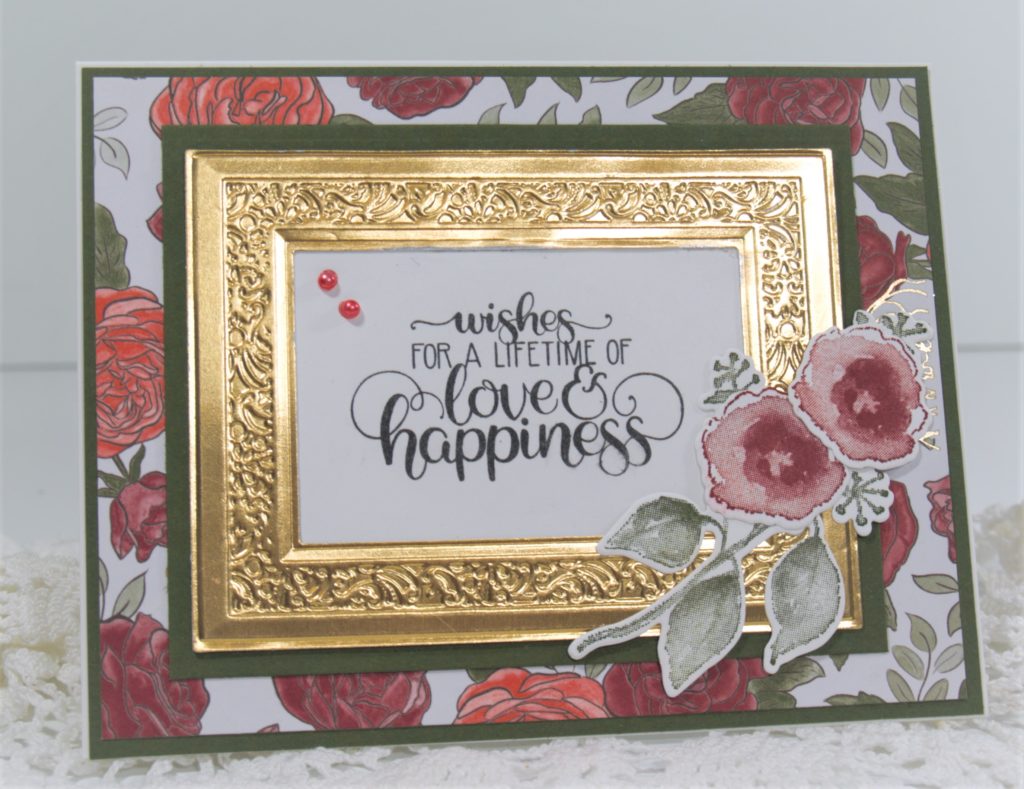
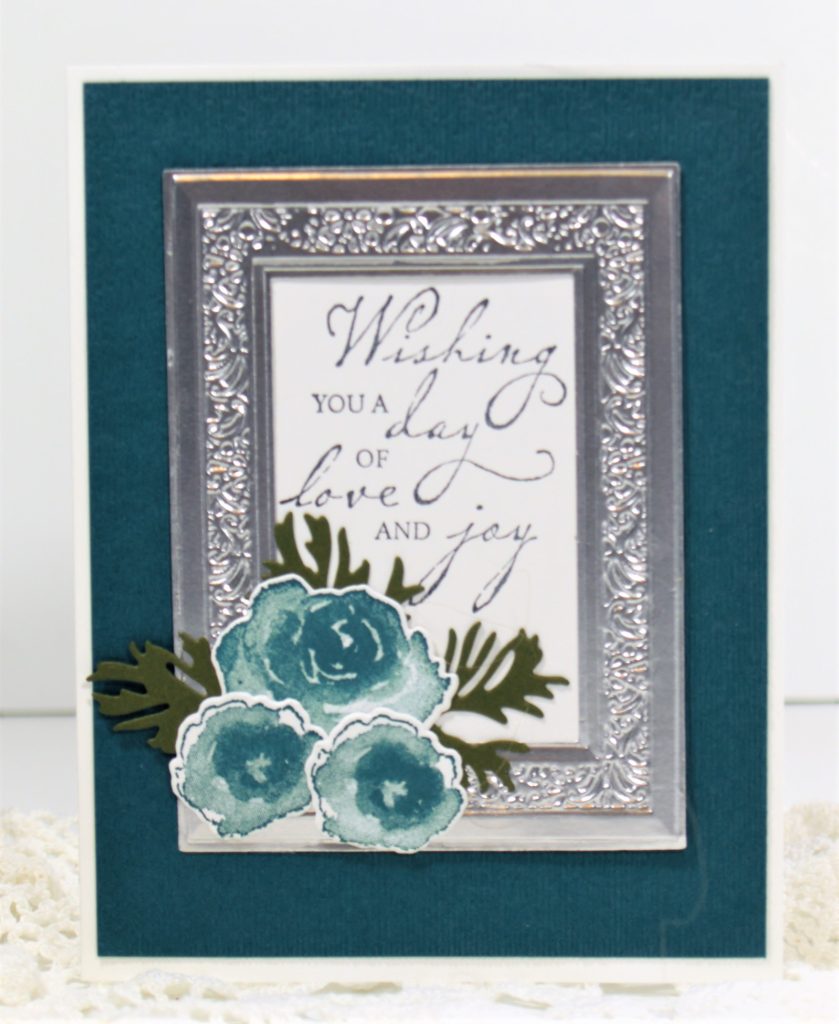
These first two use the Heirloom Frames dies and embossing folder. I bought them when they first came out and just used them for the first time. So impressive! They really add a look of elegance to the cards. Especially when you use the foil paper. I used the Gold Delicata Metallica Ink on the first one. Unfortunately, that ink is not being carried over and is already sold out. Only thesilver is left.
I didn’t buy the Christmas Time is Here Suite because it’s on the expensive side, but I bought the paper by itself because it’s gorgeous and makes elegant Christmas cards. You can grab the paper by itself right here. I actually bought 2 packages because I know I will be using this for all kinds of different cards, and since it is only available for a short time I wanted to make sure I didn’t run out.
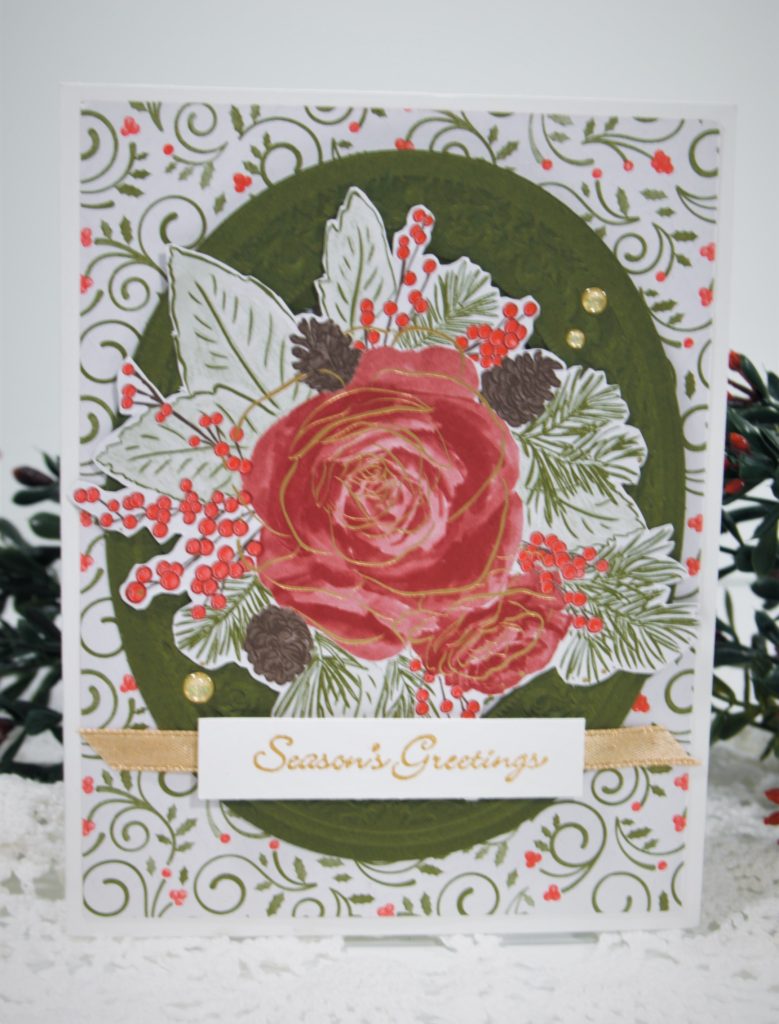
Just look at these beautiful designs! The gold foiling on the paper gives it a pretty sparkle that looks great on Christmas cards.
Because I only bought the paper and not the entire Christmas Time is Here suite, I cut out the flowers from the paper. If you don’t like fussy cutting, one of the die cuts in the suite will work on those bigger bunches, as well as on the stamped image. I think the bigger flowers make a stunning focal point for a card. I used the same bunch on these two but there is a cluster of 3 roses as well.
The Christmas Time is Here Bundle is only available for the month of November or while supplies last, so if you like this set don’t wait. It is a beautiful set.
I found myself in need of a wedding card for a friends daughter today. Time was short but I wanted something special since we have been friends with this family for many years. I had gotten the Christmas Time is Here Specialty Designer Series Paper but hadn’t used it yet. So I pulled it out to look at and it is absolutely beautiful! I didn’t get the bundle because I don’t usually like the way these detailed stamps work in the photopolymer. But I remembered that the First Frost was rubber and was similar so i used them instead. Here is the card I made.
Wedding card with Christmas Time is Here DSP and First Frost stamp set
I also used the Woven Heirloom Bundle frames and embossing folder. Doesn’t that look stunning embossed in the gold foil paper. Here it is in silver.
Wedding card using the Woven Heirloom bundle.
If you like the paper from the Christmas Time is Here Suite, order it soon. It is only available the month of November or while supplies last.
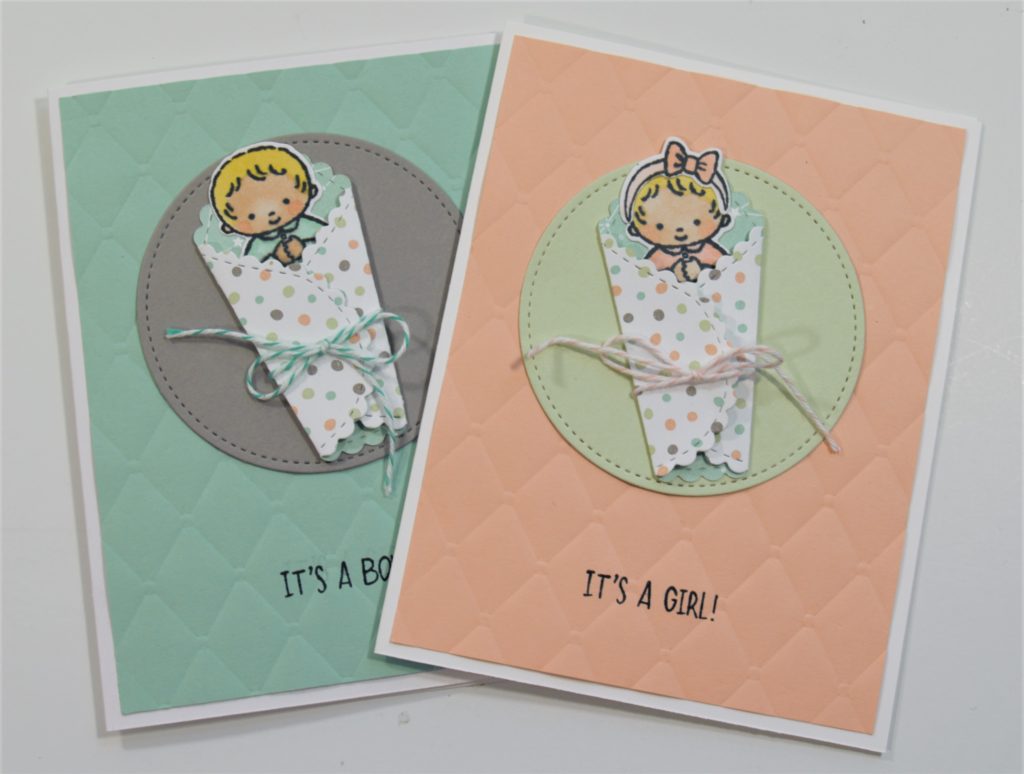
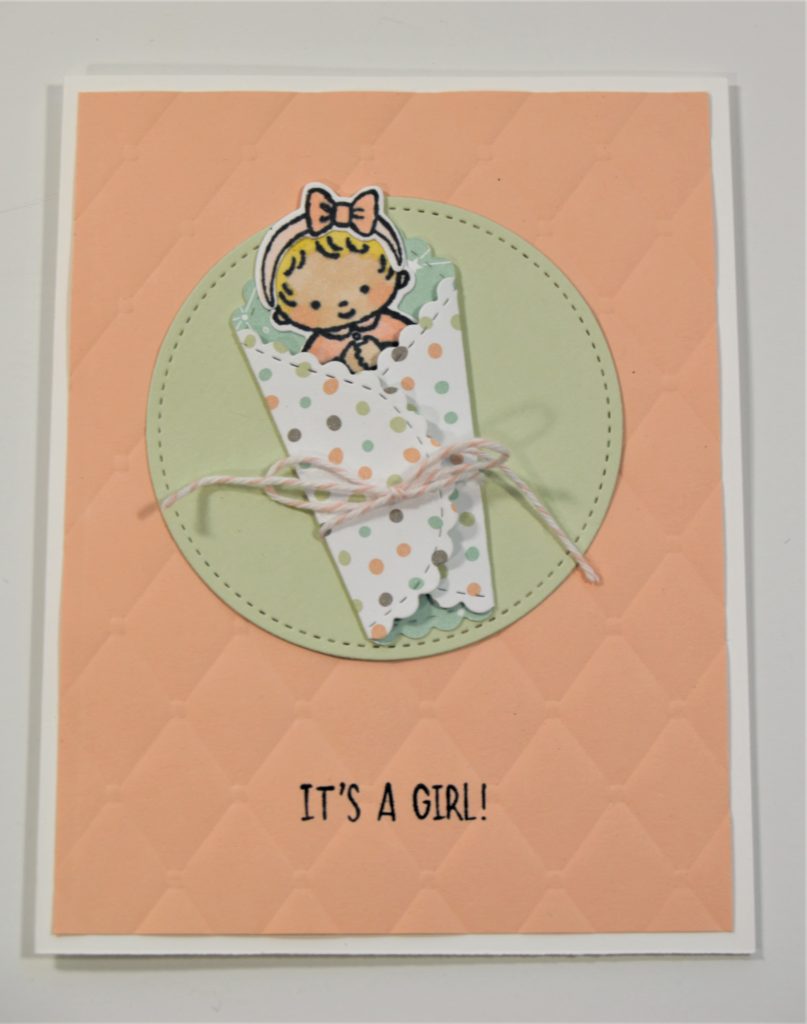
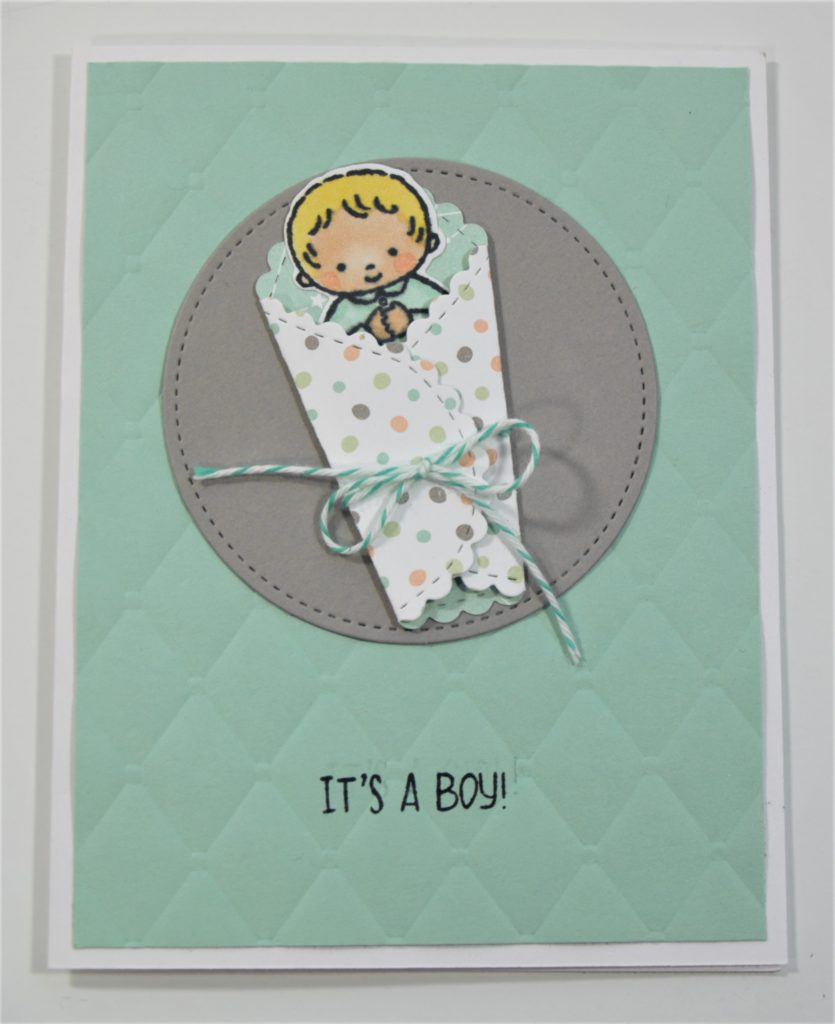
I love making baby cards and the stamp set Sweet Baby makes adorable ones! Whoever the artist is for this set does an awesome job of capturing the cuteness of little ones.
I am going to be playing with this set this week so expect to see more baby cards. We are doing one of these cards for my Card Class in May. You get to pick the boy or the girl to make or you can do a gender neutral one.
I love the little headband in this one. I remember when my girls were little and I would put these on them. Of course they never stayed on very long which is probably good because they always made indents in their heads! But they did look cute.
This stamp set is great for scrapbooks too. That was my original intention when I first ordered it. My middle daughter loved her Johnny Jumper and one of the stamps shows that. I am pretty far behind on my scrapbooks so I will be holding onto this stamp set for awhile.
But it isretiring at the end of the catalog period so if you want it now is the time to get it.
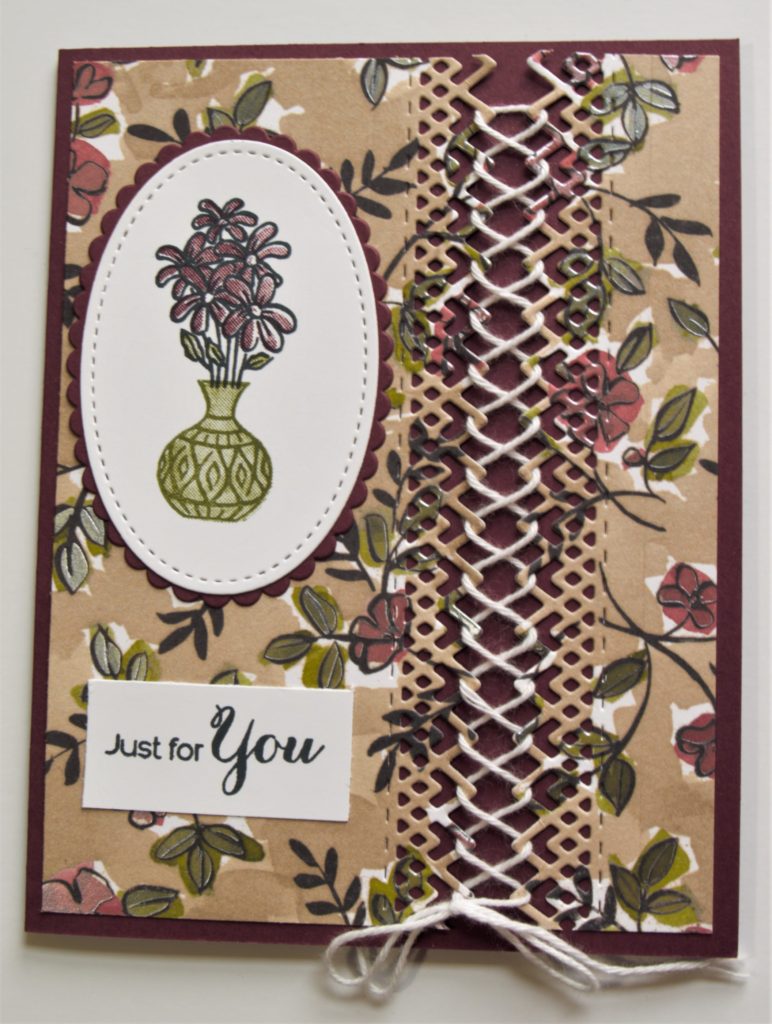
Did you know there are two stamp sets that go with the Vases BuilderPunch, Vibrant Vases and Varied Vases? One is in the Annual Catalog and is still bundled for a 10% savings. The other, Vibrant Vases is in the Occasions Catalog. I just love it when you can get more use out of a tool!
Here is a card I made at our retreat using Vibrant Vases.
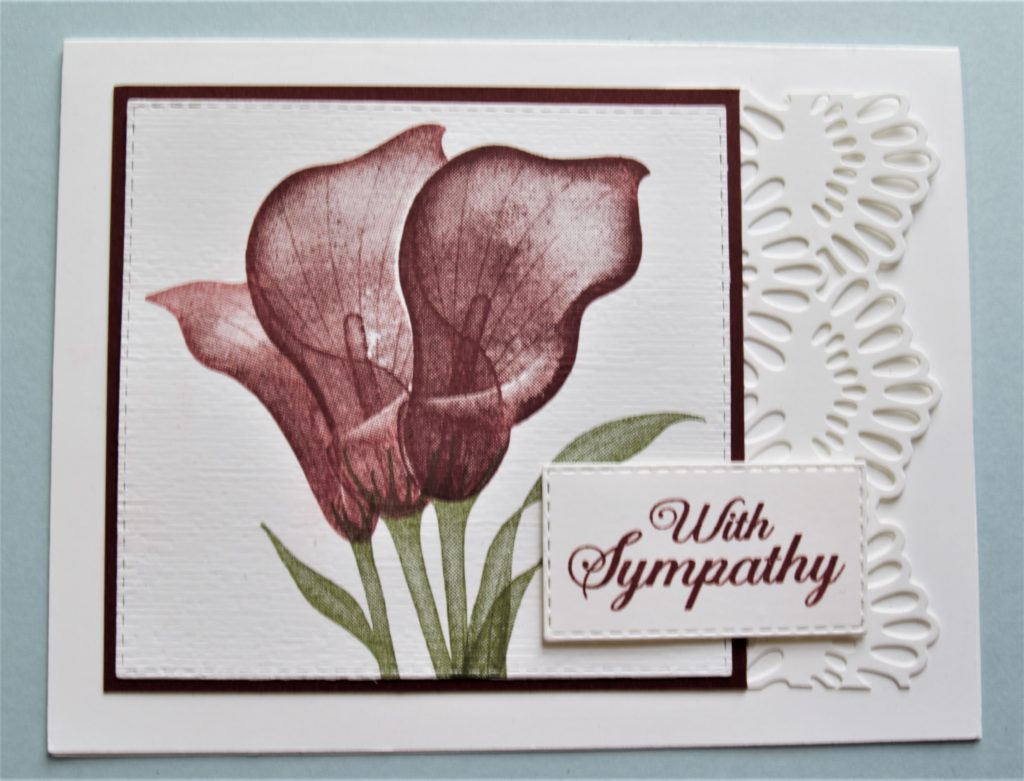
This was so fun to make. I used the Delicate Lace Edgelits on the gorgeous Share What You Love paper to make the loops for the sewing. These edgelits can get lost in the catalog. I almost missed them. Hopefully they will carry over because there are so many things you can do with them.
This is another idea for the edgelits. I just love the lacy and elegant look they give to a card.
I had another card using the Tea Together stamp and die set but couldn’t find it because my organization skills aren’t the best! My crafting space is very messy and I am working on reorganizing it. All my stuff is still laying all over the place since coming home from the retreat. I thought maybe I could organize while putting it away, but there is still too much to do up there!
Storage
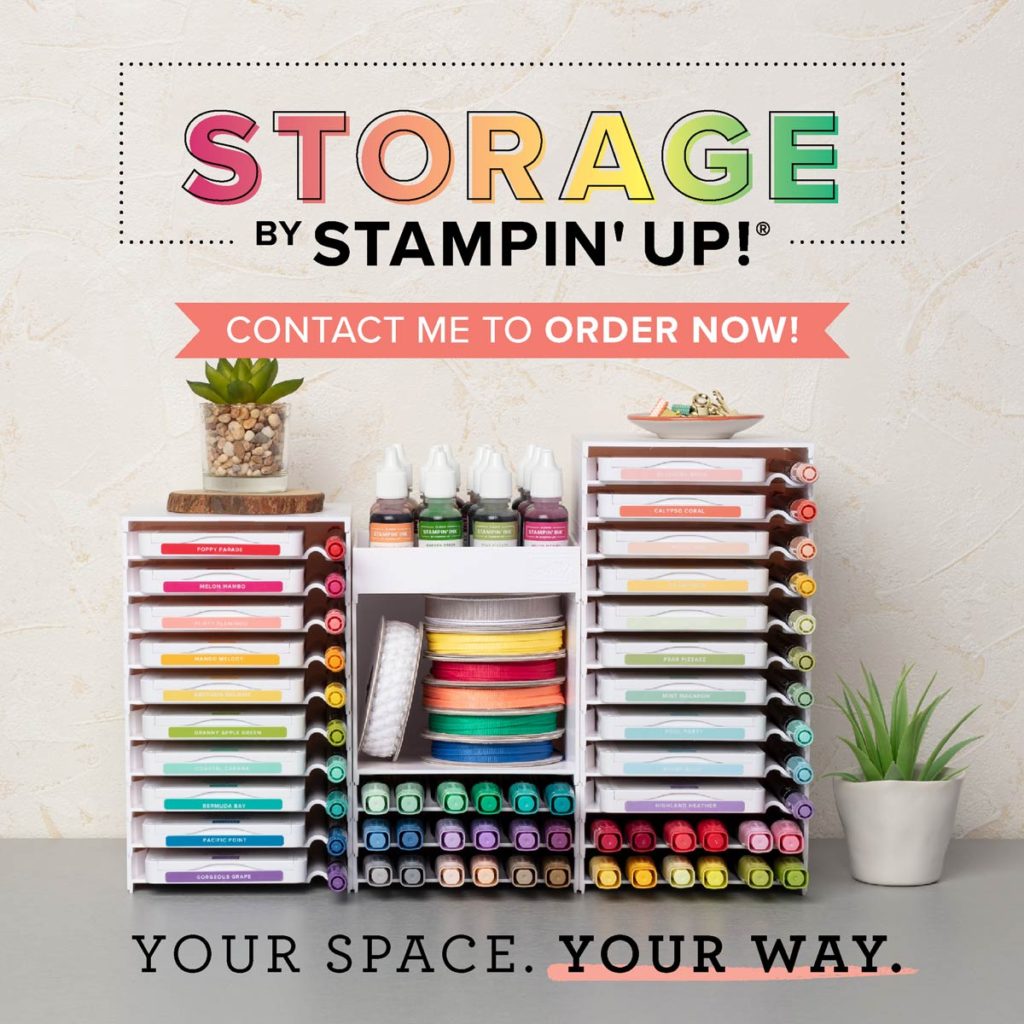
Speaking of organizing, have you seen the new storage items from Stampin Up! I am so excited to get mine. They will be carrying over into the new catalog but they are warning us already that they may sell out. Storage is a hot item right now. I guess everyone wants to get organized!
So don’t wait too long to order. Go over to my store and add the storage items to start getting organized. And don’t forget to add the Varied Vases bundle and save 10%.
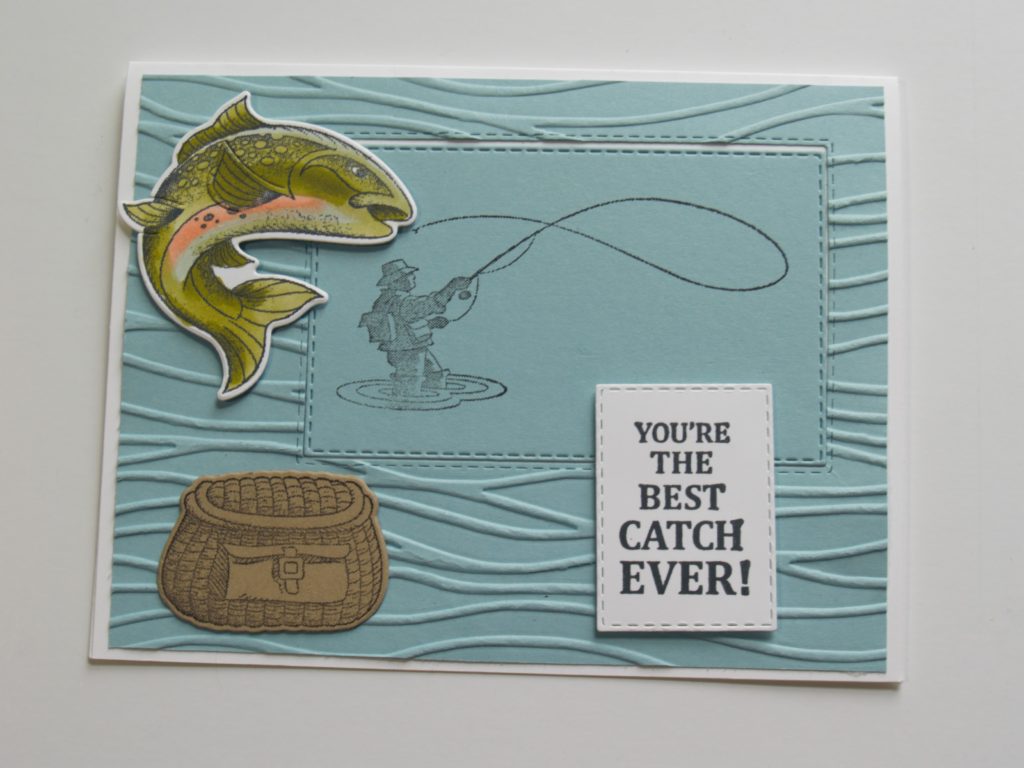
Have you seen the bundle Best Catch from Stampin Up! yet? I bought it awhile ago because these masculine sets have a habit of selling out toward the end of the catalog period (remember the tool set!). I just started playing with it at our Crafty Retreat this last weekend. What a great set to make those masculine cards! Especially if you have a fisherman in you family! Here are a couple cards I came up with.
I love this one because it looks like the fish is on the fishing line and gives it a 3D look when you pop it up. Plus it was fun to color.
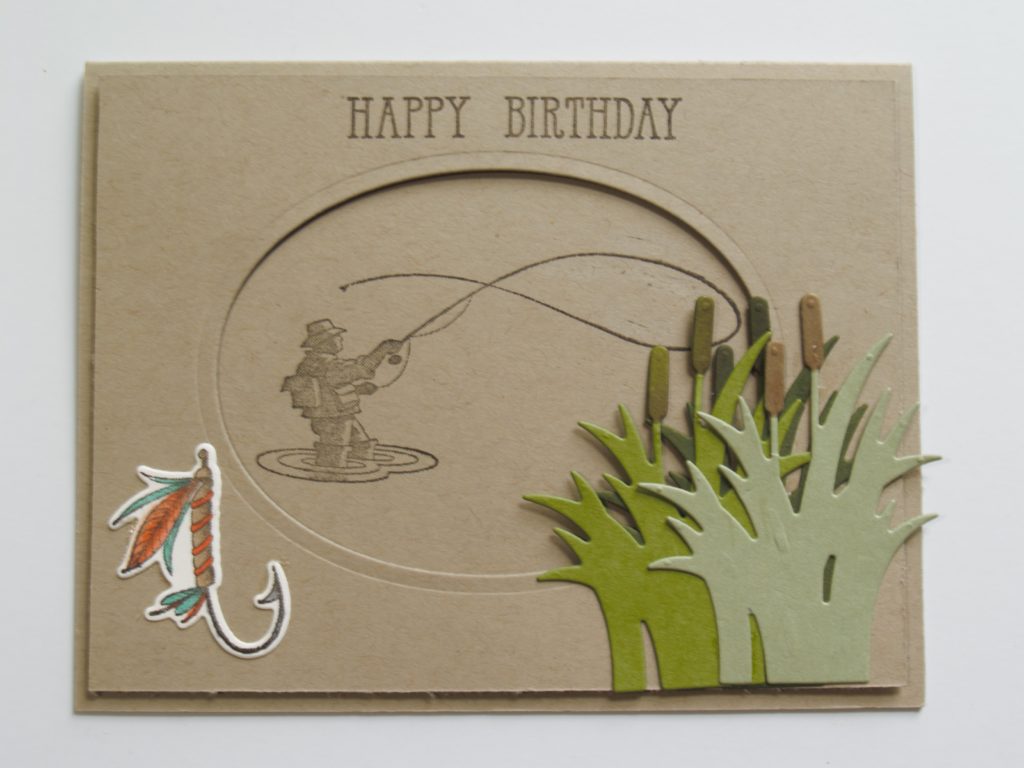
This one is a little simpler to color but still fun.
I love this set and am already planning some scrapbook pages with it.
Have you seen the new storage system by Stampin Up? I am so excited to get this. I ordered it at the beginning of the week and am waiting for it to come in. I’m trying to organize my craft room and I think this will make my work space much more user friendly.
I think both these items are awesome and I don’t want you to miss out on them. The storage is going to be carried over into the annual catalog. But if you want Best Catch, don’t wait because there are no guarantees that it will make it to the next catalog.
Happy World Card Making Day! I hope you get to spend the day crafting. Unfortunately I won’t get to spend as much time as I would like. To many things to do (like housework) that I have been neglecting lately. But I did want to share another card I made using Country Home.
I even used little pieces of a Q-tip to make cotton! Love this set!
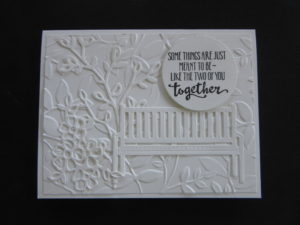
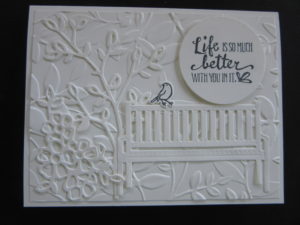
The Sitting Pretty bundle was one of the stamp sets that I knew I wanted to get right away. I love the bench die cut and my mind was full of ideas on how to use it. One of the ways I decided on was to do white on white.
I love this layout because you can use it with so many different sentiments.
I added the little bird in this one.
All that with just white. Can you imagine it with color!
Okay, this will be my last post on Apron of Love! Maybe. I really do like this bundle and time is running out to buy it. I wanted to show a few more cards I made with it.
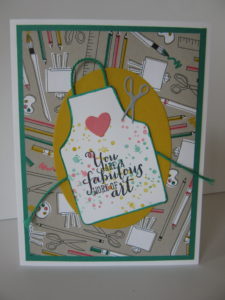
Fabulous Work Of Art
This would be such an encouraging card to send to a friend. To remind someone that they are special and unique would really make someone’s day. I love the artsy feel to this with the paint splatters and the crafty paper.
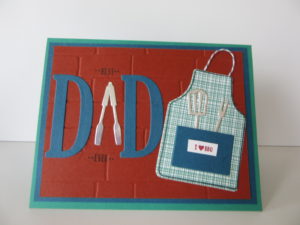
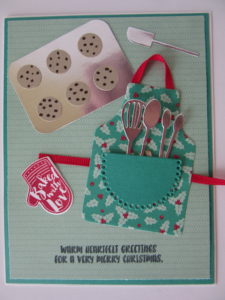
I’ve been playing with the Aprons of Love bundle this week and have discovered that aprons aren’t just for cooking. I am reminded of when I was younger and my mom and grandma were cooking. They always wore aprons. Especially on Sunday so the wouldn’t get their dresses dirty. I have one or two hanging around and occasionally will wear one. It’s also fun to see my daughters put one on every once in a while. But I think the time of aprons for cooking has passed. I don’t know many people who use them anymore. But here is a cute card that can be used for a Starbucks gift card holder.
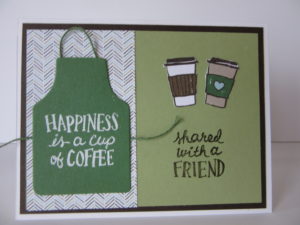
Starbucks Happiness is a Cup of Coffee Card
I also used the Coffee Cup Framelit Dies and the Coffee Break DSP. The paper has green in it so I made the apron green to match Starbucks! I did fussy cut the little cups even though there is a die to match.
I’m not a coffee drinker myself, but many of my friends are so I think this will come in handy for some upcoming events. I have some other ideas for the Apron of Love set that I will be sharing over the next few days. It has been a fun set to play with and I hope you will stop back to see what else can be done with it. I even have a scrapbook page in mind for pictures of my daughters when they were younger wearing aprons while cooking. Now I just have to find them!


")
")


")